manual shifter for automatic transmission

A manual shifter for an automatic transmission offers drivers precise control‚ blending the convenience of auto with the engagement of manual driving‚ enhancing both efficiency and performance.

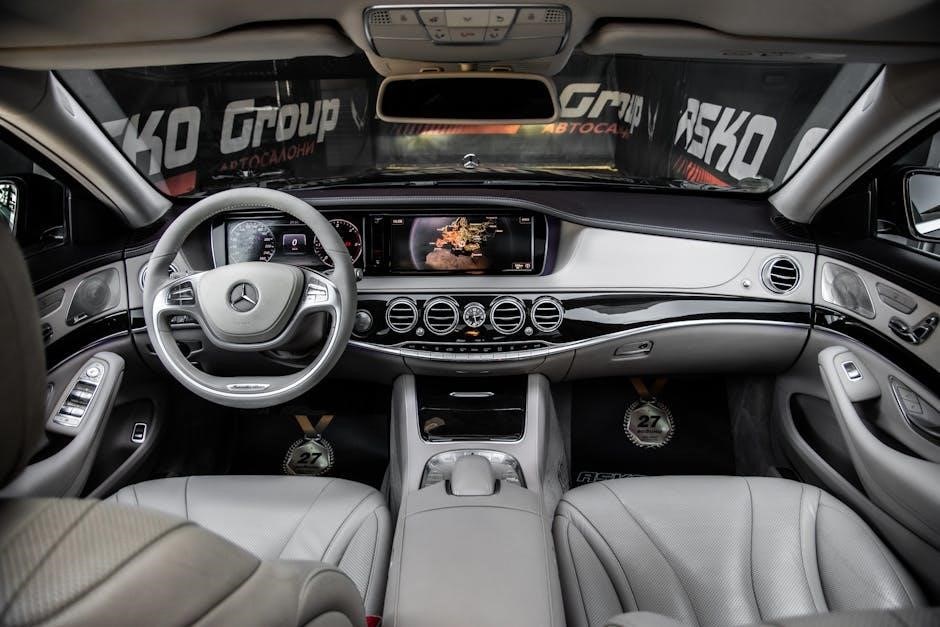
How Manual Shifters Work with Automatic Transmissions

Manual shifters allow drivers to select gears manually in an automatic transmission‚ providing control over gear changes while the system manages the clutch and torque converter operation.

Understanding the Mechanics of Manual Shifters

A manual shifter for an automatic transmission operates by allowing the driver to manually select gears via a shift lever or paddles. This system works in conjunction with the torque converter‚ which still handles the clutch engagement automatically. The driver’s input signals the transmission control module to engage the desired gear‚ offering more driver control without the need for a clutch pedal. This setup combines the ease of automatic shifting with the precision of manual gear selection‚ enhancing both performance and efficiency in various driving conditions.

In manual mode‚ the torque converter remains engaged‚ allowing seamless gear transitions without the need for a clutch pedal. It automatically handles torque transfer between the engine and transmission‚ maintaining smooth power delivery. This eliminates the manual clutching process‚ providing a hybrid driving experience that combines the benefits of automatic convenience with the control of manual shifting.

Benefits of Using a Manual Shifter with an Automatic Transmission

Role of the Torque Converter in Manual Mode

In manual mode‚ the torque converter remains engaged‚ allowing seamless gear transitions without clutch pedal input. It ensures smooth power delivery by maintaining engine-to-transmission connection‚ preventing disengagement during shifts. This design enhances acceleration consistency and provides a hybrid driving experience‚ combining automatic convenience with manual control‚ thereby optimizing both performance and ease of operation effectively.

Improved Fuel Efficiency

Manual shifters with automatic transmissions offer improved fuel efficiency by allowing drivers to select optimal gears‚ reducing unnecessary RPM fluctuations. This feature is particularly beneficial in city driving‚ where frequent stops and starts occur‚ enabling the engine to operate more efficiently at lower RPMs. By maintaining consistent speed and avoiding excessive gear changes‚ fuel consumption is minimized‚ leading to cost savings over time.

Better Driver Control

A manual shifter enhances driver control by allowing precise gear selection‚ especially during spirited driving or on steep inclines. This feature enables drivers to stay in the optimal torque band‚ providing better acceleration and responsiveness. With manual mode‚ drivers can avoid unwanted gear shifts‚ ensuring smoother transitions and a more engaging driving experience‚ particularly in dynamic road conditions where control is crucial.

Cost-Effectiveness

Manual shifters for automatic transmissions often reduce long-term costs by improving fuel efficiency and minimizing wear on the transmission. They typically require less complex mechanisms than fully automatic systems‚ leading to lower maintenance and repair expenses. Additionally‚ better control over gear shifts can extend the life of the transmission‚ making it a cost-effective option for drivers seeking both efficiency and savings.

Enhanced Driving Experience

A manual shifter for an automatic transmission elevates driving engagement by allowing drivers to actively participate in gear selections. This hands-on control fosters a more connected and enjoyable driving experience‚ especially during spirited or curved roads. The ability to manually shift gears enhances driver satisfaction‚ providing a blend of convenience and exhilaration that appeals to both everyday commuters and enthusiast drivers alike.

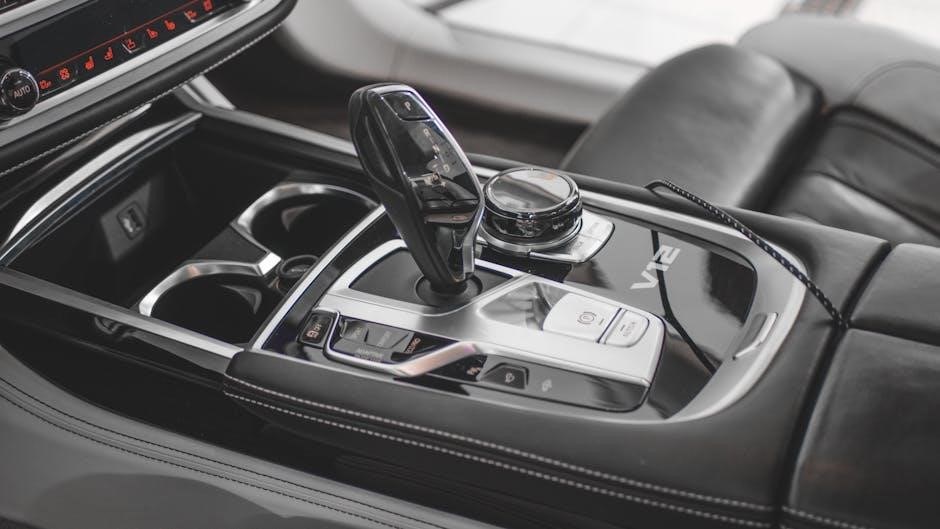
Types of Manual Shifters for Automatic Transmissions

Manual shifters for automatic transmissions come in various forms‚ including column-mounted‚ floor-mounted‚ and paddle shifters‚ each offering unique styling and ergonomic benefits for drivers seeking control.

Column-Mounted Shifters

Column-mounted shifters are typically located on the steering column‚ offering a classic and space-saving design. They provide a unique driving experience with easy access‚ allowing drivers to enjoy manual control without the bulk of a floor shifter. This retro-style shifter is popular among enthusiasts seeking a nostalgic feel and simplified interior aesthetics.

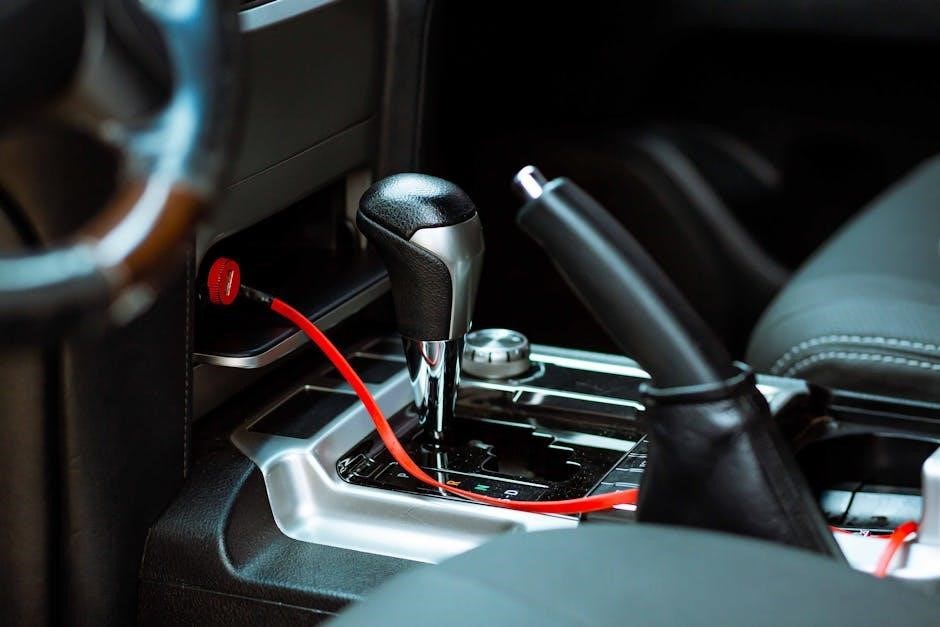
Floor-Mounted Shifters

Floor-mounted shifters are traditionally located between the front seats‚ offering a sporty and ergonomic design. They provide a direct connection to the transmission‚ allowing for quick and precise gear changes. Often associated with manual transmissions‚ some automatics feature floor-mounted shifters for enhanced driver engagement and a more dynamic driving experience‚ especially in performance-oriented vehicles.
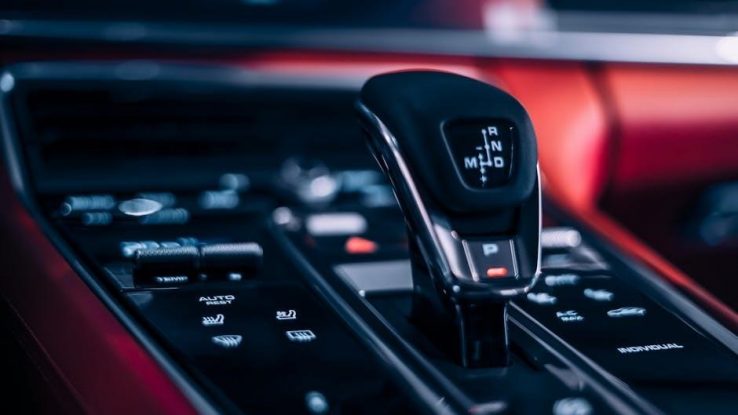
Paddle Shifters

Paddle shifters are mounted on the steering wheel‚ allowing drivers to manually shift gears without removing their hands. They offer a sporty feel and quick access to gear changes‚ ideal for spirited driving. Paddle shifters are often paired with automatic transmissions‚ providing a hybrid driving experience that combines convenience with control‚ enhancing both performance and driver engagement on the road.

How to Use a Manual Shifter Properly

Mastering a manual shifter for automatic transmissions involves smooth acceleration‚ deliberate gear selection‚ and seamless mode switching. Always refer to your owner’s manual for specific instructions.

Step-by-Step Guide to Shifting Gears

Check your surroundings and slow down before shifting. Press the clutch pedal fully and shift into the desired gear with the shifter. Gradually release the clutch while pressing the accelerator for smooth transitions. Always use the clutch pedal when shifting between gears. For automatic transmissions with manual mode‚ use paddle shifters or the shifter to upshift or downshift. Avoid rushing the process to prevent wear on the transmission.

Shifting Between Manual and Automatic Modes

To switch between manual and automatic modes‚ pull the shifter sideways to engage auto mode or use the paddle shifters for manual control. In auto mode‚ the transmission shifts gears automatically‚ while manual mode allows driver-controlled upshifting and downshifting. This feature provides flexibility‚ enabling smooth transitions based on driving conditions and personal preference‚ enhancing both convenience and driver engagement.

Best Practices for City and Highway Driving

For city driving‚ use manual mode to maintain control in traffic‚ shifting to lower gears for smoother acceleration. On highways‚ auto mode is ideal for ease‚ but manual mode can help on inclines. Avoid sudden shifts‚ and monitor gear selection to optimize fuel efficiency and ensure a smooth ride in both urban and open-road conditions.

Common Mistakes to Avoid When Using a Manual Shifter

Avoid rushing the shift process‚ riding the clutch‚ and ignoring the clutch pedal‚ as these habits can damage the transmission and reduce driving efficiency significantly.

Rushing the Shift Process

Rushing the shift process can strain the transmission‚ leading to premature wear of internal components. Always wait for the car to slow down sufficiently before shifting gears. Forcing quick shifts without proper coordination between the clutch and accelerator can cause harsh engagements‚ potentially damaging the transmission over time. Smooth transitions are key to maintaining efficiency and longevity.

Riding the Clutch

Riding the clutch‚ or keeping it partially pressed‚ can cause excessive wear on the clutch and pressure plate. This leads to overheating and premature failure of these components. It also reduces fuel efficiency and can damage the flywheel. Drivers should fully release the clutch once shifting is complete to prevent unnecessary strain on the transmission system.

Ignoring the Clutch Pedal

Ignoring the clutch pedal during manual shifting can lead to improper gear engagement and potential transmission damage. Failing to press the clutch fully prevents the gearbox from disengaging‚ causing grinding or slipping gears. Always ensure the clutch is fully depressed before shifting to maintain smooth operation and protect the transmission from unnecessary wear and tear over time.

Maintenance and Care for Manual Shifters

Regularly check transmission fluid levels and replace as needed. Inspect the clutch pedal for proper alignment and wear. Avoid harsh shifting practices to ensure smooth operation and longevity.

Transmission Fluid Check and Replacement

Regularly check the transmission fluid level and condition to ensure smooth operation. Refer to your owner’s manual for the correct fluid type‚ as some manual transmissions require gear oil while others use automatic transmission fluid. Replace the fluid every 30‚000 to 60‚000 miles to maintain optimal performance and prevent damage to the transmission system.

Clutch Inspection and Maintenance

Inspect the clutch pedal for proper height and free play as outlined in your manual. Replace worn-out clutch plates or components promptly to avoid slippage and ensure smooth gear transitions. Regularly check the hydraulic system for leaks and top up fluids as needed to maintain consistent clutch engagement and prevent costly repairs.

Avoiding Harsh Shifting Practices

Prevent sudden acceleration and hard shifts to protect your transmission. Avoid riding the clutch or shifting gears aggressively‚ as this can wear out components faster. Use smooth‚ gradual transitions between gears and brakes to maintain transmission health and ensure a longer lifespan for your vehicle’s drivetrain system. This also helps in preserving fuel efficiency and overall performance.

Advantages of Manual Mode Over Full Automatic

Manual mode offers superior control‚ especially on steep inclines and during heavy loads‚ allowing drivers to optimize torque and acceleration for better performance and fuel efficiency.

Better Control on Steep Inclines

Manual mode provides exceptional control on steep inclines by allowing drivers to hold lower gears‚ preventing unwanted shifts. This reduces brake wear and maintains consistent speed‚ enhancing stability and safety. The locked torque converter ensures optimal power delivery‚ making it ideal for uphill climbs and heavy loads‚ where automatic transmissions might struggle to adapt quickly enough.

Improved Acceleration

Manual shifters enhance acceleration by allowing drivers to manually select gears‚ ensuring the engine stays within its optimal power band. This reduces lag and provides quicker response‚ especially during overtaking or merging. The ability to downshift before accelerating maintains momentum‚ making the vehicle feel more responsive and agile compared to full automatic mode.

Optimal Torque Band Utilization

Manual shifters enable drivers to keep the engine within its optimal torque band by selecting gears that match driving conditions. This ensures maximum power delivery and efficiency‚ reducing unnecessary RPM fluctuations. By maintaining the ideal torque range‚ the vehicle performs more responsively and effectively‚ especially during spirited driving or hauling heavy loads‚ where consistent power output is crucial.

When to Use Manual Mode

Manual mode is ideal for city driving‚ steep inclines‚ and towing‚ offering enhanced control and stability in specific conditions where automatic may fall short.

City Driving

Manual mode excels in city driving by providing better control in stop-and-go traffic and uphill climbs. It allows drivers to hold lower gears‚ optimizing acceleration and responsiveness. This feature is particularly useful in urban environments where frequent speed changes occur‚ helping to maintain smooth progress and efficiency. Drivers can manually downshift before stopping or uphill to enhance control and responsiveness.

Steep Hills

Manual shifters provide enhanced control on steep hills‚ allowing drivers to maintain lower gears for consistent speed and traction. This prevents rollback when starting uphill and reduces brake strain during descents. Engine braking is also more effective‚ helping to control speed on downhill sections without excessive braking‚ making it safer and more efficient for navigating inclines.

Towing or Hauling Heavy Loads

Manual shifters are advantageous when towing or hauling heavy loads‚ as they allow drivers to maintain lower gears for consistent power delivery. This prevents the vehicle from hunting for gears under load‚ reducing strain on the transmission and brakes. Engine braking is also more effective‚ helping to control speed during descents with heavy loads‚ making towing safer and more efficient.

Troubleshooting Common Issues

Common issues include transmission slipping‚ stiff shifters‚ or gears not engaging. Check fluid levels‚ inspect components‚ and ensure proper clutch operation to resolve these problems effectively.

Transmission Slipping

Transmission slipping occurs when gears fail to engage properly‚ causing a loss of power. This can happen due to low transmission fluid levels‚ worn clutches‚ or faulty solenoids. Check fluid levels‚ inspect for worn components‚ and avoid sudden acceleration. Addressing slipping early prevents further damage to the transmission system. Regular maintenance is key to ensuring smooth operation and longevity.

Stiff Shifter

A stiff shifter can hinder smooth gear transitions‚ often caused by dirt‚ lack of lubrication‚ or mechanical issues. Regular cleaning and lubricating the shifter mechanism can resolve this. If stiffness persists‚ inspect for worn parts or alignment problems. Addressing this early ensures optimal shifting performance and prevents potential damage to the transmission system. Proper maintenance is essential for longevity and smooth operation.

Gear Slipping

Gear slipping occurs when the transmission unexpectedly shifts out of gear‚ causing a loss of power. This can be due to worn clutch packs‚ low transmission fluid levels‚ or damaged sensors. Addressing the issue promptly is crucial to avoid further damage. Regular fluid checks and inspections can help prevent slipping and ensure smooth gear engagement‚ maintaining optimal transmission performance and driver control over the vehicle.

Future of Manual Shifters in Automatic Transmissions

Manual shifters in automatic transmissions are evolving with advanced automation‚ seamless integration‚ and enhanced driver control‚ offering improved fuel efficiency and superior driving experiences.

Technological Advancements

Modern manual shifters in automatic transmissions now feature electronic interfaces‚ paddle shifters‚ and intelligent systems that predict gear shifts‚ enhancing driver control and performance while maintaining convenience.

Market Trends

The demand for manual shifters in automatic transmissions is rising‚ driven by hybrid and electric vehicles integrating such systems. Carmakers are increasingly offering paddle shifters and retro designs‚ catering to both performance enthusiasts and eco-conscious drivers. This trend reflects a blend of modern technology and classic driving experiences‚ appealing to a broader audience.

Frequently Asked Questions (FAQs)

Q: What is a manual shifter for an automatic transmission?
A manual shifter allows drivers to manually select gears in an automatic transmission‚ offering enhanced control and driving engagement while retaining the convenience of automatic shifting.

Q: How does it improve fuel efficiency?
By manually shifting gears‚ drivers can optimize engine speed‚ reducing unnecessary fuel consumption‚ especially in city driving or hilly terrain.

Q: Can it be used in all driving conditions?
Yes‚ manual shifters are versatile‚ suitable for city driving‚ highways‚ and towing‚ providing better control and performance in various scenarios.

Q: Does it require special maintenance?
Regular checks of transmission fluid and clutch systems are essential to ensure smooth operation and longevity of the manual shifter mechanism.

Q: Is it difficult to learn?
While it may take time to adapt‚ most drivers find manual shifting intuitive‚ especially with practice and familiarity with gear ratios and shifting techniques.

marble run instructions pdf

Marble runs are engaging, creative projects that combine fun with learning, enhancing problem-solving skills and hand-eye coordination․ PDF guides provide step-by-step instructions, making assembly accessible for all skill levels while fostering STEM education and creativity․

What is a Marble Run?

A marble run is a creative toy or DIY project consisting of interconnected tracks, ramps, and obstacles that guide marbles through a customizable path․ It encourages imaginative building, problem-solving, and experimentation with gravity and motion․ Marble runs can be constructed from various materials, such as plastic kits, wood, or recyclable items, and often feature adjustable components like chutes, loops, and switches․ They are popular for their educational value, promoting STEM skills, hand-eye coordination, and creativity while providing hours of fun for users of all ages․

Why Use a PDF Guide for Marble Runs?

A PDF guide for marble runs offers clear, detailed instructions and visuals, making assembly easier and more organized․ It provides step-by-step directions, diagrams, and tips for constructing complex tracks and features․ PDF guides are accessible on multiple devices, allowing users to zoom in on intricate details․ They also serve as a permanent reference, eliminating the need for internet access․ Many manufacturers include PDF manuals with their kits, ensuring compatibility and accuracy․ This format is ideal for DIY enthusiasts and educators, promoting a seamless and enjoyable building experience․

Benefits of Building a Marble Run

Building a marble run fosters creativity, problem-solving, and critical thinking while enhancing hand-eye coordination and fine motor skills․ It encourages STEM learning, teaching concepts like gravity and motion․ The process promotes patience, focus, and teamwork, making it a rewarding activity for all ages․ Marble runs also boost self-confidence as creators see their designs come to life․ This engaging project combines education with entertainment, providing hours of fun while developing essential skills in an interactive way․

Popular Marble Run Kits and Their Instructions

Top kits include Marble Genius, Magnetic Marble Run, and WoodTrick DIY, each offering detailed PDF guides for easy assembly and creative customization options․

Marble Genius Marble Run Instructions

The Marble Genius Marble Run offers a comprehensive guide in PDF format, detailing step-by-step assembly for its Super Set and Extreme Set․ Each instruction booklet is designed to be user-friendly, ensuring a smooth building experience․ The guide includes visual diagrams and written descriptions to help users of all ages construct intricate marble tracks and mechanisms․ Additional video tutorials are available online, providing hands-on demonstrations for complex components like the Auger Lift and Swings․ These resources make building the Marble Genius Marble Run both enjoyable and educational, fostering creativity and problem-solving skills while adhering to safety guidelines for a durable and functional design․

Magnetic Marble Run Assembly Guide

The Magnetic Marble Run Assembly Guide provides clear, step-by-step instructions for constructing magnetic-based marble tracks; Using magnetic connectors and color-coded blocks, users can create dynamic courses with ease․ The guide emphasizes aligning pieces carefully to ensure smooth marble flow․ It also includes tips for troubleshooting common issues like misaligned tracks or weak magnetic connections․ By following the instructions, users can build intricate designs, from simple loops to complex structures, while enhancing creativity and problem-solving skills․ The magnetic system ensures durability and flexibility, making it ideal for both beginners and experienced builders․

WoodTrick Marble Run DIY Kit Instructions

The WoodTrick Marble Run DIY Kit offers a unique, eco-friendly way to build intricate marble courses․ Made from high-quality wood, this kit includes detailed instructions in PDF format, guiding users through assembling tracks, supports, and accessories․ The step-by-step guide ensures a smooth building experience, emphasizing proper alignment and stability․ With interchangeable parts, users can create customizable designs, fostering creativity and engineering skills․ The kit also includes safety tips and maintenance advice to prolong the life of the structure, making it a durable and engaging project for all ages․

Marble Run Difficulty Levels

Marble runs offer varying difficulty levels, from beginner-friendly designs to advanced challenges․ Kits like Marble Genius and Magnetic Marble Run provide step-by-step guides, enhancing STEM skills and creativity․

Beginner-Friendly Marble Run Designs

Beginner-friendly marble run designs are perfect for newcomers, offering simple yet engaging layouts․ Kits like Marble Genius and Magnetic Marble Run include easy-to-follow instructions, allowing users to build confidence gradually․ These designs focus on basic tracks, funnels, and supports, teaching fundamental concepts of gravity and motion․ PDF guides provide visual aids and step-by-step directions, ensuring a smooth assembly process․ Ideal for children and DIY enthusiasts, these starter sets foster creativity and problem-solving skills while introducing the basics of engineering and physics in a fun, hands-on way․

Intermediate Marble Run Challenges

Intermediate marble run challenges offer more complexity, introducing features like loops, spirals, and lifts․ Kits such as the Magnetic Marble Run and WoodTrick DIY sets provide instructions for these advanced designs․ Users learn to balance marbles mid-air and incorporate multiple pathways, enhancing problem-solving skills․ PDF guides include detailed diagrams and step-by-step instructions for smooth assembly․ These challenges refine engineering intuition and creativity, encouraging users to experiment with gravity and motion dynamics while troubleshooting common issues like track alignment and marble flow efficiency․

Advanced Marble Run Projects

Advanced marble run projects require precision and creativity, often incorporating complex mechanisms like elevators, see-saws, and multi-level tracks․ These designs challenge users to master physics principles and engineering techniques․ PDF guides for kits such as WoodTrick Marble Runs offer blueprints for intricate layouts, enabling users to create elaborate courses with various features․ Additional components like motors or automated elements can be integrated for enhanced functionality․ These projects push problem-solving skills, encouraging innovation and patience while delivering a rewarding, polished final product․

DIY Marble Run Creations

DIY marble runs inspire creativity and problem-solving using everyday materials like cardboard and glue․ PDF guides offer step-by-step instructions, making it easy to build custom tracks and enhance STEM skills․

Building a Marble Run from Recyclable Materials

Transform everyday recyclables like cardboard tubes and small boxes into a functional marble run․ Start by cutting tubes into varying heights and gluing boxes on top for catchers․ Use sticky tape to secure joints and smooth edges for marble flow․ This eco-friendly project enhances creativity and problem-solving skills while teaching STEM concepts․ Detailed PDF guides provide step-by-step instructions, making it easy to design intricate tracks and funnels from household items․ Perfect for DIY enthusiasts and families aiming to reduce waste while fostering innovation․

Customizing Your Marble Run with Additional Features

Elevate your marble run’s complexity by incorporating unique elements like loops, ramps, and interactive components․ Add sounds, lights, or motorized parts for enhanced functionality․ PDF guides offer creative ideas and step-by-step tutorials to integrate these features seamlessly․ Customize tracks with color-coded blocks or magnetic connectors for versatility․ Personalize your design to challenge problem-solving skills and encourage imaginative play․ With detailed instructions, you can transform a simple run into an intricate, engaging masterpiece tailored to any skill level or theme․

Marble Run Safety and Maintenance

Ensure all small parts are secure and out of reach of young children․ Regularly inspect tracks for damage․ Follow provided maintenance tips in PDF guides to prolong durability and safety, ensuring a hazard-free experience for users of all ages while maintaining optimal performance and enjoyment․

Safety Guidelines for Assembling a Marble Run

Always follow safety guidelines when assembling a marble run․ Ensure small parts are out of reach of young children to avoid choking hazards․ Supervise children during assembly, especially when using sharp objects or tools․ Avoid forcing pieces together, as this may cause damage or breakage․ Regularly inspect tracks for wear and tear․ Use a stable, flat surface for assembly to prevent accidents․ Keep the area clear of distractions and ensure proper lighting․ Follow the instructions carefully to ensure a safe and enjoyable experience for all users․

Maintaining Your Marble Run for Longevity

Regular maintenance ensures your marble run remains functional and durable․ Clean tracks and components frequently to remove dust or debris that may obstruct marble flow․ Check for loose connections and tighten them as needed․ Lubricate moving parts, such as hinges or wheels, to prevent friction and wear․ Store the marble run in a dry, cool place to avoid warping or damage․ Avoid exposing it to harsh chemicals or extreme temperatures․ By following these steps, you can extend the life of your marble run and enjoy it for years to come․

Troubleshooting Common Issues

Identify leaks or gaps in tracks, adjust pieces for smoother marble flow, and ensure all connections are secure to maintain functionality and precision in your marble run․

Identifying and Fixing Leaks or Gaps

To identify leaks or gaps in your marble run, inspect the connections between pieces visually or by observing where marbles pause or fall․ Use the provided diagrams in the PDF guide to ensure proper alignment․ If gaps are found, tighten loose joints or reattach pieces securely․ For persistent issues, apply a small amount of adhesive or adjust the track angles․ Regularly testing the run after repairs ensures smooth marble flow and prevents further disruptions․ This step-by-step approach helps maintain the integrity and functionality of your marble run design․

Adjusting Tracks for Smoother Marble Flow

For a seamless marble run experience, ensure tracks are evenly aligned and securely connected․ Inspect each section for obstructions or misalignments․ Gently bend or adjust tracks to create a smooth path, using the PDF guide’s visual aids for reference․ If marbles hesitate or stop, check for sharp angles or uneven surfaces․ Apply a small amount of adhesive to stabilize wobbly parts and test the flow repeatedly․ Proper adjustments ensure marbles glide effortlessly, enhancing both performance and enjoyment of your marble run design․

Additional Resources and Video Tutorials

Enhance your marble run experience by exploring video tutorials on platforms like YouTube and manufacturer websites․ These resources offer step-by-step guidance, troubleshooting tips, and creative ideas to optimize your builds and ensure smooth marble flow․

Where to Find Marble Run Instructional Videos

Marble run instructional videos are widely available on platforms like YouTube, where channels such as Marble Genius and Robotime offer detailed tutorials․ Additionally, official manufacturer websites often host video guides tailored to specific kits․ These resources provide step-by-step assembly instructions, troubleshooting tips, and creative ideas to enhance your marble run experience․ Many videos also demonstrate how to customize tracks for smoother marble flow, ensuring a fun and educational experience for builders of all skill levels․

Downloading Marble Run Instruction Manuals

Marble run instruction manuals are readily available for download from official manufacturer websites, such as Marble Genius or WoodTrick․ These PDF guides provide detailed step-by-step instructions, diagrams, and troubleshooting tips for specific kits․ Many manuals are accessible by searching the product name or model number online․ For example, the Marble Genius Marble Run Extreme Set manual can be downloaded directly from their site․ These resources ensure a smooth assembly process, even for complex designs, and often include visual aids to help builders of all skill levels․

Marble run instructions in PDF format offer a comprehensive guide for creating engaging, educational, and fun projects․ They simplify assembly, fostering creativity and STEM learning for all ages․

Final Tips for Successful Marble Run Assembly

Always follow the provided PDF guide closely and take your time during assembly․ Start with simpler designs to build confidence and gradually move to more complex structures․ Ensure all parts are organized and within reach to avoid delays․ Use templates or diagrams for precise alignments and stability․ Test each section before adding more components to ensure smooth marble flow․ For tricky parts, consult video tutorials or online resources․ Most importantly, embrace creativity and enjoy the process of bringing your marble run to life!

Exploring Creative Possibilities with Marble Runs

Marble runs offer endless opportunities for creativity and innovation․ By experimenting with different materials like cardboard, wood, or 3D-printed parts, you can craft unique designs that challenge gravity and spark imagination․ Incorporate loops, ramps, and interactive elements to create dynamic pathways․ Customization allows you to tailor your marble run to suit various skill levels, from simple starter designs to intricate masterpieces․ This hands-on activity fosters problem-solving skills, creativity, and a deeper understanding of physics and engineering principles, making it a rewarding project for both kids and adults alike․

algebra 1 test with answers pdf

Algebra 1 tests with answers in PDF format provide a comprehensive resource for students to assess their understanding of algebraic concepts. These tests cover various topics, including equations, functions, and systems of equations, offering a structured approach to learning. The PDF format ensures accessibility and convenience, allowing students to practice anytime and anywhere. With detailed answer keys and step-by-step solutions, these resources help students identify areas for improvement and build confidence for exams.

Overview of the Importance of Algebra 1 Tests

Algebra 1 tests are essential for assessing a student’s mastery of foundational algebraic concepts. They help evaluate problem-solving skills, understanding of equations, and the ability to apply mathematical reasoning. Regular testing allows students to identify weak areas, track progress, and reinforce learning. These tests also prepare students for standardized exams and future academic challenges. By practicing with Algebra 1 tests, students develop critical thinking and time management skills. The inclusion of multiple-choice and open-response questions ensures a well-rounded assessment of their knowledge. Overall, Algebra 1 tests are a vital tool for measuring readiness for advanced math courses and building a strong mathematical foundation.

Why Use PDF Format for Algebra 1 Tests

The PDF format is widely preferred for Algebra 1 tests due to its versatility and accessibility. PDFs maintain consistent formatting across devices, ensuring that tests appear the same whether viewed on a computer, tablet, or smartphone. They are easily shareable and printable, making them ideal for both in-class and at-home use. Additionally, PDFs are secure and difficult to alter, which helps maintain the integrity of the test material. Many educational resources, such as Infinite Algebra 1 worksheets and official examination materials, are available in PDF format. This makes it convenient for students and educators to access and utilize these resources without requiring specialized software beyond a PDF reader.

Structure of a Typical Algebra 1 Test

A typical Algebra 1 test includes multiple-choice questions, short-answer problems, and open-response questions. It covers topics like equations, functions, and systems of equations, with clear scoring criteria provided.

Multiple Choice Questions in Algebra 1 Tests

Multiple-choice questions in Algebra 1 tests are designed to assess a student’s ability to solve problems efficiently. These questions cover a wide range of topics, from basic algebraic expressions to complex equations and functions. Each question typically provides four to five answer choices, requiring students to select the correct solution. The secure PDF format ensures that these tests are accessible and easy to navigate. Detailed answer explanations are often included, helping students understand their mistakes and improve their problem-solving skills. This format is particularly useful for practicing under timed conditions, simulating real exam environments and building test-taking strategies. The clarity and structure of multiple-choice questions make them an essential component of Algebra 1 assessments, enabling students to gauge their understanding and prepare effectively for final exams.

Short Answer and Open-Response Questions

Short answer and open-response questions in Algebra 1 tests require students to provide detailed solutions, demonstrating their problem-solving skills and understanding of algebraic concepts. These questions often involve solving equations, graphing functions, or explaining mathematical reasoning. Unlike multiple-choice questions, they allow students to express their thought process and apply knowledge in a more comprehensive manner. The PDF format ensures that these questions are neatly organized and easy to read, enabling students to write their answers clearly. Additionally, the inclusion of answers and explanations in the PDF helps students review their work, identify mistakes, and improve their grasp of algebra. This format is particularly useful for assessing critical thinking and the ability to communicate mathematical ideas effectively.

Scoring and Grading Criteria

Scoring and grading criteria for Algebra 1 tests are designed to ensure fairness and clarity. Each question is assigned a specific point value, with partial credit awarded for correct steps in solving problems. Rubrics outline expectations for open-response questions, evaluating both mathematical accuracy and the clarity of explanations. Answer keys provide detailed solutions, enabling students to understand how points are allocated. Grading criteria emphasize understanding core concepts, proper use of algebraic methods, and logical reasoning. This structured approach helps students identify areas for improvement and allows teachers to assess progress effectively. The transparency of scoring and grading criteria in PDF tests ensures a consistent and equitable evaluation process for all students.

Benefits of Using Algebra 1 Practice Tests with Answers

Algebra 1 practice tests with answers enhance problem-solving skills, identify weak areas for focused study, and boost confidence for exams. Regular practice fosters mastery of key concepts.

Improving Problem-Solving Skills

Engaging with Algebra 1 practice tests enhances problem-solving abilities by exposing students to diverse question types, such as multiple-choice and open-response problems. These tests simulate real exam scenarios, helping students develop critical thinking and time management skills. The detailed answer keys provide clear explanations, enabling students to understand their mistakes and learn from them. Regular practice builds proficiency in solving equations, manipulating expressions, and interpreting functions. Over time, this consistent exposure to various problems fosters a deeper understanding of algebraic concepts and improves overall mathematical reasoning. The step-by-step solutions further guide students in applying appropriate strategies to tackle complex problems effectively.

Identifying Weak Areas for Further Study

Algebra 1 practice tests with answers PDF help students pinpoint areas requiring additional focus by highlighting gaps in their understanding. By reviewing test results, learners can identify consistently challenging topics, such as solving quadratic equations or graphing functions. Detailed answer keys and explanations enable students to understand their mistakes and address them effectively. Over time, this process fosters a stronger grasp of fundamental concepts and reduces errors. The step-by-step solutions also guide students in mastering specific skills, ensuring they are well-prepared for future assessments. Regular practice with these resources allows learners to track their progress and target weaknesses systematically.

Building Confidence for the Final Exam

Algebra 1 practice tests with answers PDF play a crucial role in boosting students’ confidence as they approach their final exams. By consistently practicing with these resources, students become familiar with the test format and question types, reducing exam anxiety. The ability to review mistakes and understand solutions through detailed answer keys helps students feel more prepared. Regular practice also enhances problem-solving skills and speed, allowing learners to tackle challenges with assurance. Over time, this consistent preparation leads to a higher sense of self-efficacy, making students more confident in their ability to excel on the final exam and achieve their academic goals.

Sample Algebra 1 Test Questions and Solutions

These resources include a variety of practice questions covering equations, expressions, functions, and systems of equations, along with detailed solutions to help students understand the problem-solving process.

Equations and Expressions

Equations and expressions are fundamental components of Algebra 1, forming the basis for problem-solving skills. Practice tests include questions that require solving linear equations, simplifying algebraic expressions, and interpreting word problems. For example, students might solve equations like 3(2x + 6) – 4 = 14 or simplify expressions such as (2m⁴)(5m⁸). These questions are designed to assess understanding of basic algebraic principles and manipulation of variables. Multiple-choice options are often provided, along with open-response questions that require step-by-step solutions. The answer key offers detailed explanations, helping students identify common mistakes and improve their problem-solving strategies. Regular practice with these types of problems enhances fluency in algebraic manipulation and prepares students for more complex concepts.

Functions and Graphs

Functions and graphs are essential topics in Algebra 1, requiring students to understand relationships between variables and interpret visual representations. Practice tests include questions on evaluating functions, identifying function types (linear, quadratic), and analyzing graphs to find key features like slope, intercepts, and vertex. For example, students might determine the value of a function at a specific input or identify the equation of a line from a graph. Open-response questions often ask for step-by-step explanations, while multiple-choice options test quick recognition of function properties. The answer key provides detailed solutions, highlighting common errors and offering insights into graphical interpretations. Regular practice with these problems enhances students’ ability to model real-world scenarios and understand function behavior.

Systems of Equations and Inequalities

Systems of equations and inequalities are fundamental concepts in Algebra 1, requiring students to solve for multiple variables and understand solution sets. Practice tests include questions on solving systems using substitution, elimination, and graphical methods. Students are also asked to determine if solutions satisfy inequalities and to identify feasible regions. Multiple-choice questions test the ability to select correct solutions, while open-response questions require detailed step-by-step explanations. The answer key provides clear solutions, highlighting methods to avoid common errors. Regular practice helps students grasp how to model and solve real-world problems involving multiple constraints, enhancing their analytical and critical thinking skills in algebra.

Answer Key and Explanation

The answer key provides detailed step-by-step solutions for each problem, enabling students to understand the correct methods and identify common mistakes in their work.

Step-by-Step Solutions for Each Problem

Each problem in the Algebra 1 test is accompanied by detailed step-by-step solutions, guiding students through the problem-solving process. These solutions break down complex equations, functions, and systems into manageable parts, ensuring clarity and understanding. For example, when solving equations like 3(2x ⎻ 6) ⎻ 4 = 14, the solutions demonstrate how to apply distributive properties and isolate variables correctly. Similarly, for graphing functions or solving inequalities, the step-by-step approach highlights key mathematical principles and methods. This resource not only helps students verify their answers but also teaches them how to approach various problem types systematically, reinforcing their algebraic skills and problem-solving strategies.

Common Mistakes and How to Avoid Them

Common mistakes in Algebra 1 tests often stem from rushing through problems or misapplying mathematical principles. For instance, students may incorrectly distribute coefficients, forget to change the sign when moving terms across an equation, or misapply exponent rules. To avoid these errors, it’s essential to work methodically, double-checking each step. Practicing regularly helps build familiarity with problem types and reduces careless mistakes. Additionally, understanding the underlying concepts, such as the properties of equality and the order of operations, is crucial. By identifying and addressing these common pitfalls, students can improve their accuracy and performance in Algebra 1 tests.

Reviewing Test Results for Better Understanding

Reviewing test results is a crucial step in understanding strengths and areas needing improvement. By examining each question, students can pinpoint where mistakes occurred and grasp the correct methods. Answer keys and step-by-step solutions provide clarity, helping learners address misunderstandings. Identifying patterns in errors, such as consistent struggles with specific topics, enables focused study. Regularly reviewing test results fosters a deeper understanding of algebraic concepts and enhances problem-solving skills. Additionally, this process encourages continuous improvement, as students can revisit challenging problems and refine their approaches. Over time, this reflective practice builds confidence and ensures readiness for future assessments.

stp to pdf

STP (Standard for the Exchange of Product Data) is a 3D CAD file format used for product modeling and data exchange. PDF (Portable Document Format) is a universal format for sharing documents, ensuring compatibility and security across devices. Both formats are widely used in engineering and document management for their precision and accessibility, making STP to PDF conversion highly beneficial for sharing 3D models in a readable format.

1.1 Definition and Purpose of STP Files

STP (Standard for the Exchange of Product Data) is a 3D CAD file format used for product modeling and data exchange. It facilitates the transfer of precise geometric and technical information between different systems. Widely used in engineering and manufacturing, STP files ensure design consistency and accuracy. Their primary purpose is to enable collaboration and communication among designers, engineers, and stakeholders by providing a standardized format for 3D product data.

1.2 Overview of PDF and Its Advantages

PDF (Portable Document Format) is a widely used file format for sharing documents reliably across different platforms. It maintains consistent formatting and layout, ensuring content appears the same on all devices. PDFs offer security features like encryption and password protection, enhancing data safety. Additionally, they support compression, reducing file sizes without compromising quality. These advantages make PDFs ideal for sharing 3D models, technical drawings, and other sensitive information, preserving integrity and accessibility.

Benefits of Converting STP to PDF

Converting STP to PDF enables easy sharing of 3D models, ensures compatibility across devices, and maintains file quality. It also enhances security and accessibility for collaboration.

2.1 Improved Compatibility Across Devices

Converting STP to PDF ensures seamless compatibility across various devices and operating systems. PDFs are universally supported, allowing users to access 3D models on desktops, tablets, and mobile devices without specialized software. This broad accessibility makes PDFs ideal for sharing designs with stakeholders who may not have CAD viewers installed. Additionally, PDFs retain the precise geometry and details of the original STP file, ensuring consistency and clarity across different platforms.

2.2 Enhanced Security and Compression

Converting STP to PDF enhances security by allowing password protection and encryption, safeguarding sensitive data. PDFs also offer compression, reducing file sizes without losing quality, making them easier to share and store. This ensures that 3D models remain intact while being more accessible and secure, which is crucial for protecting intellectual property in engineering and design fields. The compression feature is particularly useful for large CAD files, optimizing storage and transfer efficiency.

Methods to Convert STP to PDF

To convert STP to PDF, you can use online tools, desktop software, or browser-based converters. Online tools are accessible and convenient, often requiring simple uploads and downloads. Desktop software, like CAD applications, may offer more control over output quality and settings. Browser-based converters provide instant conversion without installations, making them a quick solution for sharing 3D models in a widely compatible format.

3.1 Using Online Conversion Tools

Online conversion tools provide a quick and user-friendly way to convert STP files to PDF. Platforms like Smallpdf and ILovePDF allow drag-and-drop uploads, making the process straightforward. These tools often support multiple file formats and require no software installation. They are accessible from any browser, offering convenience for users who need fast conversions. Most online converters maintain the integrity of the STP file’s 3D geometry in the PDF output, ensuring accuracy. This method is ideal for those seeking a hassle-free and efficient solution without technical expertise.

3.2 Utilizing Desktop Software Solutions

Desktop software solutions like Aspose CAD and 3DPEA offer robust tools for converting STP to PDF. These applications provide advanced features such as batch processing, customizable settings, and high-quality output. They are ideal for users requiring precise control over the conversion process. Desktop software often supports multiple file formats and ensures compatibility with various operating systems. This method is particularly beneficial for professionals who need to handle complex 3D models and maintain their integrity in the PDF format. It offers reliability and flexibility for consistent results.

3.3 Leveraging Browser-Based Converters

Browser-based converters offer a convenient and accessible way to convert STP to PDF without installing software. These tools are web-based, allowing users to upload their STP files directly in the browser. Many platforms, like Smallpdf and ILovePDF, provide drag-and-drop functionality, making the process quick and straightforward. They support multiple file formats and ensure high-quality output. This method is ideal for users seeking a fast, hassle-free conversion experience without the need for desktop installations, perfect for occasional use or collaboration.

Popular Tools for STP to PDF Conversion

Tools like Aspose CAD, 3DPEA, and online platforms such as Smallpdf and ILovePDF are widely used for efficient STP to PDF conversion, offering user-friendly interfaces and high-quality output.

4.1 Aspose CAD Application

Aspose CAD is a powerful tool for converting STP files to PDF. It offers a simple interface for uploading files, processing them, and generating high-quality PDF outputs. Users can access it online without needing to install software. The tool supports various 3D formats and ensures accurate conversion while maintaining the integrity of the original model. Its efficiency and reliability make it a top choice for engineers and designers needing precise PDF conversions of their STP files.

4.2 3DPEA Conversion Tool

3DPEA is a specialized tool designed for converting STP files to PDF. It supports batch processing, allowing users to convert multiple files simultaneously. The tool offers customizable settings for output quality and layout. 3DPEA is user-friendly, requiring minimal steps to upload and convert files. It is compatible with both STP and STEP formats, ensuring versatility. The tool is ideal for users needing efficient, high-quality conversions without requiring additional software installation, making it a practical choice for both individual and bulk tasks.

4.3 Online Platforms Like Smallpdf and ILovePDF

Online platforms like Smallpdf and ILovePDF offer convenient STP to PDF conversion solutions. These tools are web-based, eliminating the need for software downloads. They support multiple file formats and provide features like OCR for text extraction. Users can upload STP files directly, convert them, and download the PDF output seamlessly. These platforms are accessible from any browser, making them ideal for quick conversions without installation. They also ensure cross-platform compatibility, catering to users on Windows, Mac, or mobile devices.

Step-by-Step Conversion Guide

Upload your STP file, select PDF as the output format, adjust settings if needed, and initiate the conversion. Download the PDF once the process completes successfully.

5.1 Uploading the STP File

Begin by accessing your preferred conversion tool, such as Aspose CAD or 3DPEA. Click the “Upload” or “Choose File” button to select your STP file from your device. Ensure the file is in the correct format (.stp or .step) and within the size limits specified by the converter. Some tools allow drag-and-drop functionality for convenience. Once the file is uploaded, the tool will prepare it for the next steps in the conversion process to PDF.

5.2 Adjusting Settings for Optimal Output

After uploading your STP file, adjust settings to ensure the best possible PDF output. Choose the resolution for image quality, select the layout (portrait or landscape), and decide whether to include layers or specific 3D model components. Some tools allow you to customize compression levels to reduce file size while maintaining clarity. Ensure all settings align with your requirements before proceeding to the final conversion step.

5.3 Finalizing the Conversion Process

Once settings are configured, review the preview to ensure accuracy. Click the “Convert” button to initiate the process. Depending on the file size and complexity, conversion may take a few moments. Upon completion, download the PDF file or share it directly via email or cloud storage. Ensure the output matches your expectations before finalizing, as some tools may offer post-conversion editing options for further adjustments.

Frequently Asked Questions

Is the conversion process free? Many online tools offer free STP to PDF conversion with basic features. For advanced options, a subscription or one-time payment may be required. Additionally, some platforms allow batch processing of multiple STP files simultaneously, saving time for users with numerous conversions. To ensure high-quality PDF output, it’s crucial to select the appropriate settings during the conversion process, such as resolution and format options, which vary depending on the tool being used.

6.1 Is the Conversion Process Free?

The conversion process from STP to PDF can be free, depending on the tool used. Online platforms like Smallpdf and ILovePDF offer free conversions with basic features. However, some tools may require payment for advanced options, such as high-resolution output or batch processing; Free versions often have limitations, like file size restrictions or watermarks. For occasional use, free tools suffice, but for professional needs, a subscription might be necessary to access premium features. Always check the tool’s pricing model before proceeding.

6.2 Can I Convert Multiple STP Files at Once?

Yes, some tools support batch conversion of multiple STP files to PDF simultaneously. Platforms like 3DPEA and certain online converters allow users to upload several files at once, saving time. However, free versions may limit the number of files or require a subscription for bulk processing. Always check the tool’s features to confirm if it supports multiple file conversions and any associated limitations or costs for large-scale processing.

6.3 How to Ensure High-Quality PDF Output

To ensure high-quality PDF output when converting STP files, use a reliable converter that supports 3D model details. Select high-resolution settings and ensure the STP file is of good quality. Some tools, like Aspose CAD, allow adjusting output settings for clarity. Avoid over-compression to maintain visual accuracy. Batch processing may affect quality, so convert files individually for critical projects. Verify the PDF after conversion to ensure all 3D elements are preserved and the layout is intact for professional presentation.

Best Practices for STP to PDF Conversion

Use a reliable converter to maintain file integrity. Adjust settings for optimal quality and compatibility. Review the PDF to ensure all 3D elements are accurately preserved.

7.1 Choosing the Right Converter for Your Needs

Selecting the appropriate tool for converting STP to PDF is crucial for ensuring quality and compatibility. Consider factors like file compatibility, conversion accuracy, and user-friendliness. Opt for tools that support 3D model conversion and maintain detail. Check for security features if handling sensitive data. Evaluate whether you need a simple online converter or advanced desktop software. Read reviews and test free versions to find the best fit. This ensures your conversion meets your specific requirements and delivers high-quality results efficiently.

7.2 Maintaining File Integrity During Conversion

Maintaining file integrity is essential when converting STP to PDF. Ensure the converter preserves the original 3D model’s geometry, dimensions, and metadata. Avoid excessive compression that may distort details. Choose tools that support lossless conversion to retain precision. Verify the output PDF matches the STP file’s specifications. Additionally, check for any embedded data or annotations to ensure they remain intact. This guarantees the PDF is an accurate representation of the original STP file, maintaining its professional and technical integrity.

Troubleshooting Common Issues

Common issues during STP to PDF conversion include large file sizes and compatibility problems. Use optimized converters and verify file sizes before conversion to resolve these challenges effectively.

8.1 Handling Large File Sizes

Large STP files can pose challenges during conversion, often exceeding size limits of online tools. To address this, users can compress the file using specialized software or split it into smaller parts. Utilizing desktop applications like Aspose CAD or 3DPEA allows for better handling of large files without size restrictions. Additionally, optimizing the STP file by reducing unnecessary data before conversion can help mitigate this issue, ensuring smoother processing and successful PDF output.

8.2 Resolving Compatibility Problems

Compatibility issues may arise when converting STP to PDF, especially with complex 3D models. To resolve this, ensure your software is updated and supports the latest STP format. Using dedicated tools like Aspose CAD or 3DPEA can help maintain file integrity. If errors occur, simplify the STP file by removing unnecessary layers or elements. Additionally, verifying the converter’s compatibility with your device’s operating system can prevent issues, ensuring a smooth conversion process and accurate PDF output.

canon digital rebel xt manual

The Canon Digital Rebel XT, released in 2005, is a high-performance DSLR camera featuring an 8․0-megapixel CMOS sensor and EF-S lens compatibility․ Popular among photography enthusiasts, it offers versatile shooting modes and user-friendly design, making it an excellent choice for both beginners and advanced photographers․

1․1 Overview of the Camera and Its Importance

The Canon Digital Rebel XT, introduced in 2005, marked a significant step in DSLR technology, offering an 8․0-megapixel CMOS sensor and EF-S lens compatibility․ Its compact design and intuitive interface made it accessible to both beginners and professionals․ The camera’s versatility in shooting modes and compatibility with a wide range of lenses solidified its importance in the photography world, making it a popular choice for capturing high-quality images with ease and precision․

1․2 Key Features of the Canon Digital Rebel XT

The Canon Digital Rebel XT boasts an 8․0-megapixel CMOS sensor, delivering high-resolution images with excellent detail․ It features the EF-S lens mount, expanding compatibility with a wide range of Canon lenses․ The camera offers various shooting modes, including manual and automatic options, catering to both beginners and advanced users․ Additionally, it supports custom functions, enabling personalized settings for enhanced creativity․ Its compact design, fast shutter speed, and compatibility with memory cards like CF/MD ensure versatility and efficiency, making it a reliable choice for photographers․

Understanding the Canon Digital Rebel XT Manual

The Canon Digital Rebel XT manual provides detailed guidance on camera setup, shooting modes, and troubleshooting․ It covers features, customization options, and maintenance tips, ensuring optimal performance․

2․1 Structure and Content of the Manual

The Canon Digital Rebel XT manual is a comprehensive guide structured to help users master the camera’s features․ It begins with an overview of the camera’s components and setup, followed by detailed explanations of shooting modes, customization options, and troubleshooting․ The manual also covers technical specifications, maintenance tips, and software updates․ Appendices provide quick references and error solutions, ensuring users can optimize their photography experience effectively․

2․2 How to Navigate the Manual Effectively

To navigate the Canon Digital Rebel XT manual effectively, start with the table of contents for quick access to specific topics․ Use the index to locate detailed explanations of features like shooting modes or custom functions․ Begin with the setup guide for initial configurations, then explore sections on advanced features such as white balance and autofocus․ Visual aids like diagrams and charts help clarify complex settings․ Always refer to the troubleshooting section for resolving common errors and updating firmware․ Regularly review the appendices for quick references and error solutions․ This structured approach ensures you maximize the camera’s potential and enhance your photography skills․

Key Features and Specifications

The Canon Digital Rebel XT features an 8․0-megapixel CMOS sensor, EF-S lens compatibility, and various shooting modes․ It supports custom functions and offers versatile photography options․

3․1 8․0-Megapixel CMOS Sensor

The Canon Digital Rebel XT is equipped with an 8․0-megapixel CMOS sensor, delivering high-resolution images with excellent detail and color accuracy․ This sensor ensures crisp and vibrant photos, even in challenging lighting conditions․ Its high sensitivity allows for effective low-light photography, making it suitable for a wide range of shooting scenarios․ The CMOS technology also contributes to efficient power consumption, enhancing battery life during extended use․

3․2 Canon EF-S Lens Mount Compatibility

The Canon Digital Rebel XT features an EF-S lens mount, ensuring compatibility with Canon’s extensive range of EF-S and EF lenses․ This versatility allows photographers to explore various focal lengths and specialized optics, from wide-angle to telephoto and macro lenses․ The EF-S mount is designed to optimize lens performance for the APS-C sensor size, providing enhanced image quality and creative flexibility for both amateur and professional photographers․ This compatibility expands the camera’s potential for diverse shooting scenarios․

3․3 Shooting Modes and Custom Functions

The Canon Digital Rebel XT offers a variety of shooting modes, including Auto, Manual, Aperture Priority (AV), Shutter Priority (TV), and Program (P), catering to both beginners and advanced users․ Custom functions allow photographers to tailor settings to their preferences, such as ISO, autofocus, and metering modes․ The camera also features six custom functions, enabling precise control over image capture, ensuring versatility and personalized shooting experiences for diverse photography needs and styles․

Setting Up the Camera

The Canon Digital Rebel XT requires initial setup, including inserting the battery, attaching the lens, and formatting the memory card․ Follow on-screen instructions to set the date, time, and language, ensuring proper camera functionality․ Review settings to confirm everything is correctly configured for optimal performance․

4․1 Initial Setup and Configuration

Insert the battery and memory card, ensuring they are securely locked in place․ Attach the lens by aligning the mount and turning clockwise until it clicks․ Turn the camera on and select your language, date, and time using the LCD screen․ Navigate through the menu to set additional preferences, such as image quality and autofocus options․ Refer to the manual for detailed guidance on configuring these settings to optimize your camera’s performance․ Proper setup ensures a smooth shooting experience․

4․2 Charging and Battery Management

Insert the NB-2LH battery into the charger, ensuring it aligns with the contacts․ Charge until the indicator turns green, typically taking 90-120 minutes․ Avoid using third-party batteries to prevent damage․ Store the battery in a cool, dry place when not in use․ For optimal performance, avoid fully depleting the battery before recharging․ Proper charging and storage extend the battery’s lifespan and ensure reliable camera operation․ Always use Canon-approved chargers for safety․

4․3 Memory Card Selection and Formatting

Use a compatible CompactFlash (CF) card with the Canon Digital Rebel XT․ Select a card with sufficient storage capacity based on your needs․ Before first use, format the memory card in the camera to ensure proper operation․ Formatting deletes all data, so transfer important files to a computer beforehand․ Regular formatting helps maintain card performance and prevents errors․ Always use a compatible CF card to avoid issues during shooting;

Shooting Modes and Techniques

The Canon Digital Rebel XT offers various shooting modes, from Auto to Manual, catering to both beginners and advanced photographers․ Explore techniques to enhance your photography skills and adapt to different scenarios with customizable settings․

5․1 Auto Mode for Beginners

The Canon Digital Rebel XT’s Auto Mode is designed for beginners, simplifying photography by automatically adjusting settings like exposure, focus, and white balance․ This mode allows users to focus on composition and creativity without worrying about technical details․ It’s ideal for those new to DSLR cameras, providing point-and-shoot convenience while delivering high-quality images․ The camera’s advanced sensor ensures sharp, detailed photos, making it a great starting point for learning photography fundamentals․

5․2 Manual Mode for Advanced Users

Manual Mode on the Canon Digital Rebel XT offers advanced users full control over camera settings, enabling precise adjustments to aperture, shutter speed, ISO, and white balance․ This mode is ideal for those who want to explore creative photography techniques, such as depth of field manipulation or low-light shooting․ With manual control, users can achieve customized results tailored to their artistic vision, making it a powerful tool for refining photographic skills and capturing unique moments․

5․3 Customizing Shooting Settings

Customizing shooting settings on the Canon Digital Rebel XT allows users to tailor the camera to their preferences․ Through the menu system, photographers can adjust exposure compensation, white balance, and focusing modes․ Custom Functions enable advanced tweaks, such as adjusting the behavior of autofocus or metering․ These features empower users to personalize their shooting experience, ensuring optimal results in various lighting conditions and creative scenarios․ This level of customization caters to both novice and experienced photographers․

Advanced Features and Functions

The Canon Digital Rebel XT offers advanced features like White Balance, ISO settings, and Autofocus modes, allowing precise control over imaging․ Flash and external lighting options enhance versatility․

6․1 White Balance and ISO Settings

The Canon Digital Rebel XT allows precise control over White Balance and ISO settings to enhance image quality․ White Balance ensures accurate color representation in various lighting conditions, with options like Auto, Daylight, Shade, and Tungsten․ The ISO range (100-1600) adjusts sensitivity for low-light shooting․ Lower ISOs reduce noise, while higher settings enable shooting in dim environments․ These features provide flexibility for capturing vibrant, detailed images in diverse situations, making the camera versatile for creative photography․

6․2 Autofocus and Metering Modes

The Canon Digital Rebel XT features a 7-point autofocus system for precise subject tracking and sharp images․ It offers One-Shot AF for stationary subjects and AI Servo AF for moving objects․ The camera also includes 35-zone evaluative metering for balanced exposures․ Users can choose between Evaluative, Center-Weighted, and Partial metering modes to suit their shooting needs․ These features ensure accurate focus and exposure, delivering high-quality results in various photography scenarios․

6․3 Using Flash and External Lighting

The Canon Digital Rebel XT features a built-in flash for low-light conditions and supports external Speedlite flashes like the 580EX II․ The camera offers red-eye reduction and flash exposure compensation․ When using external lighting, the E-TTL II autoflash system ensures accurate flash metering․ For optimal results, sync the flash with the camera’s shutter speed and adjust settings to avoid overexposure․ Proper use of flash and external lighting enhances image quality in challenging lighting scenarios․

Maintenance and Troubleshooting

Regularly clean the sensor and lens to maintain image quality․ Refer to the manual for troubleshooting common errors and updating firmware for optimal performance․

7․1 Cleaning the Sensor and Lens

Regular cleaning of the sensor and lens is essential for maintaining image quality․ Use a soft, dry brush or microfiber cloth to remove dust․ For stubborn smudges, apply a few drops of cleaning solution to the cloth, not the lens․ Avoid harsh chemicals or tissues, as they may scratch the surface․ Refer to the manual for detailed cleaning guidelines to ensure optimal camera performance and prevent damage․ Proper maintenance ensures sharper, clearer photos․

7․2 Resolving Common Errors and Issues

Common issues with the Canon Digital Rebel XT include error messages like “Error 99” and connectivity problems․ Check camera settings, clean the sensor, and ensure proper lens alignment․ For connection errors, verify cable compatibility and restart the camera․ Refer to the manual for troubleshooting guides or update firmware to resolve software-related issues․ Regular maintenance and firmware updates help prevent errors and ensure smooth operation․ Always follow Canon’s recommended procedures to avoid further complications․

7․3 Updating Firmware and Software

Updating the Canon Digital Rebel XT’s firmware and software ensures optimal performance and fixes issues․ Download the latest firmware from Canon’s official website, ensuring compatibility with your camera model․ Use a fully charged battery and avoid interruptions during the update․ Follow the step-by-step instructions in the manual or Canon’s support page to complete the process successfully․ Regular updates enhance functionality and maintain camera efficiency․

Downloading and Accessing the Manual

The Canon Digital Rebel XT manual is available for free download as a PDF from Canon’s official website․ It provides detailed guidance for optimal camera use․

8․1 Official Canon Website and Resources

The official Canon website offers comprehensive resources for the Digital Rebel XT, including the user manual, drivers, and software updates․ Users can easily navigate to the support section, search for their camera model, and download the necessary files․ The manual is provided in PDF format, ensuring accessibility across various devices․ Additionally, Canon’s website features troubleshooting guides and FAQs to assist users in resolving common issues and optimizing their camera’s performance․

8․2 PDF Download and Viewing Tips

Download the Canon Digital Rebel XT manual from the official Canon website as a PDF file․ Ensure you use Adobe Acrobat Reader for optimal viewing․ A “COPY” watermark may appear when opened with Reader 5․x or later versions․ Printing the manual will also include this watermark․ Save the PDF to your device for easy access and reference․ This format allows you to navigate and search the document effortlessly, ensuring a smooth user experience․

honeywell pro series thermostat install manual

The Honeywell Pro Series Thermostat offers a user-friendly interface and advanced features for optimal temperature control. Designed for energy efficiency, it supports smart home integration and is compatible with various HVAC systems.

Overview of Features and Benefits

The Honeywell Pro Series Thermostat offers a user-friendly interface, programmable scheduling, and energy-saving modes. It features a backlit keypad for easy navigation and compatibility with various HVAC systems. The thermostat supports Wi-Fi connectivity for smart home integration, allowing remote temperature control via smartphone apps. Its adaptive learning capabilities optimize heating and cooling cycles, enhancing efficiency and comfort while reducing energy consumption.

Why Choose the Honeywell Pro Series?

The Honeywell Pro Series Thermostat is a top choice for its user-friendly design, energy-saving features, and seamless smart home integration. It offers advanced programmability, adaptive learning, and compatibility with various HVAC systems. With Wi-Fi connectivity, remote access, and a clear digital display, it provides unmatched convenience and efficiency, making it an excellent option for modern homes seeking comfort and energy savings.

Downloading the Honeywell Pro Series Thermostat Manual

The Honeywell Pro Series Thermostat manual is essential for proper installation, configuration, and troubleshooting; Visit the Honeywell Home website, navigate to Support, and download the PDF guide for your specific model.

Importance of the Manual for Installation and Setup

The Honeywell Pro Series Thermostat manual is crucial for successful installation and setup. It provides detailed, step-by-step instructions tailored to your specific model, ensuring proper wiring and configuration. The guide includes troubleshooting tips and essential information for optimizing performance, making it indispensable for both DIY enthusiasts and professionals to achieve efficient and reliable operation.

Step-by-Step Guide to Downloading the PDF Manual

To download the Honeywell Pro Series Thermostat manual, visit the official Honeywell Home website. Navigate to the Support section and select “Product Manuals.” Enter your thermostat model number, such as T6 Pro or T4 Pro. Verify the download by ensuring the file is labeled for your specific model. This ensures you receive accurate instructions for installation and setup.

Key Sections of the Manual

The Honeywell Pro Series manual includes essential sections like installation instructions, wiring diagrams, and programming guides. It also covers troubleshooting tips, energy-saving features, and Wi-Fi setup. Detailed diagrams ensure clarity, while step-by-step guides simplify the setup process. This comprehensive resource helps users optimize their thermostat’s performance and integrate it seamlessly with smart home systems for enhanced convenience and efficiency.

Honeywell Pro Series Thermostat System Compatibility

The Honeywell Pro Series Thermostat is compatible with most HVAC systems, including gas, oil, electric, heat pumps, and multi-stage systems. It also supports Wi-Fi and smart home integration.

Compatible HVAC Systems

The Honeywell Pro Series Thermostat is designed to work seamlessly with a variety of HVAC systems, including gas, oil, electric, and heat pump configurations. It is also compatible with single-stage and multi-stage heating and cooling systems, ensuring flexibility for different home setups. This versatility makes it a reliable choice for homeowners with diverse heating and cooling needs.

Wi-Fi and Smart Home Integration

The Honeywell Pro Series Thermostat features Wi-Fi connectivity, enabling remote control through smartphone apps like Honeywell Home and Total Connect Comfort. It seamlessly integrates with smart home systems, allowing users to adjust settings, monitor energy usage, and receive alerts. This integration enhances convenience and energy efficiency, making it a modern solution for smart home environments.

Tools and Materials Needed for Installation

Essential tools include a screwdriver, drill, and wire strippers. Additional materials like anchors, screws, and a level ensure secure installation of your Honeywell Pro Series Thermostat.

Essential Tools Required

A screwdriver, drill, and wire strippers are necessary for installation. Additionally, pliers and a voltage tester are recommended to ensure safe and proper wiring of your Honeywell Pro Series Thermostat.

Additional Materials for a Secure Installation

Wall anchors, screws, and a level ensure proper mounting. Insulation for wires and a voltage tester prevent electrical issues. The UWP mounting system and decorative cover plate, included in the package, enhance installation security and provide a polished finish.

Step-by-Step Installation Guide

Start by turning off power to your HVAC system. Remove the old thermostat, then connect wires to the new Honeywell Pro Series Thermostat, ensuring correct wiring.

Pre-Installation Checks

Before installing your Honeywell Pro Series Thermostat, ensure the power to your HVAC system is turned off. Verify compatibility with your HVAC system type, such as gas, oil, or heat pump. Gather all necessary tools and materials, including a screwdriver and batteries. Review the manual to understand system requirements and safety precautions. Ensure the thermostat’s wiring matches your system’s configuration for a smooth setup process.

Wiring and Mounting the Thermostat

Mount the thermostat base to the wall using the provided screws and anchors. Connect the wires according to the wiring diagram in the manual, ensuring correct terminal assignments. Secure the thermostat faceplate to the base, and insert the batteries. Double-check all connections for accuracy and safety before restoring power to the system to ensure proper functionality.

Powering the Thermostat

Connect the thermostat to your HVAC system’s wiring, ensuring compatibility with your specific model. Insert 2 AA batteries for backup power or hardwire directly for continuous operation. Turn off the furnace or HVAC system before connecting to avoid damage. Follow the manual’s wiring diagram to ensure correct power connections and safe installation. Verify power status after setup.

Final Installation Checks

After installation, turn on your HVAC system and verify proper operation. Check the thermostat display for accurate temperature readings and ensure all buttons function correctly. Test the schedule settings and energy-saving modes. Confirm wiring connections are secure and test Wi-Fi connectivity if applicable. Ensure the thermostat powers on and responds to adjustments. Review the manual for any final setup steps.

Programming Your Honeywell Pro Series Thermostat

Program daily and weekly schedules to optimize heating and cooling. Utilize energy-saving modes to reduce consumption without compromising comfort.

Setting Up Daily and Weekly Schedules

Set custom temperature schedules for your Honeywell Pro Series Thermostat to optimize comfort and energy use. Program daily and weekly settings via the touchscreen or app. Choose specific times for heating and cooling cycles, ensuring energy efficiency. The thermostat allows flexibility for unique weekday and weekend plans, adapting to your lifestyle seamlessly.

Understanding Energy-Saving Modes

The Honeywell Pro Series Thermostat features energy-saving modes that adapt to your system’s performance. These modes optimize heating and cooling cycles to reduce energy consumption. The thermostat learns your home’s thermal characteristics, adjusting operations to maintain comfort while minimizing waste. Smart features like adaptive recovery ensure efficient temperature control, helping you save energy without sacrificing convenience or performance.

Connecting to Wi-Fi and Smart Home Integration

The Honeywell Pro Series Thermostat seamlessly connects to Wi-Fi, enabling remote control via smartphone apps like Honeywell Home. It integrates with smart home systems, ensuring voice command compatibility and enhanced energy tracking for optimal performance.

Setting Up Wi-Fi Connectivity

Seamlessly connect your Honeywell Pro Series Thermostat to Wi-Fi by downloading the Honeywell Lyric app. Open the app, select your thermostat model, and follow the in-app instructions to link it to your network. Ensure your thermostat is in setup mode and enter your Wi-Fi password when prompted. If issues arise, reset the thermostat or check your network settings for troubleshooting.

Integrating with Smart Home Systems

The Honeywell Pro Series Thermostat seamlessly integrates with smart home systems like Amazon Alexa and Google Assistant, enabling voice control. Use the Honeywell Home app to connect your thermostat to your smart home network. This integration allows remote temperature adjustments and energy tracking. For setup, enable the Honeywell skill in your smart home app and link your account for enhanced functionality and convenience.

Troubleshooting Common Issues

The Honeywell Pro Series Thermostat may face connectivity or display issues. Use the Honeywell Home app for diagnostics and software updates to resolve these problems quickly.

Resolving Connectivity Problems

  • Restart your router and ensure stable internet connection.
  • Check if the thermostat is connected to the correct Wi-Fi network.
  • Use the Honeywell Home app to diagnose and resolve connectivity issues.
  • Reset the thermostat by removing batteries or powering it off temporarily.
  • Ensure firmware is updated to the latest version for optimal performance.

Addressing Display or Sensor Issues

Check for loose connections or power issues causing display problems. Clean the screen gently with a soft cloth. Calibrate sensors if temperature readings are inaccurate. Ensure proper installation of sensors for accurate data. Reset the thermostat by removing batteries or cycling power. If issues persist, update firmware or contact Honeywell support for assistance. Always refer to the manual for detailed troubleshooting steps.

FAQs About the Honeywell Pro Series Thermostat

  • Q: Is it compatible with all HVAC systems? A: Yes, it works with most standard systems, including heat pumps and multi-stage units.
  • Q: Can I install it myself? A: Yes, with basic wiring knowledge and the manual’s guidance.
  • Q: Does it support smart home integration? A: Yes, it integrates with systems like Honeywell Home for remote control.

Frequently Asked Questions

Q: Is the Honeywell Pro Series Thermostat compatible with all HVAC systems?
A: Yes, it supports most standard systems, including single-stage, multi-stage, heat pumps, and gas or oil systems.

Q: Do I need professional help to install the thermostat?
A: No, installation is DIY-friendly with basic wiring knowledge and the manual’s step-by-step guide.

Q: How often should I update the thermostat’s software?
A: Check for updates every few months or enable automatic updates through the Honeywell Home app.

Q: Can the thermostat be controlled remotely?
A: Yes, through the Honeywell Home app, allowing users to adjust settings from their smartphone.

Q: Does it require a C-wire for installation?
A: Some models may require a C-wire, while others are battery-powered, depending on the specific Honeywell Pro Series model.

Clarifying Common Misconceptions

Some believe the Honeywell Pro Series Thermostat is overly complex to install, but it’s designed for DIY installation with clear manual guidance. Another myth is that it requires a C-wire for all models, though some are battery-powered. Additionally, many think it’s incompatible with older HVAC systems, but it supports most standard systems, including single-stage and multi-stage setups.

Regularly update your Honeywell Pro Series Thermostat for optimal performance. Ensure proper installation and follow manual guidelines to maximize energy efficiency and comfort. Check batteries annually.

Best Practices for Maintenance

Regular maintenance ensures your Honeywell Pro Series Thermostat performs optimally. Check and replace batteries annually, clean the display, and update software periodically. Inspect wiring connections and ensure proper installation. Schedule regular system checks to maintain energy efficiency and prolong lifespan. Refer to the manual for detailed maintenance guidelines to keep your thermostat functioning smoothly and efficiently.

Maximizing Energy Efficiency

Maximizing energy efficiency with the Honeywell Pro Series Thermostat involves utilizing its smart scheduling and energy-saving modes. Program daily and weekly schedules to align with your lifestyle, and enable features like adaptive learning to optimize heating and cooling cycles. Remote access via the Honeywell Home app allows adjustments on the go, ensuring energy isn’t wasted. Regular software updates and proper maintenance further enhance efficiency, helping you save energy and reduce costs while maintaining comfort.

para 10 pdf

Para 10‚ also known as “Wa Alamu‚” is a significant section of the Holy Quran‚ offering spiritual guidance and wisdom․ Available in PDF format with translations‚ it provides easy access for readers worldwide to explore its teachings and deepen their understanding of Islamic values․

Overview of the Holy Quran and Its Significance

The Holy Quran is the sacred book of Islam‚ believed to be the literal word of God (Allah) as revealed to Prophet Muhammad through the Angel Gabriel over 23 years․ It serves as a comprehensive guide for believers‚ offering teachings on faith‚ morality‚ law‚ and spirituality․ Divided into 114 chapters (Surahs) and 30 parts (Paras)‚ the Quran provides wisdom‚ comfort‚ and direction for millions worldwide․ Para 10‚ known as “Wa Alamu‚” holds a special place in Islamic tradition‚ offering solace and spiritual enrichment․ Its verses emphasize justice‚ compassion‚ and devotion‚ making it a cherished part of daily recitation and reflection for Muslims globally․

Structure and Content of Para 10

Para 10‚ or “Wa Alamu‚” contains key verses from Surahs like Al-Anfal and At-Tawbah‚ focusing on themes of justice‚ repentance‚ and divine mercy․ Its structure offers profound spiritual insights․

Key Verses and Their Meanings

Para 10 includes key verses from Surah Al-Anfal and Surah At-Tawbah‚ emphasizing themes of justice‚ compassion‚ and divine mercy․ Verse 60 of Surah Al-Anfal highlights preparation for defense‚ while verses in At-Tawbah focus on repentance and seeking forgiveness․ These verses guide believers in maintaining ethical conduct and trusting Allah’s wisdom‚ offering deep spiritual and moral lessons for followers․

Surahs Included in Para 10

Para 10 of the Holy Quran encompasses significant portions of two surahs: Surah Al-Anfal (The Spoils of War) from verse 41 to 75 and Surah At-Tawbah (The Repentance) from verse 1 to 92․ These surahs collectively contain 129 verses‚ offering profound insights into justice‚ righteousness‚ and divine guidance․ Surah Al-Anfal focuses on themes of fairness and community responsibilities‚ while Surah At-Tawbah emphasizes repentance and seeking forgiveness․ Together‚ they provide essential teachings for believers‚ blending practical advice with spiritual enlightenment․ These surahs are readily available in Para 10 PDF formats‚ making them accessible for study and reflection․

Benefits of Reciting Para 10

Reciting Para 10 offers spiritual and emotional peace‚ fostering a deeper connection with faith․ It also enhances intellectual understanding of Islamic teachings and values․

Spiritual and Emotional Benefits

Reciting Para 10 brings immense spiritual and emotional peace‚ fostering a deeper connection with faith․ It provides comfort and solace‚ helping believers navigate life’s challenges with resilience․ The verses in Para 10 are known to calm the mind and soul‚ offering a sense of inner tranquility․ Regular recitation strengthens one’s relationship with Allah‚ promoting emotional stability and mental well-being․ Many find it a source of inspiration‚ guiding them toward righteousness and compassion․ The emotional benefits extend to reducing stress and anxiety‚ as the words of the Quran bring unparalleled comfort․ Overall‚ Para 10 serves as a powerful tool for spiritual growth and emotional healing․

Intellectual and Educational Value

Para 10 holds significant intellectual and educational value‚ offering profound insights into Islamic teachings․ Its verses are rich in moral lessons‚ fostering critical thinking and ethical understanding․ The structured language and divine wisdom within Para 10 make it an excellent resource for learning classical Arabic and mastering Tajweed rules․ It serves as a cornerstone for Islamic education‚ enabling learners to grasp the Quran’s deeper meanings․ The availability of Para 10 in PDF format further enhances its accessibility‚ allowing scholars and students to engage in self-study and structured learning․ This section is particularly valued for its clarity and depth‚ making it a vital tool for intellectual and spiritual growth․

How to Download Para 10 PDF

Para 10 PDF is easily accessible online via websites like Holy Quran Website or Islamicnet․com․ Visit these platforms‚ select the desired language‚ and download the PDF instantly․

Free Download Options

Holy Quran Para 10 PDF is available for free download from reputable websites like Holy Quran Website and Islamicnet․com․ These platforms offer the document in multiple formats‚ including PDF and text‚ ensuring accessibility for all users․ The PDF file is lightweight and easy to access‚ making it convenient for reading and study․ Additionally‚ many websites provide translations in Urdu and English‚ catering to a diverse audience․ Users can download Para 10 without any registration or subscription‚ ensuring a seamless experience․ This free resource is ideal for those seeking to deepen their understanding of the Quran’s teachings and spiritual guidance․ The simplicity of the download process makes it widely accessible globally․

Platforms Offering Para 10 PDF

Several reputable platforms offer the Holy Quran Para 10 PDF for free download․ Websites like Holy Quran Website and Islamicnet․com provide easy access to the document in PDF and text formats․ Additionally‚ HomeQuran․com and Dawateislami․net are popular choices for downloading Para 10 with translations in Urdu and English․ These platforms ensure that the Quran’s teachings are accessible to a global audience․ Some sites also offer additional resources‚ such as Tajweed guides and audio recitations‚ to enhance learning․ Users can explore these platforms to find the version that best suits their needs‚ making it easier to study and reflect on the sacred text․

Learning Resources for Para 10

Para 10 learning resources are widely available online‚ catering to diverse needs․ Websites like Islamicnet․com and HomeQuran․com offer free online courses with Tajweed guidance․ Additionally‚ platforms such as Dawateislami․net provide downloadable PDFs and audio recitations for better understanding․ These resources enable learners to study Para 10 at their convenience‚ enhancing their spiritual and educational journey with the Quran․

Online Courses and Tutorials

Online courses and tutorials for Para 10 are readily available‚ offering structured learning experiences; Websites like Islamicnet․com and HomeQuran․com provide free courses with Tajweed guidance‚ enabling learners to master recitation․ These platforms cater to all skill levels‚ from beginners to advanced learners․ Tutorials often include video lessons‚ audio recitations‚ and interactive exercises to enhance understanding․ Many courses focus on the entirety of Para 10‚ covering its key verses and meanings․ This accessible format allows learners to study at their own pace‚ making it ideal for those seeking flexibility․ The resources are designed to deepen both spiritual connection and academic knowledge of the Quran․

Recommended Websites for Study

Several websites are highly recommended for studying Para 10‚ offering comprehensive resources and tools․ Islamicnet․com and Dawateislami․net provide free access to Para 10 PDFs‚ along with Tajweed lessons and translations․ These platforms are user-friendly and cater to both beginners and advanced learners․ Additionally‚ HomeQuran․com offers structured courses and interactive materials to enhance understanding․ These websites ensure that learners can access high-quality resources anytime‚ making it easier to study and reflect on the teachings of Para 10․ They are ideal for those seeking a deeper connection with the Quran and its spiritual guidance․

Cultural and Religious Significance

Para 10 holds profound cultural and religious significance‚ offering wisdom‚ peace‚ and spiritual strength․ It embodies Islamic values‚ guiding believers in their faith journey and practices‚ especially during Ramadan and other sacred occasions․

Para 10 in Islamic Practices

Para 10‚ known as “Wa Alamu‚” holds a revered place in Islamic practices‚ particularly in daily recitation and congregational prayers․ It is often recited during Ramadan‚ Tarawih‚ and other sacred occasions‚ fostering a deeper connection with Allah․ Many Muslims incorporate it into their daily routines for spiritual growth and emotional solace․ The section is frequently taught in madrasas and online platforms‚ emphasizing its educational value․ Its verses are also used in dhikr and du’a‚ reflecting its role in strengthening faith and community bonds․ The practice of reciting Para 10 is believed to bring peace‚ clarity‚ and divine guidance‚ making it a cherished part of Islamic worship and tradition․

Its Role in Ramadan and Other Occasions

Para 10 plays a significant role during Ramadan‚ particularly in Tarawih prayers‚ where its verses are often recited to seek divine blessings․ Many Muslims also recite it during Laylat al-Qadr‚ the holiest night in Ramadan‚ to maximize spiritual rewards․ The section is frequently included in special congregational prayers and gatherings‚ fostering unity among believers․ Beyond Ramadan‚ Para 10 is recited on other sacred occasions such as Eid celebrations and during personal supplications for guidance․ Its availability in PDF format makes it easily accessible for recitation during these events‚ enhancing its role in Islamic worship and communal practices throughout the year․

Final Thoughts on the Importance of Para 10

Para 10 holds profound significance as a source of spiritual and intellectual enrichment․ Its verses‚ revealed in Arabic‚ encapsulate divine wisdom‚ guiding believers toward righteousness and compassion․ Reciting Para 10 fosters a deeper connection with Islamic teachings‚ offering solace‚ clarity‚ and moral direction․ It is particularly cherished during Ramadan‚ enhancing worship and reflection․ The availability of Para 10 in PDF format has made it accessible globally‚ enabling Muslims to study and recite its verses conveniently․ This section of the Quran remains a timeless treasure‚ inspiring personal growth‚ fostering unity‚ and strengthening faith in Allah’s divine message․

charge 3 jbl manual

Product Overview

The JBL Charge 3 is a portable Bluetooth speaker featuring IPX7 waterproof design, 6000mAh battery for up to 20 hours of playtime, and a built-in power bank․ It delivers stereo sound with passive bass radiators, ensuring robust audio quality․ The durable fabric and rugged housing make it ideal for outdoor use, while JBL Connect allows linking multiple speakers for enhanced sound experiences․

1․1 Release Date and Design

The JBL Charge 3 was released in 2016, featuring a cylindrical design with durable fabric and sturdy housing․ It measures 9․1 inches tall and 3․4 inches wide, weighing 1․76 pounds․ The speaker includes a waterproof cap for ports and passive bass radiators for enhanced sound․ Its rugged design ensures durability, making it suitable for outdoor use, while the sleek aesthetics appeal to a wide range of users seeking a portable audio solution․

1․2 Key Features and Specifications

The JBL Charge 3 boasts a 6000mAh battery, offering up to 20 hours of continuous playtime․ It features IPX7 waterproofing, ensuring protection against water immersion․ The speaker delivers stereo sound with dual 50mm drivers and passive bass radiators for enhanced low-frequency response․ It supports Bluetooth connectivity and includes a USB port for charging external devices․ Built with durable fabric and rugged housing, it combines portability with robust performance, making it ideal for outdoor and indoor use․

Key Features of the JBL Charge 3

The JBL Charge 3 offers a waterproof IPX7 design, 6000mAh battery, and built-in power bank․ It features stereo sound, passive bass radiators, and Bluetooth connectivity․

2․1 Waterproof Design (IPX7 Rating)

The JBL Charge 3 boasts an IPX7 waterproof rating, making it resistant to water immersion up to 1 meter for 30 minutes․ To maintain its water resistance, ensure all cable connections are removed and the port cap is tightly closed before exposure․ Charging the speaker while wet is not recommended, as it may cause permanent damage to the device or its power source․

2․2 High-Capacity Battery (6000mAh)

The JBL Charge 3 is equipped with a high-capacity 6000mAh Li-ion battery, offering up to 20 hours of continuous music playback․ It also functions as a portable power bank, allowing users to charge smartphones, tablets, or other devices via its USB output․ This feature makes it ideal for extended outdoor adventures, ensuring both music and device connectivity remain uninterrupted for a long duration․

2․3 Stereo Sound and Passive Bass Radiators

The JBL Charge 3 delivers robust stereo sound through its dual 50mm drivers, producing 20W of rated power․ Passive bass radiators enhance low-frequency response, ensuring deep and resonant bass․ This combination creates a balanced and immersive audio experience, making it suitable for both indoor and outdoor settings․ The speaker’s design optimizes sound dispersion, providing clear and powerful sound across various music genres and environments․

Setup and Initial Configuration

The JBL Charge 3 setup involves unboxing, connecting via Bluetooth, and initial configuration․ It ensures a seamless and quick start with your new speaker․

3․1 Unboxing and First Impressions

Unboxing the JBL Charge 3 reveals a sleek, durable design with a rugged fabric exterior and waterproof construction․ The speaker feels solid and well-built, with a satisfying weight that reflects its high-quality components․ Included in the box are the speaker, a micro-USB charging cable, and a quick-start guide․ Initial impressions highlight its portability and premium finish, making it ready for immediate use straight out of the box․

3․2 Pairing the Speaker with Bluetooth Devices

To pair the JBL Charge 3 with a Bluetooth device, ensure the speaker is turned on and in pairing mode․ The Bluetooth button will flash blue․ On your device, enable Bluetooth and select “JBL Charge 3” from the available options․ Once connected, the LED indicator will turn solid blue․ The speaker supports up to two devices simultaneously and remembers previously connected devices for easy reconnection․ Use the JBL Connect feature to link multiple speakers for amplified sound․

3․3 Software and Firmware Updates

Regular software and firmware updates ensure optimal performance of the JBL Charge 3․ To update, download the JBL Connect app for iOS or Android․ Connect the speaker to the app via Bluetooth, then follow in-app prompts to check for and install updates․ Ensure the speaker is fully charged and connected to a stable Wi-Fi network during the process․ Updates enhance functionality, improve connectivity, and add new features to the speaker․

Usage and Functionality

The JBL Charge 3 is a portable Bluetooth speaker offering up to 20 hours of playtime with its 6000mAh battery․ It features a built-in power bank for charging devices, supports both Bluetooth and Aux input for music playback, and connects multiple speakers via JBL Connect for enhanced stereo sound and passive bass radiators․

4;1 Playing Music via Bluetooth and Aux Input

The JBL Charge 3 supports seamless music playback via Bluetooth and 3․5mm Aux input․ Pair your device wirelessly via Bluetooth for a stable connection, or use the Aux port for wired playback․ The speaker automatically switches between inputs, ensuring uninterrupted listening․ With clear sound reproduction and intuitive controls for play, pause, and volume adjustment, the Charge 3 offers versatile and high-quality music playback options for any setting or preference․

4․2 Using the Built-In Power Bank

The JBL Charge 3 features a built-in 6000mAh power bank, allowing you to charge smartphones, tablets, or other USB devices on the go․ Simply connect your device using a USB cable to the speaker’s USB port․ The power bank provides convenient charging without interrupting music playback․ This dual functionality makes the Charge 3 a versatile companion for outdoor adventures, ensuring your devices stay powered up all day long․

4․3 Connecting Multiple Speakers via JBL Connect

The JBL Charge 3 supports JBL Connect, enabling wireless connection of multiple speakers․ Press the JBL Connect button on each speaker to pair them, ensuring they play the same music source simultaneously․ This feature amplifies your audio experience, creating a synchronized sound system perfect for larger gatherings or outdoor settings․ The connection is seamless and maintains high-quality audio across all linked devices․

Maintenance and Care

Regularly clean the speaker with a soft cloth and avoid water exposure․ Ensure the charging port is dry before use to prevent damage and optimize battery life․ Store it in a cool, dry place․

5․1 Cleaning the Speaker and Charging Port

To maintain your JBL Charge 3, use a soft, dry cloth to wipe the speaker and housing․ Avoid liquids or harsh chemicals, as they may damage the fabric or electronics․ For the charging port, gently clean with a dry cotton swab to remove dust or debris․ Ensure the port is dry before charging to prevent damage․ Regular cleaning ensures optimal performance and extends the speaker’s lifespan․

5․2 Protecting the Speaker from Water Damage

The JBL Charge 3 is IPX7 waterproof, but proper care is essential․ Before exposing it to water, remove all cable connections and ensure the charging port cap is tightly closed․ Avoid submerging the speaker in water while charging, as this may cause permanent damage; Regularly inspect the cap for a secure seal to maintain water resistance and ensure optimal functionality over time․

5․3 Optimizing Battery Life

To maximize the JBL Charge 3’s battery life, avoid using the USB port for charging other devices while playing music, as this drains the battery faster․ Keep the firmware updated, as newer versions often improve power management․ Turn off unnecessary features like Bluetooth discovery when not in use to conserve energy․ Store the speaker in a cool, dry place to prevent battery degradation․ Finally, avoid overcharging by unplugging once the battery is fully charged․

Troubleshooting Common Issues

Address common issues like no sound, distorted audio, or Bluetooth disconnections by restarting the speaker, checking volume levels, or resetting Bluetooth connections․ For charging problems, ensure the port is clean and the cable is functional․ Refer to the manual for detailed troubleshooting steps to resolve these issues effectively and maintain optimal performance․

6․1 No Sound or Distorted Audio

If the JBL Charge 3 produces no sound or distorted audio, ensure the speaker is properly connected to the Bluetooth device and the volume is adjusted․ Check for dirt or debris in the charging port, as this can affect sound quality․ Restart the speaker and ensure it is not in power-saving mode․ If issues persist, reset the speaker by pressing and holding the volume and Bluetooth buttons simultaneously for 5 seconds․

6․2 Bluetooth Connection Problems

If experiencing Bluetooth connection issues with the JBL Charge 3, ensure the speaker is in pairing mode and within range of the device․ Restart both devices and check for firmware updates․ Clear previous pairings and reset the speaker by pressing and holding the Bluetooth button for 5 seconds․ If problems persist, perform a factory reset by pressing the volume and Bluetooth buttons simultaneously for 10 seconds․ Refer to the manual for detailed guidance․

6․3 Battery Charging Issues

If the JBL Charge 3 fails to charge, ensure the charging cable is undamaged and the port is clean․ Use the original charger and avoid charging near water․ If the battery doesn’t charge, reset the speaker by pressing the volume up and Bluetooth buttons for 10 seconds․ If issues persist, check for firmware updates or contact JBL support․ Avoid using damaged cables or third-party chargers to prevent further damage․

Accessories and Compatibility

Recommended accessories include a carrying case, USB cable, and aux cable․ Compatible with Bluetooth-enabled devices, smartphones, tablets, and laptops, supporting various operating systems․

7․1 Recommended Accessories

Recommended accessories for the JBL Charge 3 include a durable carrying case for protection, a USB charging cable, and an aux cable for wired connections․ A wall adapter is also suggested for faster charging․ These accessories enhance portability and convenience, ensuring optimal performance and longevity of the speaker․ They are designed to complement the Charge 3’s rugged design and waterproof functionality, making it ideal for outdoor use and travel․

7․2 Compatible Devices and Operating Systems

The JBL Charge 3 is compatible with a wide range of devices, including smartphones, tablets, and laptops, via Bluetooth or aux input․ It supports Android and iOS operating systems, ensuring seamless connectivity․ The speaker also works with any device equipped with Bluetooth technology, making it versatile for various setups․ Its compatibility extends to devices with 3․5mm audio jacks, providing flexibility for non-Bluetooth connections and ensuring universal accessibility․

Warranty and Customer Support

The JBL Charge 3 comes with a one-year limited warranty covering manufacturing defects․ For support, contact JBL via phone, email, or live chat on their official website․

8․1 Warranty Terms and Conditions

The JBL Charge 3 is backed by a one-year limited warranty covering manufacturing defects․ The warranty does not apply to damage caused by water exposure, misuse, or unauthorized repairs․ To claim warranty, register your product on JBL’s official website and provide proof of purchase․ The warranty is void if the speaker is tampered with or modified․ For details, refer to the manual or contact JBL support․

8․2 Contacting JBL Customer Service

The JBL Charge 3 is a top choice for portable audio, offering a waterproof design, long battery life, and a built-in power bank․ Its manual ensures easy use․

9․1 Final Thoughts on the JBL Charge 3

The JBL Charge 3 stands out as a top-tier portable speaker, blending durability, versatility, and impressive audio performance․ Its IPX7 waterproof design and 6000mAh battery make it perfect for outdoor adventures․ The speaker delivers robust stereo sound with deep bass, while its built-in power bank adds convenience․ With JBL Connect, users can amplify their experience by linking multiple speakers․ Overall, it’s a reliable and feature-packed choice for music lovers seeking a portable, high-quality sound solution․

9․2 User Feedback and Reviews

Users praise the JBL Charge 3 for its sturdy build, waterproof design, and long battery life․ Many highlight its clear, balanced sound and deep bass as standout features․ The ability to charge devices on the go is a big plus․ Some note that while it’s slightly heavy, the durability and performance justify the weight․ Overall, it’s a favorite among outdoor enthusiasts and music lovers seeking a reliable, high-quality portable speaker․

resistance bands exercises for beginners pdf

Resistance bands are a versatile and effective tool for strength training, offering an affordable and portable way to work out anywhere. Perfect for beginners, they provide adjustable resistance levels, making them ideal for those starting their fitness journey. With minimal space required, resistance bands allow for a variety of exercises that target multiple muscle groups, ensuring a comprehensive full-body workout. Their simplicity and ease of use make them an excellent choice for home workouts or on-the-go training sessions.

What Are Resistance Bands?

Resistance bands are lightweight, flexible straps or tubes made of durable materials like rubber or latex. They are designed to provide tension when stretched, offering a form of resistance that works muscles effectively. Available in various thicknesses and resistance levels, they are portable and easy to use. Resistance bands can be anchored to stable objects or used unanchored, making them versatile for different exercises. They are an excellent alternative to weights, providing a low-cost, space-saving solution for strength training at home or on the go.

Why Resistance Bands Are Ideal for Beginners

Resistance bands are perfect for beginners due to their simplicity and adaptability. They are lightweight, easy to use, and require minimal setup, making them accessible for those new to strength training. The bands offer adjustable resistance levels, allowing users to start with lighter tension and gradually increase as they build strength. Additionally, they are low-impact, reducing the risk of injury compared to heavy weights. Their portability and affordability make them an excellent choice for home workouts or traveling, ensuring consistency in fitness routines without the need for bulky equipment.

Benefits of Using Resistance Bands

Resistance bands offer an affordable, portable way to strength train anywhere, providing a low-impact, full-body workout. They’re ideal for all fitness levels, ensuring versatile and effective training.

Affordability and Portability

Resistance bands are highly affordable and portable, making them an excellent choice for beginners. They are significantly cheaper than gym memberships or heavy equipment, offering a cost-effective way to start strength training. Their lightweight design allows easy transport, fitting seamlessly into a bag for workouts on the go. This portability ensures you can exercise anywhere, whether at home, in a park, or while traveling. Their compact size and versatility make resistance bands an ideal option for those seeking a convenient and space-saving fitness solution.

Full-Body Workout Potential

Resistance bands offer a versatile way to engage multiple muscle groups, delivering a full-body workout. They allow for exercises that target the upper body, lower body, and core simultaneously, enhancing overall muscle engagement. Whether you’re focusing on strength, endurance, or flexibility, resistance bands provide a comprehensive workout. Their adaptability ensures that you can tailor exercises to suit your fitness goals, making them an excellent option for a well-rounded training routine that promotes balanced physical development without the need for bulky equipment.

Low-Impact Exercise Option

Resistance bands are an excellent low-impact exercise option, making them ideal for individuals with joint pain or those recovering from injuries. They provide a gentle yet effective way to strengthen muscles without putting excessive strain on the body. This makes them suitable for people of all fitness levels, including beginners and those with mobility challenges. The controlled movements allowed by resistance bands reduce the risk of injury, while still promoting muscle engagement and flexibility. This low-impact nature ensures a safe and sustainable way to stay active and build strength over time.

How to Choose the Right Resistance Band

Selecting the right resistance band involves considering resistance levels, durability, and portability. Choose bands that align with your fitness goals and offer adjustable resistance options for versatility.

Understanding Resistance Levels

Resistance bands come in varying levels, from light to heavy, offering adjustable challenges for different fitness goals. Light bands are ideal for beginners, focusing on form and mobility, while medium bands provide moderate resistance for strength building. Heavy bands are best for advanced users aiming to increase muscle mass and endurance. Understanding your fitness level and goals helps in selecting the right resistance level. Start with lighter bands to master exercises before progressing to heavier ones to avoid injury and ensure steady progress.

Key Features to Look For

When selecting resistance bands, prioritize durability, comfort, and versatility. Look for bands made from high-quality, durable materials that can withstand regular use. Ensure the band has multiple resistance levels or loops for adjustable tension. Comfort is crucial, so opt for bands with soft, non-slip handles or textured surfaces. Portability is another key feature, as compact bands are easy to carry. Additionally, consider bands with anchor points or attachments for versatile exercises. These features enhance safety, functionality, and overall workout efficiency, making them ideal for beginners starting their fitness journey.

Essential Resistance Band Exercises for Beginners

Master foundational exercises like banded squats, chest presses, and rows. These target major muscle groups, improving strength and flexibility. Start with basic moves, ensuring proper form for safety and effectiveness.

Upper Body Exercises

Start with banded chest presses to target the chest and shoulders. Use resistance bands for shoulder presses to strengthen deltoids. Incorporate banded rows to engage the back muscles. Perform bicep curls and tricep extensions for arm strength. These exercises are scalable, allowing you to adjust resistance levels as you progress. Focus on maintaining proper form to avoid injury and maximize results. Upper body exercises with resistance bands are versatile and effective for building strength without bulky equipment, making them ideal for home or travel workouts. Begin with lighter resistance and gradually increase as you build strength.

Lower Body Exercises

Beginners can effectively target the legs and glutes with resistance bands. Banded squats and lunges are excellent for strengthening the quadriceps and hamstrings. For glute activation, try banded hip thrusts or side-lying leg curls. Calf raises with bands can improve ankle strength and muscle tone. These exercises are low-impact, reducing stress on joints compared to heavy weights. Start with lighter resistance and focus on controlled movements to build strength progressively. Lower body exercises with resistance bands are perfect for a balanced workout, enhancing mobility and muscle definition without requiring complex equipment.

Core and Full-Body Exercises

Resistance bands are excellent for engaging the core and performing full-body workouts. Exercises like banded planks, Russian twists, and pallof presses target the abdominals and obliques, improving stability and strength. For full-body movements, try banded thrusters or chest presses, which work the legs, shoulders, and core simultaneously. These exercises promote muscle coordination and endurance. Start with lighter resistance and focus on maintaining proper form to avoid strain. Progress by increasing resistance or adding variations as you build strength and confidence in your technique.

Mastering Anchoring Techniques

Mastering anchoring techniques is essential for effective resistance band workouts. Secure the band to a sturdy object, adjust the length, and maintain proper body positioning for stability and control.

Anchored vs. Unanchored Exercises

Anchored exercises involve securing the resistance band to a stable object, providing a fixed point for movement. This setup allows for controlled resistance and is ideal for targeting specific muscle groups. Unanchored exercises, on the other hand, rely on your own body to create tension, offering more flexibility and portability. Both methods are effective, but anchored exercises often provide greater stability and focus, while unanchored exercises are perfect for dynamic movements and full-body engagement. Understanding both techniques can enhance your workout versatility and effectiveness.

Proper Anchoring Methods

Proper anchoring is essential for effective and safe resistance band exercises. Choose a sturdy, non-moving object like a door, column, or beam to anchor the band. Ensure the anchor point is at the correct height for your exercise to maintain proper form. Secure the band tightly to avoid slippage during movement. For door anchors, place the band at the top or bottom of the door and close it firmly. Always test the anchor’s stability before starting your workout to prevent accidents and ensure a smooth exercise experience.

Safety Tips and Precautions

Always inspect resistance bands for damage before use. Choose the right resistance level to avoid injury. Ensure proper anchoring and maintain control during exercises to prevent accidents.

Common Mistakes to Avoid

Beginners often use excessive resistance, leading to poor form and potential injury. Overstretching the bands can reduce durability and cause snapping. Ensure proper anchoring to maintain control during exercises. Neglecting to inspect bands for damage or wear is a common oversight. Avoid using bands beyond their recommended capacity. Proper form is essential; sacrificing technique for heavier resistance compromises effectiveness and safety. Start with lighter bands and gradually progress as strength improves. Consistency and attention to detail are key to a safe and effective workout routine with resistance bands.

Modifying Exercises for Different Fitness Levels

Resistance bands can be easily adjusted to suit various fitness levels. Beginners can start with lighter bands or reduce the number of repetitions. For intermediate levels, increasing resistance or adding pauses during exercises enhances intensity. Advanced users can combine multiple bands or incorporate dynamic movements. Modifying exercises ensures a safe and progressive workout experience. Always listen to your body and adjust as needed to avoid overexertion. Gradual progression helps build strength and confidence effectively, making resistance bands versatile for all fitness levels and goals.

Progression and Variation in Workouts

Progression involves increasing resistance over time, while variation keeps workouts engaging. Experiment with different band tensions, exercise combinations, and incorporate other forms of training for balanced growth.

Increasing Resistance Over Time

As you gain strength, gradually increase resistance by using thicker bands or layering multiple bands. This progression prevents plateaus and ensures continuous muscle growth. Start with lighter bands and slowly move to heavier ones, allowing your muscles to adapt. You can also adjust anchoring points or combine bands for added tension. Consistency is key—challenge yourself incrementally to avoid injury while building strength and endurance. This method ensures a safe and effective way to advance your workouts over time.

Combining Bands with Other Exercises

Enhance your workouts by integrating resistance bands with other exercises, such as bodyweight movements or dumbbell routines. For example, add a band to your push-ups for extra chest resistance or loop it around a pull-up bar for assisted reps. Combining bands with squats or lunges increases lower body challenge. You can also pair bands with yoga or Pilates for added tension and core engagement. This versatility allows for diverse and dynamic workouts, keeping routines fresh and effective while targeting multiple muscle groups simultaneously.

Resistance bands offer a convenient, effective way to build strength anywhere. Start with basic exercises, progress gradually, and explore various resistance levels. Stay consistent for best results!

Final Tips for Consistency

Consistency is key to seeing results with resistance band exercises. Set a regular schedule and stick to it, even if it’s just 15-20 minutes a day. Track your progress by increasing resistance or reps over time. Stay motivated by incorporating variety in your workouts and celebrating small achievements. Focus on proper form to avoid injuries and maximize efficiency. Lastly, make resistance band exercises a habit by incorporating them into your daily routine for long-term fitness success.

Additional Resources for Further Learning

For further learning, explore online tutorials, fitness blogs, and instructional videos that demonstrate resistance band exercises. Downloadable PDF guides often provide detailed workout plans and progress tracking sheets. Join fitness communities or forums to share tips and stay motivated. Many websites offer free resistance band workout plans tailored for beginners. Consider following fitness influencers or subscribing to channels that specialize in resistance band training. Utilizing these resources can help you diversify your routine and stay inspired on your fitness journey.

hunger game pdf

The Hunger Games PDF is a widely popular format of Suzanne Collins’ iconic dystopian novel, offering readers a convenient and accessible way to immerse themselves in Panem’s gripping world.

1.1 Overview of the Book and Its Popularity

The Hunger Games, written by Suzanne Collins, is a captivating dystopian novel set in Panem. It follows Katniss Everdeen’s struggle in a deadly game, resonating with themes of survival and rebellion. The book’s popularity stems from its thrilling plot, well-developed characters, and social commentary, making it a global phenomenon and a cornerstone of young adult literature.

1.2 Importance of the PDF Format for Readers

The PDF format of The Hunger Games offers readers a portable and accessible way to enjoy the book. It allows for easy reading across various devices, maintaining the original layout and quality. PDFs are ideal for offline access, making them a preferred choice for fans seeking convenience and flexibility while engaging with the story.

Sources to Download The Hunger Games PDF

Readers can access The Hunger Games PDF through official eBook platforms, popular websites, and authorized retailers, ensuring convenient and legal downloading options for fans worldwide.

2.1 Official Platforms for Legal Downloads

Official platforms like Amazon Kindle, Barnes & Noble Nook, and Google Play Books provide legal and high-quality downloads of The Hunger Games PDF. These platforms ensure copyright compliance, supporting authors and publishers while offering readers a seamless and secure downloading experience. They often feature discounts and promotions, making the eBook accessible to a global audience.

2.2 Popular Websites Offering Free Access

Websites like PDF Drive, Archive.org, and Royallib.com offer free access to The Hunger Games PDF. These platforms provide direct downloads, attracting readers seeking cost-free options. However, be cautious of copyright infringement and ensure the source is legal. Always verify the website’s legitimacy to avoid unauthorized content and support authors ethically.

Key Details About The Hunger Games Book

The Hunger Games, written by Suzanne Collins, is a dystopian novel published in 2008. It is the first book in the trilogy, set in Panem, exploring themes of survival and rebellion.

3.1 Author and Publication Information

Suzanne Collins is the renowned author of The Hunger Games, first published in 2008 by Scholastic. This captivating dystopian novel marks the beginning of the trilogy, gaining worldwide acclaim for its gripping storyline and thought-provoking themes. Collins’ vivid storytelling has made the book a modern classic, resonating with readers of all ages.

3.2 Plot Summary and Main Characters

The Hunger Games is set in Panem, where Katniss Everdeen volunteers to participate in the deadly Games to save her sister. Alongside fellow tribute Peeta Mellark, Katniss navigates the arena’s brutality, showcasing her resilience and archery skills. The story explores themes of survival, rebellion, and moral dilemmas, with Katniss emerging as the face of hope against oppression, supported by key characters like Gale and Haymitch.

The Hunger Games Trilogy and Series

The trilogy includes The Hunger Games, Catching Fire, and Mockingjay, with a prequel, The Ballad of Songbirds and Snakes, expanding the series’ universe and themes.

4.1 List of Books in the Trilogy

The Hunger Games trilogy consists of three books: The Hunger Games (2008), Catching Fire (2009), and Mockingjay (2010). These novels follow Katniss Everdeen’s journey, exploring themes of survival, rebellion, and societal critique, captivating readers worldwide and solidifying their place in young adult literature.

4.2 Prequels and Related Works

Suzanne Collins’ The Ballad of Songbirds and Snakes (2020) serves as a prequel, exploring the early days of the Hunger Games and the rise of Coriolanus Snow. This novel delves into the origins of the Games and the complexities of Panem’s history, offering fans a deeper understanding of the world and its evolution. Related works expand the trilogy’s universe, enriching the reader’s experience.

Formats Available for The Hunger Games

The Hunger Games is available in PDF, EPUB, MOBI, and audiobook formats, catering to diverse reading preferences and ensuring accessibility across various devices and platforms.

5.1 PDF, EPUB, and MOBI Versions

The Hunger Games is available in PDF, EPUB, and MOBI formats, ensuring compatibility with various e-readers and devices. PDFs retain the book’s original layout, while EPUBs adapt to different screens. MOBI files are optimized for Kindle devices. These formats are widely available on official platforms like Amazon and Barnes & Noble, as well as through free download sites, making them accessible to all readers.

5.2 Audiobook Options for Readers

Audiobook versions of The Hunger Games offer an engaging listening experience, narrated by Carolyn McCormick. Available on platforms like Audible and Google Play Books, these audiobooks provide a convenient alternative for readers who prefer listening on-the-go. The narration captures the suspense and emotion of the story, making it an excellent choice for those who enjoy immersive storytelling without reading the text.

Special Features of The Hunger Games PDF

The Hunger Games PDF features enhanced digital elements, including interactive annotations and bookmarks, enriching the reading experience. The format preserves the book’s suspenseful narrative and vivid descriptions, ensuring an immersive journey through Panem’s dystopian world.

6.1 Interactive Elements and Annotations

The Hunger Games PDF includes interactive elements like clickable bookmarks and annotations, offering readers deeper insights into the story. These features enhance engagement, allowing fans to explore characters, themes, and plot twists. Annotations provide context, while bookmarks enable easy navigation, making the PDF a versatile and enriching format for both casual and dedicated readers.

6.2 Enhanced Reading Experiences

The Hunger Games PDF offers enhanced readability with adjustable fonts and night mode, improving the reading experience. Compatible with various devices, it ensures seamless access to the story. Exclusive content, such as maps of Panem and character profiles, further immerses readers in the world of Katniss Everdeen, making the PDF a modern and engaging way to enjoy the classic dystopian tale.

How to Read The Hunger Games Online

The Hunger Games PDF can be easily accessed online via platforms like Google Drive or online readers, offering a seamless reading experience on various devices.

7.1 Platforms Supporting Online Reading

Popular platforms like Google Drive, online e-book libraries, and dedicated PDF readers support online reading of The Hunger Games. Websites such as royallib.com and archive.org offer free access, while others require subscription. These platforms ensure compatibility with various devices, making the book accessible anywhere, anytime, without the need for downloads.

7.2 Tips for a Better Online Reading Experience

For a better online reading experience of The Hunger Games PDF, use platforms with adjustable font sizes and night mode. Enable full-screen mode to minimize distractions. Utilize bookmarks and search functions for easy navigation. Ensure a stable internet connection and consider downloading the PDF for offline access. Check for the latest version of the PDF to ensure quality and readability.

Language and Translation Options

The Hunger Games PDF is available in multiple languages, including English, Spanish, and Russian. Translations maintain high quality and accuracy, ensuring the story’s emotional depth is preserved.

8.1 Availability in Multiple Languages

The Hunger Games PDF is accessible in numerous languages, including English, Spanish, French, German, Italian, and Russian. This widespread availability ensures global readers can enjoy the thrilling story of Katniss Everdeen. The translations are meticulously done, preserving the original narrative’s intensity and emotional depth, making it a favorite across diverse linguistic communities worldwide.

8.2 Translation Quality and Accuracy

The Hunger Games PDF translations are meticulously crafted by professional linguists, ensuring the original narrative’s emotional depth and intensity remain intact. The accuracy of these translations is highly praised, with careful attention to cultural nuances and contextual details. This ensures that readers worldwide can fully immerse themselves in Katniss Everdeen’s journey, experiencing the story’s gripping tension and moral complexity in their native languages.

Devices Compatible with The Hunger Games PDF

The Hunger Games PDF is compatible with smartphones, tablets, eReaders, and desktops, ensuring versatile reading experiences across various devices with consistent display quality.

9.1 Smartphones, Tablets, and eReaders

The Hunger Games PDF is seamlessly compatible with smartphones, tablets, and eReaders, ensuring readers can enjoy the novel on-the-go. The format adapts to various screen sizes, maintaining clarity and readability. Whether on a Kindle, iPad, or Android device, fans of Katniss Everdeen can immerse themselves in Panem’s dystopian world with ease and convenience.

9.2 Desktop and Laptop Compatibility

The Hunger Games PDF is fully compatible with desktops and laptops, offering a seamless reading experience on larger screens. Readers can easily access the file using PDF readers like Adobe Acrobat or built-in browser tools, ensuring high-quality text and layout. This compatibility makes it ideal for those who prefer reading on traditional computers or laptops for an immersive experience.

The Hunger Games PDF offers a convenient way to experience Suzanne Collins’ thrilling dystopian tale. Its accessibility ensures that the story of Katniss Everdeen reaches a broad audience, making it easy for fans to delve into Panem’s world anytime, anywhere, and cherish its profound themes and engaging narrative.

10.1 Final Thoughts on The Hunger Games PDF

The Hunger Games PDF remains a popular choice for fans of Suzanne Collins’ trilogy, offering a convenient and accessible way to experience Katniss Everdeen’s journey. Its portability and readability make it an ideal format for modern readers, ensuring the story’s themes of survival and rebellion continue to captivate audiences worldwide with ease and convenience.

10.2 Encouragement to Explore the Series

Readers are highly encouraged to explore the entire Hunger Games series, as it offers a captivating continuation of Katniss Everdeen’s journey. The trilogy, including Catching Fire and Mockingjay, expands the world of Panem and delves deeper into themes of rebellion and survival. The series’ engaging storytelling and character development make it a must-read for fans of dystopian fiction, ensuring a memorable and impactful experience.