construction project schedule example pdf

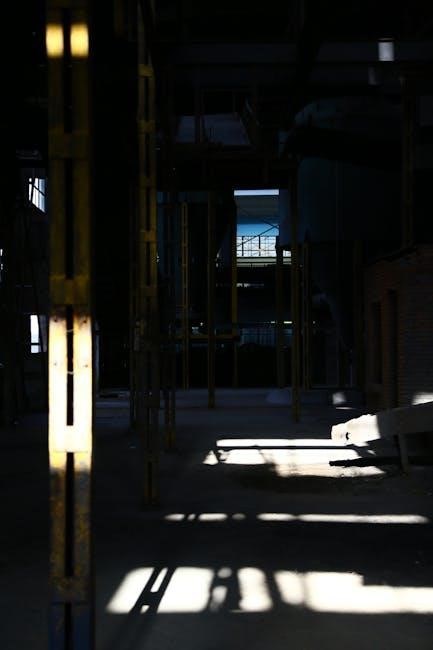
A construction project schedule is a detailed plan outlining timelines, tasks, and resources. It ensures efficiency, reduces delays, and aligns with project goals. Tools like Gantt charts and CPM are widely used to create and manage schedules, as seen in examples like the 6-storey office block project, which includes milestones and task durations. Proper scheduling helps stakeholders stay informed and ensures successful project completion.

1.1 Importance of Project Scheduling in Construction

Project scheduling is essential for construction as it ensures efficient resource planning, task management, and timely completion. It helps track progress, identify delays, and communicate updates to stakeholders. A well-planned schedule minimizes risks, optimizes workflows, and ensures alignment with project goals, ultimately enhancing overall productivity and client satisfaction.

1.2 Overview of a Construction Project Schedule

A construction project schedule is a detailed blueprint outlining tasks, timelines, and dependencies. It organizes workflows, sets milestones, and allocates resources. Tools like Gantt charts provide visual representations, helping teams track progress and manage delays. The schedule ensures clarity and alignment with project objectives, guiding all stakeholders through each phase efficiently.

Key Components of a Construction Project Schedule

A construction project schedule includes tasks, timelines, milestones, and dependencies. It outlines the sequence of activities, durations, and resource allocations, ensuring clarity and coordination among stakeholders.

2.1 Gantt Charts in Construction Scheduling

Gantt charts visually represent construction timelines, displaying tasks, durations, and dependencies. They simplify complex schedules, aiding in progress tracking and resource planning. For example, a 6-storey office project Gantt chart outlines start and finish dates for each activity, enhancing clarity and stakeholder communication, ensuring alignment with project goals and timelines.

2.2 Milestones and Phases in Construction Projects

Milestones mark significant events in a project, such as completing foundation work or achieving structural completion. Phases divide the project into manageable segments, like planning, excavation, and installation; For instance, the 6-storey office project includes phases like mobilization and external works, with milestones like concrete slab completion, ensuring clear progress tracking and stakeholder alignment.

2.3 Task Duration and Dependencies

Task duration defines the time required for each activity, while dependencies show how tasks are linked. For example, in a construction project, foundation work must precede structural framing. The schedule outlines these relationships, ensuring sequential execution and minimizing delays, as seen in the 6-storey office project, which details dependencies and durations for each task.

2.4 Resource Allocation and Management

Effective resource allocation ensures materials, labor, and equipment are assigned efficiently. For example, the 6-storey office project allocates resources like cranes and workers to specific tasks, optimizing productivity. Proper management avoids bottlenecks and ensures tasks are completed on time, enhancing overall project efficiency and adherence to the construction schedule.

Common Techniques for Creating a Construction Schedule

Techniques include the Critical Path Method (CPM), Program Evaluation and Review Technique (PERT), and Duration-Only Scheduling. These methods help plan tasks, manage uncertainties, and optimize timelines for efficient project execution.

3.1 Critical Path Method (CPM)

The Critical Path Method (CPM) is a step-by-step project management technique for scheduling. It identifies critical and non-critical tasks, determining the longest stretch of dependent activities. CPM helps predict project duration, optimize resources, and foresee delays. For example, a 103-day program for a 6-storey office block highlights task sequencing and timeline management effectively.

3.2 Program Evaluation and Review Technique (PERT)

PERT is a project management tool for planning and controlling large, complex tasks. It uses weighted averages for task durations and identifies critical paths. PERT helps manage uncertainties, ensuring realistic timelines. For example, a 103-day office block project uses PERT to sequence tasks and manage uncertainties, optimizing resource allocation and reducing delays.

3.3 Duration-Only Scheduling

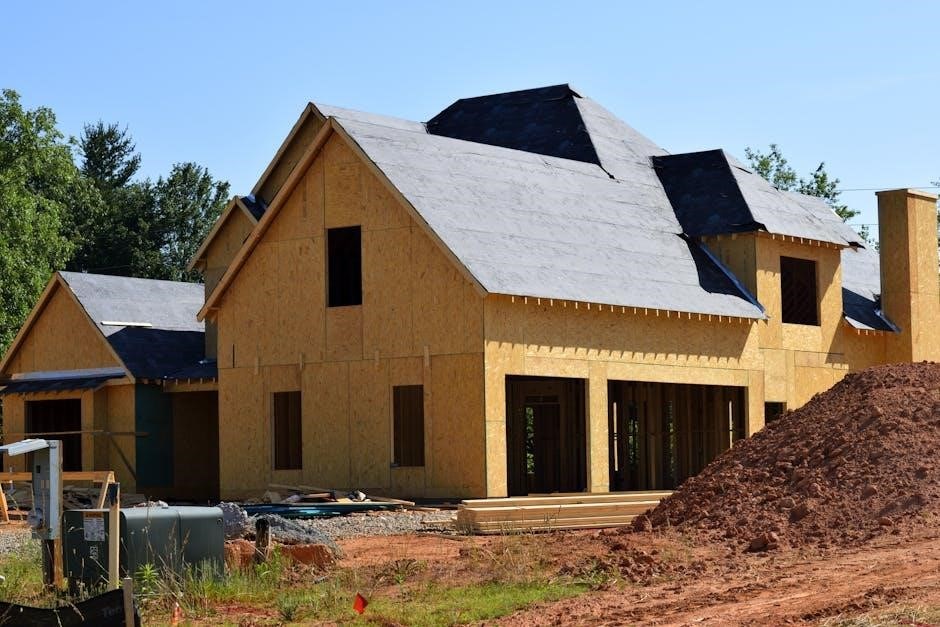
Duration-only scheduling focuses on task durations without dependencies. It simplifies project planning by listing activities with start and end dates. For example, a custom home project schedule uses this method to outline tasks like zoning and site planning, ensuring clarity and ease of tracking progress without complex interactivity.

Best Practices for Developing a Construction Schedule

Effective scheduling involves breaking activities into manageable tasks, setting clear milestones, and regularly updating timelines. Tools like Primavera P6 and Gantt charts help visualize workflows, ensuring alignment with project goals and stakeholder expectations.

4.1 Breaking Down Activities into Manageable Tasks

Breaking down activities into smaller, manageable tasks enhances clarity and accountability. For example, a 6-storey office project might split tasks into foundation work, framing, and installation. This approach ensures each task is realistically timed and resourced, reducing complexity and improving tracking, as seen in detailed Gantt charts and schedules.

4.2 Establishing Clear Milestones

Establishing clear milestones is crucial for tracking progress in construction projects. Milestones mark key phases, such as completing foundation work or finishing structural framing. For example, a 6-storey office project might include milestones like mobilization and external works completion. These checkpoints ensure alignment with project timelines and goals, enhancing overall management efficiency.

4.3 Regularly Updating the Schedule

Regularly updating the schedule ensures alignment with project progress and adapts to changes. Updates reflect task completions, delays, and scope adjustments. For example, a 6-storey office project might adjust timelines for external works based on unforeseen site conditions. This practice maintains accuracy, keeps stakeholders informed, and ensures the project stays on track.

Tools for Creating a Construction Project Schedule

Tools like Primavera P6, Microsoft Project, and Smartsheet are essential for creating detailed schedules. They offer features like Gantt charts, task tracking, and resource management to streamline planning.

5.1 Primavera P6

Primavera P6 is a robust tool for construction scheduling, offering advanced features like critical path analysis, resource leveling, and progress tracking. It’s widely used for complex projects, enabling precise timeline management and real-time updates. The software supports detailed Gantt charts and integrates seamlessly with project baselines, ensuring efficient coordination among stakeholders.

5.2 Microsoft Project

Microsoft Project is a versatile tool for creating construction schedules, offering features like task management, resource allocation, and timeline visualization. It supports Gantt charts, calendars, and dependencies, making it ideal for managing complex projects. Its user-friendly interface and integration with other Microsoft tools enhance collaboration and project tracking efficiency for construction professionals.

5.3 Smartsheet and Online Templates

Smartsheet is a cloud-based platform offering pre-built construction project templates for efficient scheduling. Its customizable templates enable users to outline tasks, durations, and dependencies. With real-time collaboration and integration with other tools, Smartsheet streamlines project management. Online templates provide a structured approach, ensuring consistency and accuracy in tracking progress and resource allocation for construction projects.

Handling Changes and Updates in the Schedule

Construction schedules often face changes due to scope adjustments or unforeseen delays. Effective management involves updating timelines, reallocating resources, and communicating revisions to stakeholders to maintain project alignment and progress.

6.1 Managing Scope Changes

Scope changes in construction projects require careful adjustments to timelines and resources. Updates to Gantt charts and task durations ensure alignment with new requirements. Effective communication with stakeholders is crucial to minimize delays and maintain project progress, as seen in examples like the 6-storey office block project, where scope adjustments were seamlessly integrated.

6.2 Adjusting for Delays and Unforeseen Circumstances

Delays in construction projects often require immediate adjustments to task durations and resource allocation. Tools like Gantt charts help visualize shifts in timelines. For example, the 6-storey office block project adjusted its schedule to accommodate unforeseen site conditions, ensuring minimal impact on overall progress and completion dates.

6.3 Communicating Schedule Updates to Stakeholders

Effective communication of schedule updates is crucial for stakeholder alignment. Regular updates via Gantt charts and detailed reports ensure transparency. Tools like Primavera P6 facilitate real-time sharing, enabling stakeholders to track progress and adapt to changes promptly, as seen in examples like the 6-storey office block project schedule.

Presenting the Construction Schedule

A clear construction schedule presentation ensures readability and understanding. Gantt charts, like the 6-storey office block example, visually organize tasks and timelines, aiding stakeholder comprehension and project tracking.

7.1 Clarity and Readability of the Schedule

Clarity and readability are essential for effective construction scheduling. A well-organized schedule ensures all stakeholders understand timelines and tasks. Use simple layouts, clear terminology, and visual aids like color coding. Include task descriptions and start/end dates. For example, the 6-storey office block schedule clearly outlines milestones, making it easy to follow and execute.

7.2 Visualizing the Schedule with Gantt Charts

Gantt charts are effective tools for visually representing construction schedules. They display tasks, durations, and dependencies on a timeline, making it easy to track progress. For example, the 6-storey office block project uses a Gantt chart to illustrate milestones like mobilization and construction phases, providing clarity and helping stakeholders understand the project flow.

7.3 Stakeholder Communication

Effective stakeholder communication is crucial for project success. Sharing the construction schedule with all parties ensures transparency and alignment. Tools like Gantt charts and regular updates help stakeholders track progress. For example, the 6-storey office block project schedule was shared with clients, ensuring everyone understood timelines and milestones, minimizing misunderstandings and ensuring smooth execution.

Monitoring and Controlling Project Progress

Monitoring involves tracking actual progress against the planned schedule. Regular updates, site inspections, and performance reports help identify variances. Tools like Gantt charts and project management software ensure timely adjustments, keeping the project on track and stakeholders informed.

8.1 Tracking Actual vs. Planned Progress

Tracking actual progress against the planned schedule is crucial for identifying deviations. Gantt charts and project management software compare task durations and start/finish dates. Regular on-site inspections and performance reports help monitor advancements, ensuring alignment with the construction project schedule example PDF, which outlines expected timelines and milestones for tasks like mobilization and office block construction.

8.2 Identifying and Addressing Variances

Variance identification involves comparing actual progress with the planned schedule. Discrepancies in task durations or delays are flagged using Gantt charts or project management tools. Corrective actions, such as reallocating resources or adjusting timelines, are implemented to realign the project with its construction project schedule example PDF, ensuring minimal impact on overall completion.

8.3 Using KPIs for Schedule Performance

Key Performance Indicators (KPIs) like Schedule Performance Index (SPI) and Schedule Variance (SV) help measure project timeline adherence. By tracking these metrics, managers can identify delays early and take corrective actions. Tools like Gantt charts and Primavera P6 enable real-time monitoring, ensuring the construction project schedule example PDF remains aligned with actual progress and milestones.

Case Studies and Examples

Real-world examples, like the 6-storey office block project, provide practical insights into construction scheduling. These case studies demonstrate how timelines, milestones, and tasks are effectively organized and managed.

9.1 Example of a Residential Construction Schedule

A residential construction schedule outlines tasks like zoning approvals, permit issuance, and design development. For example, a custom home project might include phases such as site preparation, foundation work, and interior finishing, with timelines and dependencies clearly defined to ensure smooth progress.

9.2 Example of a Commercial Construction Schedule

A commercial construction schedule for a 6-storey office block includes mobilization, foundation work, and external finishes. The 103-day program outlines key tasks like site preparation, structural work, and interior fitting. Gantt charts and task dependencies are used to manage timelines and ensure project completion within budget and scope.

9.3 Lessons Learned from Real-World Projects

Real-world projects highlight the importance of adaptability and detailed planning. Pipeline rerouting and labor intensity losses emphasize the need for contingency plans. Breaking activities into smaller tasks enhances manageability and reduces delays. Proper scheduling tools and clear communication ensure alignment with project goals, minimizing risks and improving overall efficiency in construction management.

Future Trends in Construction Scheduling

Future trends include AI and machine learning optimizing schedules, sustainability integration, and Integrated Project Delivery (IPD) enhancing collaboration and efficiency in construction project management.

10.1 Artificial Intelligence and Machine Learning

Artificial Intelligence (AI) and Machine Learning (ML) are revolutionizing construction scheduling by optimizing resource allocation, predicting delays, and automating task sequencing. These technologies analyze historical data to improve accuracy and adapt to real-time changes, ensuring more efficient and sustainable project management. AI-driven tools, like predictive analytics, are expected to enhance decision-making and reduce risks in complex projects.

10.2 Sustainability and Green Building Schedules

Sustainability-focused schedules integrate eco-friendly practices, such as using renewable materials and optimizing energy efficiency. Green building certifications like LEED require detailed planning to meet environmental standards. Advanced scheduling tools help balance sustainability goals with project timelines, ensuring compliance and minimizing ecological impact while maintaining efficiency and cost-effectiveness throughout the construction process.

10.3 Integrated Project Delivery (IPD)

IPD emphasizes collaboration among stakeholders through shared responsibilities and incentives. By integrating people, systems, and processes, IPD enhances project efficiency and reduces conflicts. Schedules in IPD are dynamic, incorporating real-time input from all parties, ensuring alignment with project goals and fostering innovation for successful outcomes in construction projects.

Effective construction scheduling is crucial for managing risks and ensuring timely delivery. Techniques like CPM and Gantt charts help streamline processes, fostering collaboration and stakeholder satisfaction.

11.1 Summary of Key Points

Effective construction scheduling ensures timely project delivery and meets stakeholder expectations. Tools like Gantt charts and CPM help manage tasks, while milestones and resource allocation ensure efficiency. Proper scheduling minimizes risks and enhances collaboration, leading to successful project outcomes; Examples like the 6-storey office block project demonstrate the importance of detailed planning.

11.2 Final Thoughts on Effective Scheduling

Effective scheduling is the backbone of successful construction projects. Tools like Gantt charts and CPM ensure clarity and organization. Regular updates and adaptability are crucial for handling changes. By following best practices and leveraging technology, stakeholders can achieve timely delivery and meet project objectives, as demonstrated in examples like the 6-storey office block schedule.

hillsborough county school calendar 2024 to 2025 printable pdf

The Hillsborough County School Calendar for 2024-2025 provides a clear schedule, including key dates, holidays, and academic milestones. It helps students, parents, and staff stay organized throughout the year. The calendar is available in a printable PDF format, making it easy to access and plan for important events. This resource ensures everyone stays informed about school closures, breaks, and significant academic deadlines.

Overview of the Academic Year

The 2024-2025 academic year for Hillsborough County schools begins on August 12, 2024, and ends on May 30, 2025. The calendar includes fall, winter, and spring breaks, along with holidays like Labor Day, Veterans Day, and Memorial Day. Grading periods are evenly distributed, with the first ending in October 2024 and the second in January 2025. This structured schedule ensures students, parents, and staff can plan effectively for the entire school year, including exams, extracurricular activities, and family vacations.

Importance of the Printable PDF Format

Importance of the Printable PDF Format

The printable PDF version of the Hillsborough County School Calendar is essential for easy access and organization. It allows parents, students, and staff to download and print the calendar, ensuring they have a physical copy for quick reference; The PDF format is universal, making it compatible with all devices, and its clarity ensures readability. This feature is particularly useful for those without consistent internet access, providing a reliable backup. Additionally, the PDF can be easily shared or posted for visibility.

Key Dates and Holidays in the 2024-2025 School Year

  • First Day of School: August 12, 2024
  • Labor Day: September 2, 2024
  • End of 1st Grading Period: October 25, 2024
  • Fall Break: November 25-27, 2024
  • Winter Break: December 23, 2024 — January 3, 2025
  • Spring Break: March 24-28, 2025

First and Last Days of School

The 2024-2025 school year in Hillsborough County begins on August 12, 2024, marking the first day for students. The last day of school is scheduled for May 30, 2025. Seniors will have an earlier release on May 21, 2025. This schedule allows for a balanced academic year, ensuring students and staff have adequate time for learning and breaks. The calendar includes a total of 180 student days, aligning with state requirements for instructional hours.

Fall Break and Winter Break

Fall Break for the 2024-2025 school year in Hillsborough County is scheduled for October 28-29, 2024, providing a short but welcome break for students and staff. Winter Break extends from December 23, 2024, to January 3, 2025, offering a longer period for holiday celebrations and relaxation. These breaks are essential for rejuvenation and align with traditional holiday observances, ensuring a well-balanced academic schedule throughout the year.

Spring Break and Holiday Observances

Spring Break for Hillsborough County schools in 2024-2025 occurs from March 24 to April 4, offering students and families a mid-semester recess. Additionally, the calendar includes observances for Presidents Day on February 17 and Memorial Day on May 26, ensuring alignment with national holidays. These dates are crucial for planning family activities and ensuring students meet academic deadlines before and after breaks.

Important Academic Milestones

The calendar highlights key academic milestones, including grading periods, report card distribution dates, and progress reporting schedules. It also outlines parent-teacher conference timings, ensuring students and families stay informed and aligned with school progress throughout the year.

Grading Periods and Report Cards

The 2024-2025 Hillsborough County School Calendar outlines grading periods, with the first ending on October 25, 2024, and the second on January 24, 2025. Report cards are distributed shortly after each grading period, providing students and parents with updates on academic performance. The calendar also highlights when progress reports will be issued, ensuring families stay informed about student progress. Parents can access report cards online through Synergy ParentVUE, making it easy to track academic milestones throughout the year.

Progress Reporting and Parent-Teacher Conferences

The 2024-2025 calendar includes dates for progress reporting, enabling parents to monitor student development. Parent-teacher conferences are scheduled throughout the year, providing opportunities for face-to-face discussions about academic progress and goals. These events are crucial for fostering collaboration between families and educators, ensuring students receive the support they need to succeed. Parents can use the calendar to plan for these meetings and stay actively involved in their child’s education.

Types of Calendars Available

Hillsborough County offers various school calendars, including traditional, year-round, and early release schedules, providing flexibility for different educational needs and organizational preferences for families and students.

Traditional Academic Calendar

The traditional academic calendar is the most commonly used schedule, offering a structured format with standard breaks and holidays. It begins in August and ends in May, aligning with federal holidays. Families benefit from predictable planning, with fall, winter, and spring breaks clearly defined. This calendar includes key academic dates, such as grading periods and report card distribution, ensuring transparency for parents and students. Its printable PDF version allows easy access and physical planning for the entire school year.

Year-Round and Early Release Schedules

The year-round calendar offers a balanced schedule with shorter breaks throughout the year, reducing summer learning loss. Early release days, typically on Wednesdays, allow for teacher planning and professional development. These schedules are designed to enhance student learning and support teacher collaboration. The printable PDF calendar includes specific dates for year-round schools and early release days, ensuring families can plan accordingly for the 2024-2025 school year.

Downloading and Printing the Calendar

Access the 2024-2025 Hillsborough County School Calendar as a PDF online. Simply click the download link, save, and print for easy reference throughout the academic year.

Steps to Access the PDF Version

To access the Hillsborough County School Calendar 2024-2025 in PDF format, visit the official district website. Navigate to the Calendars section, select the 2024-2025 Academic Calendar, and click the provided download link. Once downloaded, you can print the PDF or save it digitally for easy access. Ensure you have a PDF reader installed to view the document properly. This ensures you stay updated on all important dates and events throughout the school year.

Customizing the Calendar for Personal Use

The Hillsborough County School Calendar 2024-2025 can be tailored to meet individual needs. Users can print the PDF and highlight key dates or integrate it into digital calendars like Google Calendar for reminders. Additionally, the calendar can be synced with personal schedules, allowing parents and students to stay organized. This flexibility ensures the calendar remains a practical tool for academic and personal planning throughout the school year.

Synchronizing with Digital Calendars

The Hillsborough County School Calendar can be synced with digital tools like Google Calendar or iCal, ensuring real-time updates and reminders for important school events and deadlines.

Google Calendar Integration

Sync the Hillsborough County School Calendar with Google Calendar for seamless integration. Subscribe to the iCal feed to receive real-time updates and reminders for school events. This feature allows users to access important dates, such as holidays, grading periods, and parent-teacher conferences, directly within their personal Google Calendar. The calendar can be customized to highlight specific events, ensuring families stay organized and informed throughout the school year. Access the iCal feed here for easy setup.

iCal Feed and Subscription Options

The Hillsborough County School Calendar offers an iCal feed for easy subscription. Users can sync the calendar with digital platforms like Apple Calendar or Microsoft Outlook. This feature provides real-time updates for school events, holidays, and important deadlines. By subscribing, families can receive automatic notifications and ensure they never miss key dates. Subscribe to the iCal feed to stay connected and organized throughout the 2024-2025 school year.

Planning Tools for Parents and Students

The Hillsborough County School Calendar provides essential planning tools, including a printable PDF and digital sync options, to help families and students stay organized and informed throughout the year.

Marking Important Dates

The Hillsborough County School Calendar allows parents and students to mark critical dates, such as the first day of school, holidays, and grading periods. By highlighting key events like Labor Day (September 2, 2024), the end of the first grading period (October 25, 2024), and Winter Break (December 23, 2024 — January 3, 2025), families can stay organized. This practice helps ensure no important deadlines or breaks are missed, fostering better academic and personal planning throughout the year.

Using the Calendar for Academic Planning

The Hillsborough County School Calendar is an essential tool for academic planning, helping students and parents track key dates like the first day of school (August 12, 2024) and holidays. By identifying grading periods and breaks, families can plan study schedules, projects, and extracurricular activities effectively. The calendar also aids in avoiding conflicts between school events and personal commitments, ensuring a smooth academic year. Its printable format makes it easy to reference and plan ahead.

Hillsborough County School District Details

The Hillsborough County School District, located in Tampa, FL, serves students with a focus on academic excellence and community engagement. It includes various schools and programs.

School District Office Information

The Hillsborough County School District office is located at 4500 Northdale Boulevard, Tampa, FL 33624. This office oversees all district operations, including curriculum development, staff support, and policy implementation. Families can visit for inquiries or to access resources. The office is a central hub for administrative services, ensuring smooth district-wide operations and supporting student success throughout the academic year. Contact information is available on the district’s official website.

Staff Development and Non-Student Days

Staff Development and Non-Student Days are scheduled throughout the 2024-2025 academic year. These days allow teachers and staff to engage in professional growth and prepare for student instruction. Non-Student Days include holidays, teacher workdays, and district-wide training events. The calendar identifies these dates, ensuring families can plan accordingly. These days are crucial for maintaining high educational standards and supporting staff effectiveness in Hillsborough County schools.

Inclement Weather and Make-Up Days

The district designates specific dates as make-up days for inclement weather closures, such as October 14, November 11, and November 25-27, subject to change as needed.

Hurricane Day Policies

The Hillsborough County School District designates specific dates as hurricane make-up days, such as October 14, November 11, and November 25-27, ensuring minimal academic disruption. These dates are subject to change based on weather conditions and district needs. The district communicates updates promptly to ensure parents and students are informed. Hurricane days are strategically assigned to maintain the academic calendar’s integrity while prioritizing safety during severe weather events.

Assigned Make-Up Days

The Hillsborough County School Calendar includes assigned make-up days to address potential school closures due to inclement weather or other disruptions. Dates such as October 14, November 11, and November 25-27, 2024, are designated as make-up days. These dates ensure the academic year remains on track. The district updates the calendar as needed, providing families with clear communication regarding any changes to the scheduled make-up days throughout the school year.

Frequently Asked Questions

Common queries include how to access the printable PDF, notable dates like holidays, and how to stay updated on calendar changes throughout the year.

Addressing Common Queries

Many questions revolve around accessing the printable PDF, understanding holidays, and staying informed about updates. Parents often ask about first and last school days, breaks, and make-up days. Queries also include how to sync the calendar with digital tools like Google Calendar and iCal. Additionally, inquiries about non-student days and staff development days are frequent. The district provides updates and resources to help address these common concerns efficiently.

Calendar Updates and Changes

The Hillsborough County School Calendar may undergo updates due to weather events or administrative changes. Hurricane make-up days, such as November 11 and January 5, are scheduled as needed. Early release days are also subject to adjustments. Parents and staff are encouraged to check the official district website for the latest revisions. The printable PDF is updated regularly to reflect any changes, ensuring accuracy and convenience for planning purposes throughout the school year.

The Hillsborough County School Calendar 2024-2025 is an essential tool for staying organized. It helps families and students plan effectively, ensuring a successful academic year.

Final Tips for Staying Organized

Download the printable PDF calendar to mark key dates, holidays, and academic milestones. Sync it with your digital calendar for easy access. Share with family members to ensure everyone stays informed. Highlight important events like exams or parent-teacher conferences. Regularly check for updates on the district’s website. Use the calendar to plan academic goals and track progress throughout the year. This tool helps families and students stay organized and prepared for the 2024-2025 school year.

pax era manual

Getting Started with the PAX Era

Welcome to the PAX Era! This section guides you through the initial steps of unboxing, preparing, and setting up your device for the first use.

1.1 Inserting the Pod

To insert the pod, align it with the PAX Era device and gently push until it clicks. Ensure the pod is Era-compatible for proper functionality. The indicator light will pulse white, confirming successful insertion and readiness for use. Always check that the pod is securely seated to avoid any issues during operation.

1.2 Initial Setup and Preparation

Before first use, charge the PAX Era until the indicator light turns blue. Ensure the device is free from debris and the chamber is clean. Insert a compatible pod and check the battery level by gently shaking the device. The petals will illuminate to show the current charge status. Power on by drawing from the mouthpiece, and allow the device to heat up for a few moments before use.

Charging the PAX Era

To charge, connect the PAX Era to a USB port. The LED will turn blue during charging and stop when fully charged. Avoid overcharging to preserve battery life.

2.1 How to Charge the Device

To charge the PAX Era, connect it to a USB port using the provided cable. The LED indicator will glow blue during charging and turn off when fully charged. Charging typically takes 45 minutes. Avoid overcharging, as it may reduce battery life. Ensure the device is placed on a stable surface while charging. Always use the original cable for optimal performance and safety.

2.2 Understanding Battery Level Indicators

The PAX Era features LED indicators to show battery status. Gently shake the device to check the battery level. The petals will illuminate white, indicating the current charge level. When the battery is low, the petals will glow red. This intuitive system ensures you stay informed about your device’s power status at all times.

Using PAX Era Pods

PAX Era pods are designed exclusively for the PAX Era device, offering unique flavor profiles and potency. These pods are pre-loaded with concentrate for convenience and consistency, delivering a smooth and enjoyable vaping experience tailored to your preferences.

3.1 Compatible Pods and Their Features

PAX Era compatible pods are specifically designed for seamless performance with the device. Each pod features a unique blend of concentrates, offering distinct flavor profiles and potency levels. They are pre-loaded for convenience and ensure consistent vapor quality. The pods are crafted with high-quality materials to enhance the vaping experience, providing smooth draws and optimal flavor extraction.

3.2 How to Change or Replace Pods

To change or replace pods, first ensure the device is cool. Gently pull the pod straight out from the Era. Take a new compatible pod and insert it firmly into the device until it clicks. The indicator light will pulse white, confirming the pod is securely connected. Always use PAX-approved pods for optimal performance and flavor consistency.

Temperature Control and ExpertTemp Technology

The PAX Era features adjustable temperature settings to customize your vaping experience. ExpertTemp Technology optimizes heat levels for consistent flavor and vapor quality, enhancing sessions seamlessly.

4.1 Adjusting Temperature Settings

To adjust the temperature on your PAX Era, start by shaking the device to enter Temp Set mode. The LED petals will illuminate, indicating the current temperature level. Press the mouthpiece to cycle through four preset temperature settings. Once you’ve selected your desired temperature, hold the mouthpiece down for two seconds to confirm. The device will begin heating, and the LED will turn blue when ready; This feature allows you to customize your vaping experience by selecting from optimized temperature levels designed to enhance flavor and vapor quality. Experiment with different settings to find your preference, and use the PAX app for further customization.

4.2 Understanding ExpertTemp Technology

ExpertTemp Technology ensures a consistent and optimal vaping experience by automatically regulating the PAX Era’s temperature. It eliminates the need for manual adjustments, maintaining a steady heat level throughout your session. This innovative feature prevents overheating and preserves the integrity of your material, delivering smooth and flavorful vapor every time. It’s designed to provide a hassle-free experience, making it perfect for both newcomers and experienced users alike, while ensuring your device operates efficiently and effectively.

App Connectivity and Advanced Features

The PAX Vapor app enables seamless connectivity with your PAX Era device. Connect via Bluetooth to customize temperature, control sessions, and monitor usage. The app enhances your vaping experience by allowing precise adjustments and providing real-time feedback, ensuring a tailored and enjoyable session every time.

5.1 Connecting the PAX Era to the App

To connect your PAX Era to the app, download the PAX Vapor app from Google Play or the Apple App Store. Open the app and follow the in-app instructions to pair your device via Bluetooth. Ensure your PAX Era is powered on and in pairing mode. Once connected, you can access advanced features like temperature control and session management, enhancing your vaping experience.

5.2 Customizing Settings via the App

The PAX Vapor app allows you to customize your PAX Era experience. Adjust temperature settings to enhance flavor profiles, set session limits for controlled vaping, and explore personalized preferences. The app provides real-time feedback and lets you monitor device status, ensuring a tailored experience that suits your needs. Use the app to fine-tune your settings and optimize your vaping sessions effortlessly.

Troubleshooting Common Issues

Encounter issues with your PAX Era? This section helps resolve common problems like low battery, pod compatibility, and device errors with quick troubleshooting solutions.

6.1 Common Problems and Solutions

Experiencing issues with your PAX Era? Common problems include low battery, incompatible pods, or device errors. Solutions involve charging the device, ensuring pod compatibility, and restarting the vaporizer. For persistent issues, clean the device thoroughly and check for firmware updates via the PAX app. Refer to the troubleshooting guide for detailed step-by-step solutions to ensure optimal performance and longevity of your PAX Era.

6.2 Understanding Error Indicators

The PAX Era uses LED indicators to signal issues. A solid red light indicates low battery or a short circuit, while flashing red suggests a connection problem. White pulsing light means the device is ready, and blue indicates charging. If the light flashes multiple colors, it may signal a firmware issue. Refer to the user guide for detailed explanations of each indicator and how to resolve them effectively.

Maintenance and Cleaning

Regular cleaning ensures optimal performance. Use a soft cloth and isopropyl alcohol to wipe the mouthpiece and exterior. Avoid harsh chemicals to maintain hygiene and functionality.

7.1 Cleaning the Device

Regular cleaning is essential for maintaining your PAX Era’s performance. Use a soft cloth dampened with isopropyl alcohol to wipe down the exterior and mouthpiece. Gently scrub any visible residue or buildup. Avoid using harsh chemicals or abrasive materials, as they may damage the device. For the pod compartment, a cotton swab lightly soaked in alcohol can remove debris. Clean the device after every few uses to ensure optimal functionality and hygiene.

7.2 Regular Maintenance Tips

Regular maintenance ensures your PAX Era performs optimally. Check the pod compartment for residue and clean it with a cotton swab. Store the device upright to prevent oil leakage. Charge the battery when it’s low to avoid deep discharges. Use the official PAX charger to maintain battery health. Regularly inspect and clean the mouthpiece for smooth airflow and flavor preservation.

Safety Precautions and Regulations

Always follow safety guidelines to ensure safe use. Keep the device away from children and flammable materials. Use only authorized PAX Era pods and comply with local vaping regulations.

8;1 Safety Guidelines for Use

Ensure safe handling and usage of the PAX Era by following these guidelines:

  • Keep the device away from children and pets.
  • Use only PAX-approved pods to avoid damage or hazards.
  • Avoid exposure to extreme temperatures or flammable materials.
  • Store the device on a heat-resistant surface when in use.
  • Do not modify the device or attempt unauthorized repairs.

Regularly inspect the device for damage and follow proper charging procedures.

8.2 Compliance with Vaping Regulations

Adhere to local vaping laws and regulations when using the PAX Era:

  • Ensure you are of legal vaping age in your region.
  • Follow all applicable laws regarding public vaping spaces.
  • Use only authorized PAX Era pods and accessories.
  • Dispose of used pods and materials responsibly.

Stay informed about updates to vaping regulations in your area.

Advanced Features and Customization

Explore ExpertTemp Technology and dose control for precise vaping experiences. Customize settings via the PAX app to tailor temperature and session preferences for optimal satisfaction.

9.1 Dose Control and Session Management

The PAX Era offers dose control, allowing you to monitor and limit your consumption. Session management features enable you to track usage and set preferences via the app. This ensures a personalized and responsible vaping experience, enhancing control over your sessions while maintaining device efficiency and performance.

9.2 Customizing Vaping Experiences

Customize your vaping sessions with temperature adjustments and mode settings. The PAX Era allows you to tailor flavor and vapor production through precise temperature control. Use the app to explore different profiles, ensuring each session meets your preferences for a personalized and enjoyable experience.

Explore all features, refer to this guide for troubleshooting, and keep your PAX Era updated. Regular cleaning and proper storage will enhance its longevity and performance;

10.1 Maximizing Your Vaping Experience

The PAX Era is designed for a seamless vaping experience. Experiment with temperature settings to enhance flavor profiles, and use the app for customization. Regularly clean your device to maintain performance and ensure optimal vapor quality. Always follow safety guidelines and stay updated with firmware for the best results. Enjoy a tailored and satisfying experience with your PAX Era;

10.2 Staying Updated with PAX Era

Stay updated with the latest PAX Era features by regularly checking for firmware updates through the PAX Vapor app. Ensure your device is always running on the most current software for optimal performance. Visit the official PAX website or app store to download the newest app version and access improved functionality, security, and user experiences tailored for your PAX Era.

troy bilt power washer 2700 psi manual

Welcome to the Troy-Bilt 2700 PSI Power Washer manual guide. This manual provides essential information for safe and effective operation, including setup, maintenance, and troubleshooting tips.

Overview of the Troy-Bilt 2700 PSI Pressure Washer

The Troy-Bilt 2700 PSI Pressure Washer is a gas-powered cleaning tool designed for medium-duty tasks. It features a Briggs & Stratton 725 EXi engine, delivering 2700 PSI and 2.3 GPM, ideal for cleaning decks, fences, and driveways. Built for reliability, it includes a durable pump and user-friendly design. The washer is suitable for various surfaces, offering versatile cleaning solutions. Its compact design ensures easy maneuverability and storage, making it a practical choice for homeowners seeking efficient power washing performance. This model is a popular option for tackling outdoor cleaning projects effectively.

Importance of Reading the Manual

Reading the Troy-Bilt 2700 PSI Pressure Washer manual is crucial for safe and effective operation. It provides detailed safety guidelines, operating instructions, and maintenance tips to ensure optimal performance. The manual highlights potential hazards, such as high-pressure risks, and offers solutions to common issues. By understanding the washer’s features and limitations, users can avoid mistakes, prolong the product’s lifespan, and achieve better cleaning results. It also guides users on how to access additional resources, such as downloadable manuals or customer support.

Safety Guidelines and Precautions

Always follow safety guidelines to avoid accidents. Wear protective gear, avoid high-pressure streams near people, and ensure proper ventilation. Follow manual instructions carefully to prevent injuries.

General Safety Information

This section outlines essential safety measures to ensure safe operation of the Troy-Bilt 2700 PSI pressure washer. Always wear protective gear, including gloves and eyewear, to prevent injury from high-pressure streams or debris. Keep children and pets away from the unit during operation. Avoid spraying near people or delicate surfaces. Ensure the area is well-ventilated and free from flammable materials. Follow all instructions carefully to prevent accidents and maintain the equipment’s performance. Regularly inspect the machine for damage or wear;

High-PressureHazards and Precautions

The Troy-Bilt 2700 PSI pressure washer generates a powerful water stream that can cause severe injuries or damage. Avoid aiming the nozzle at people, pets, or fragile surfaces, as it may result in cuts or propel objects. Never use the pressure washer near open wounds or sensitive areas. Keep the nozzle at a safe distance from windows, electrical components, and soft materials. Always maintain control of the spray gun to prevent accidental discharge. Be aware of your surroundings to minimize risks associated with high-pressure operation.

Protective Gear and Safe Operating Practices

Always wear protective gear, including safety goggles, gloves, and closed-toe shoes, when operating the Troy-Bilt 2700 PSI pressure washer. Ensure loose clothing or long hair is secured to avoid entanglement. Keep children and pets at a safe distance. Avoid using the pressure washer near open flames or sparks. Never aim the nozzle at people or animals, and maintain a firm grip on the spray gun. Regularly inspect hoses and connections for damage before use to ensure safe operation.

Product Features and Specifications

The Troy-Bilt 2700 PSI pressure washer features a Briggs & Stratton 725 EXi engine, delivering reliable power for medium-duty cleaning tasks. Its axial cam pump provides 2.3 GPM flow rate, ideal for tough stains. Included accessories like spray tips and detergent siphon tube enhance versatility, making it suitable for various surfaces and cleaning projects.

Engine and Pump Details

The Troy-Bilt 2700 PSI pressure washer is powered by a Briggs & Stratton 725 EXi engine, known for its reliability and durability. The axial cam pump delivers a maximum flow rate of 2.3 gallons per minute (GPM) at 2700 PSI, ensuring efficient cleaning performance. The pump is designed for direct drive operation, connecting seamlessly to the engine’s vertical shaft. This configuration optimizes power transfer, making it ideal for medium-duty tasks like cleaning decks, fences, and driveways. The engine and pump combination provides consistent power for tackling tough stains and grime effectively.

PSI and GPM Ratings

The Troy-Bilt 2700 PSI pressure washer delivers a maximum pressure of 2700 pounds per square inch (PSI) and a flow rate of 2.3 gallons per minute (GPM). These ratings ensure efficient cleaning power for various tasks, from light-duty cleaning to tackling tough stains. The combination of high PSI and GPM makes it suitable for medium-duty applications, providing consistent performance for outdoor cleaning projects. This rating is certified by the Pressure Washer Manufacturers Association (PWMA) standard, ensuring reliability and effectiveness in operation.

Included Accessories and Components

The Troy-Bilt 2700 PSI pressure washer comes with essential accessories to enhance your cleaning experience. These include a detergent siphon tube for applying pressure washer-safe detergents, a spray wand for precise control, and a spray gun with a trigger lock to prevent accidental start-ups. Additionally, multiple spray tips are provided, offering various cleaning patterns for different surfaces. These components ensure versatile and efficient cleaning solutions for a wide range of tasks.

Assembly and Setup Instructions

This section guides you through unboxing, inventorying parts, connecting hoses, and configuring your Troy-Bilt 2700 PSI pressure washer for safe and effective operation.

Unboxing and Inventory of Parts

Carefully unpack your Troy-Bilt 2700 PSI pressure washer and verify all components. Ensure you have the power washer unit, spray wand, spray gun, high-pressure hose, detergent siphon tube, and spray tips. Check for any damage or missing items. Refer to the manual for a detailed parts list. Familiarize yourself with each component to ensure proper assembly and operation. This step is crucial for safe setup and functionality.

Connecting Hose and Water Supply

Attach the high-pressure hose to both the pump and spray gun, ensuring a secure connection. Connect the water supply hose to a clean water source using a 1/2″ garden hose. Check for leaks by turning on the water supply. The maximum hose length recommended is 25 feet to maintain optimal water pressure. Prime the pump according to the manual to prevent cavitation. Ensure all connections are tight before starting the engine for the first time. This step is crucial for proper function and safety.

Initial Setup and Configuration

Begin by inspecting all components for damage. Attach the spray wand to the gun and ensure the handle is securely tightened. Install the high-pressure hose between the pump and spray gun. Connect the water supply hose to a clean water source, ensuring no debris or blockages. Prime the pump by squeezing the trigger to expel air from the system. Double-check all connections for tightness and ensure the detergent siphon tube is properly attached. This setup ensures optimal performance and prevents early wear.

Operating the Troy-Bilt 2700 PSI Power Washer

Start the engine and prime the pump before use. Select appropriate spray tips for your cleaning task and apply detergent as needed for optimal results.

Starting the Engine and Priming the Pump

To start the engine, ensure the pump is primed by squeezing the trigger to release air. Check oil levels and ensure the choke is properly engaged. Prime the pump by squeezing the spray gun trigger until water flows, preventing dry operation. This ensures smooth engine start and prolongs pump life; Always follow the manual’s specific priming instructions to avoid damage and maintain optimal performance. Proper starting procedures are crucial for longevity and efficiency.

Using Spray Tips and Detergent

The Troy-Bilt 2700 PSI pressure washer comes with multiple spray tips for various cleaning tasks. Choose the correct tip based on surface type to avoid damage. For tough stains, use the narrow-angle tip. Always use pressure washer-safe detergent and follow the manual’s guidelines. Add detergent to the designated tank and ensure proper dilution. Avoid using household cleaners as they may damage components. Use the included siphon tube for detergent application and test surfaces at a low setting before full cleaning.

Best Practices for Cleaning Various Surfaces

For optimal results, adjust the pressure and spray tip based on the surface. Start with a wide-angle tip for delicate surfaces like siding or vehicles. Use a narrower tip for stubborn stains on concrete or decks. Always test a small area first to ensure no damage. Avoid using high pressure on windows or soft materials. For tough grime, apply detergent and let it sit before rinsing. Keep the nozzle moving to maintain even cleaning and prevent etching surfaces. Regularly clean flat surfaces in sections to achieve a consistent finish;

Maintenance and Troubleshooting

Regularly check and maintain the engine, pump, and hoses to ensure optimal performance. Troubleshoot common issues like low pressure or engine problems by referencing the manual.

Regular Maintenance Tasks

Regular maintenance ensures your Troy-Bilt 2700 PSI pressure washer runs efficiently. Check engine oil levels and top up as needed. Inspect hoses for damage and replace worn parts. Clean or replace the air filter to maintain proper airflow. Drains and flushes the pump after each use to prevent debris buildup. Store the unit in a dry, protected area during off-season. Winterize by draining fluids and applying a pump saver. Regular lubrication of moving parts prevents wear and tear. Always follow the manual’s maintenance schedule for optimal performance.

Winterizing the Pressure Washer

Winterizing your Troy-Bilt 2700 PSI pressure washer ensures it remains functional for years. Drain all water from the pump, hoses, and tank to prevent freezing. Use a pump saver or antifreeze solution to protect internal components. Store the unit in a dry, climate-controlled area. Disconnect the battery if applicable. Ensure the fuel tank is full to prevent rust. Cover the pressure washer to shield it from dust and moisture. Proper winter care extends the lifespan and maintains performance.

Common Issues and Solutions

Common issues with the Troy-Bilt 2700 PSI pressure washer include the engine not starting, low water pressure, or the hose kinking. For engine issues, check the fuel level and spark plug. Low water pressure may indicate a clogged nozzle or faulty pump. Regularly inspect hoses for kinks and damage. If problems persist, consult the manual or contact customer support. Proper maintenance and timely repairs ensure optimal performance and extend the lifespan of your pressure washer. Always refer to the manual for troubleshooting guidance.

Where to Find the Troy-Bilt 2700 PSI Manual

The Troy-Bilt 2700 PSI manual is available for free download on the official Troy-Bilt website. Visit www.troybilt.com, enter your model number, and access the PDF. For a pre-printed copy, contact customer support at 800.828.5500.

Downloading the Manual from Official Sources

The Troy-Bilt 2700 PSI manual is easily accessible online. Visit the official Troy-Bilt website and navigate to the “Support” section. Enter your model number in the search bar to find the manual. Click the download link to save the PDF version. This ensures you have the most up-to-date instructions and safety guidelines. The process is quick, free, and requires no registration. Always verify the source to avoid unauthorized websites.

Ordering a Pre-Printed Manual

If you prefer a physical copy of the Troy-Bilt 2700 PSI manual, you can order a pre-printed version. Contact Troy-Bilt’s Customer Support at 800.828.5500 (toll-free in the U.S.). Have your model and serial numbers ready to ensure the correct manual is provided. This service is ideal for those who prefer a hard copy for easy reference. The process is straightforward and ensures you receive an official, high-quality manual tailored to your specific model.

The Troy-Bilt 2700 PSI Power Washer manual is a comprehensive guide designed to help users optimize their cleaning experience. By following the safety guidelines, assembly instructions, and maintenance tips, you can ensure efficient and long-lasting performance. Whether tackling tough stains or routine cleaning, this manual empowers you with the knowledge to use your pressure washer effectively. For further assistance, Troy-Bilt offers downloadable resources and customer support to address any questions or concerns. Happy cleaning!

lost in space parents guide

“Lost in Space” is a Netflix series reboot of the 1960s classic, following the Robinson family as they navigate survival in space. Rated PG, it blends adventure, family dynamics, and intense moments, making it a popular yet thought-provoking watch for both kids and adults. This guide helps parents understand the shows content and themes to make informed viewing decisions.

Overview of the Series

Lost in Space is a Netflix reboot of the 1960s classic, following the Robinson family as they survive in space after a catastrophic event. The series blends sci-fi adventure with family drama, showcasing the resourcefulness and intelligence of the Robinsons as they face unforeseen challenges. With a PG rating, it offers thrilling yet appropriate content for mature audiences, emphasizing teamwork and problem-solving in a futuristic setting.

Themes and Tone

The series emphasizes family bonds, trust, and resilience, blending hope with tension. While it features thrilling adventures and futuristic elements, the tone remains balanced, offering moments of emotional depth. Parents should be aware of intense scenes and mild violence, but the overall narrative promotes problem-solving and unity, making it suitable for mature younger audiences who can handle suspense and complex themes.

Safety Concerns for Children

Lost in Space contains violence and intense scenes that may disturb younger viewers. Parental guidance is advised to ensure children can process the content safely and appropriately.

Violence and Gore

The series includes scenes with mild violence, such as spaceship battles and confrontations, but avoids excessive gore. These moments are intense yet not overly graphic, making them manageable for older children with parental context. However, sensitive younger viewers may still find certain sequences unsettling, highlighting the need for discretion based on individual child maturity levels and sensitivity thresholds.

Frightening and Intense Scenes

The series features intense moments, such as spaceship crises and alien encounters, which may frighten young or sensitive viewers. Scenes involving the robot and space creatures can be unsettling, though the show avoids excessive gore. Parents should use discretion, as some episodes build suspense and danger, potentially causing anxiety for younger children. Balancing excitement with caution is key for family viewing.

Age Appropriate Content

Lost in Space is rated PG, balancing thrilling adventures with educational value. While suitable for older children, younger viewers may need parental guidance due to intense scenes.

Recommended Age Rating

The series is rated PG, making it suitable for children aged 10 and above. However, due to intense scenes and emotional content, parental discretion is advised for younger viewers. The show’s blend of adventure, problem-solving, and family-oriented themes makes it engaging for older kids and teens, while the suspenseful moments may require guidance for sensitive children.

Mature Themes and Discussions

Lost in Space explores complex themes like betrayal, sacrifice, and moral ambiguity, particularly through Dr. Smith’s manipulative actions. These elements may prompt discussions about trust, ethics, and consequences. While the show avoids explicit content, its emotional intensity and character conflicts address mature issues, making it essential for parents to guide younger viewers in understanding these nuanced topics.

Educational Value

The series offers educational value by showcasing scientific concepts, problem-solving, and resourcefulness. It inspires STEM interest and promotes teamwork, making it a valuable learning experience.

Scientific Concepts and Problem-Solving

The series excels in showcasing scientific concepts like space travel, alien technology, and survival tactics. Characters use creativity and logic to overcome challenges, encouraging critical thinking. Scenes depicting repairs of spacecraft or navigating hostile environments highlight practical applications of STEM principles. This makes the show both entertaining and educational, inspiring kids to explore science and engineering.

Family Dynamics and Trust

The series emphasizes strong family bonds and trust, with the Robinsons relying on each other to survive. Parents and children collaborate, showcasing teamwork and mutual respect. The show highlights open communication and support, offering a positive model for families. It encourages kids to value teamwork and parents to foster trust and collaboration in their own households.

Parental Guidance Tips

Parents should monitor viewing, foster open conversations, and address intense scenes to help children process emotions and themes effectively.

Monitoring and Open Conversations

Parents should actively monitor their children while watching Lost in Space to ensure they understand the content. Encouraging open discussions about the show’s themes, such as survival and morality, can help kids process complex emotions. This approach fosters a safe environment for questions and reflections, aiding in their emotional and cognitive development.

Helping Children Process Intense Scenes

While Lost in Space is rated PG, some scenes can be unsettling for young viewers. Parents should pause the show to explain complex or frightening moments, reassuring children that the events are fictional. Encourage discussions about the characters’ problem-solving and resilience, helping kids differentiate between fantasy and reality. Validating their feelings and offering comfort can ease anxiety and foster understanding.

Character Analysis

The Robinson parents, John and Maureen, exemplify bravery and resourcefulness, guiding their family through crises. Their leadership fosters trust and cooperation, providing strong role models for young viewers.

Role Models and Their Impact

The Robinson parents, John and Maureen, are exemplary role models, showcasing resilience, teamwork, and quick thinking. Their ability to remain calm under pressure teaches kids how to handle stress. The show highlights their strong moral compass, emphasizing the importance of honesty and responsibility. These traits inspire young viewers to adopt similar values, fostering positive character development and problem-solving skills.

Criticism of Certain Characters

Dr. Smith faces criticism for her manipulative and selfish actions, often prioritizing her own survival over the group’s well-being. Her decisions, while driven by fear, can be seen as morally questionable. Similarly, the Robot’s unpredictable behavior raises concerns, especially its occasional hostility toward the crew. These flaws, however, add depth to the story, making the characters more complex and relatable despite their imperfections.

Emotional and Psychological Aspects

The series explores characters’ emotional struggles, like frustration and anxiety, offering lessons in resilience. It highlights how family support helps navigate stress and uncertainty, fostering growth.

Dealing with Frustration and Anxiety

The series portrays characters facing unforeseen challenges, often leading to frustration and anxiety. For instance, Will Robinson’s interactions with the Robot highlight emotional turmoil and problem-solving. Parents can use these scenes to discuss coping mechanisms and resilience with their children, emphasizing communication and support as key tools for managing stress and anxiety in real life.

Building Resilience in Children

The Robinsons’ survival journey in Lost in Space showcases resilience through teamwork, creativity, and perseverance. Will’s bond with the Robot and the family’s unity during crises offer valuable lessons. Parents can highlight these moments to teach children the importance of adaptability, courage, and learning from mistakes, fostering resilience in their own lives through shared viewing and discussion.

The Balance of Fun and Intensity

The series masterfully blends thrilling adventures with intense moments, creating an engaging yet family-friendly experience that captivates both children and adults.

Adventure and Excitement

Lost in Space captivates audiences with thrilling space exploration, unexpected challenges, and the Robinsons’ ingenuity. Each episode delivers suspenseful adventures, inspiring curiosity and excitement, while highlighting teamwork and resilience. The series strikes a balance between fun and intensity, making it appealing for both children and adults. Its dynamic storytelling keeps viewers engaged, fostering a sense of adventure and wonder.

Managing Fear and Suspense

Lost in Space balances thrilling suspense with family-friendly content, though some scenes may unsettle younger viewers. Parents can help children process fear by discussing intense moments and reassuring them. The show’s PG rating ensures moderate intensity, making it suitable for guided viewing. Open conversations about frightening scenes can foster emotional resilience and help kids differentiate between fiction and reality, promoting healthier reactions to suspenseful media.

Reviews and Ratings

Lost in Space is rated PG, blending adventure, family themes, and suspense. Common Sense Media highlights its classic fun appeal with moderate violence, recommending it for older kids. Parents praise its focus on family dynamics and problem-solving, though some note intense scenes may unsettle younger viewers, making parental discretion advised for sensitive children.

Common Sense Media Insights

Lost in Space is rated PG, offering a mix of adventure, family themes, and suspense. Common Sense Media praises its focus on resilience and problem-solving, while noting some intense scenes. The guide recommends it for older children, emphasizing parental discretion for sensitive younger viewers due to frightening moments and mild violence.

Parent and Child Reviews

Parents praise Lost in Space for its educational value, emphasizing scientific concepts and family teamwork. Kids enjoy the thrilling adventures and relatable characters. Some parents caution about intense scenes, suggesting it’s best for older children. Overall, the series is commended for promoting resilience and trust, making it a engaging yet thought-provoking watch for families with parental guidance.

Lost in Space offers a thrilling blend of adventure and family dynamics, making it suitable for children with parental guidance. Its positive themes of resilience and trust make it a worthwhile watch for families.

Final Thoughts for Parents

Parents should consider their child’s sensitivity before allowing them to watch Lost in Space. While the show promotes family values and problem-solving, its intense scenes and mature themes may not suit all children. Open discussions and guidance are recommended to help kids process the content effectively and appreciate its educational aspects.

Recommendations for Watching

Parents are advised to watch Lost in Space with their children to guide them through intense scenes and foster meaningful discussions; The show, rated PG, balances adventure with emotional depth, making it suitable for mature children. Encourage your kids to reflect on the characters’ problem-solving and teamwork, while being mindful of sensitive content that may require additional context or reassurance.

canon ae 1 instruction manual

The Canon AE-1‚ released in 1976‚ revolutionized photography with its advanced features and user-friendly design‚ making it a favorite among professionals and enthusiasts alike. This iconic 35mm SLR camera combined aperture priority mode‚ a built-in light meter‚ and a robust build‚ ensuring exceptional image quality and reliability. Its enduring popularity lies in its simplicity and versatility‚ catering to both casual shooters and advanced photographers. The AE-1 remains a timeless tool for capturing memories and artistic expressions‚ solidifying its place in photography history.

1.1 Historical Overview of the Canon AE-1

The Canon AE-1‚ introduced in 1976‚ marked a significant milestone in photography by offering advanced features in an accessible format. Part of Canon’s A-series‚ it was designed to appeal to both professionals and hobbyists. Its release revolutionized the industry by combining user-friendly controls with sophisticated technology. The AE-1’s enduring popularity stems from its innovative design and reliability‚ solidifying its legacy as a groundbreaking camera;

1.2 Significance of the Canon AE-1 in Photography

The Canon AE-1 played a pivotal role in democratizing photography by offering advanced features at an affordable price. Its intuitive design and versatility made it accessible to both professionals and enthusiasts‚ revolutionizing the industry. It remains a symbol of innovation‚ inspiring future camera designs and maintaining a loyal following among photographers who value its reliability and artistic capabilities.

Key Features of the Canon AE-1

The Canon AE-1 is a 35mm SLR camera known for its durability‚ featuring a built-in light meter‚ interchangeable FD lenses‚ and aperture priority mode‚ making it a favorite among photographers for its precise control and versatility.

2.1 Overview of the Camera’s Specifications

The Canon AE-1 is a 35mm SLR camera with an FD lens mount‚ featuring aperture priority and manual modes. It uses a horizontally traveling focal-plane shutter with speeds from 2-1/1000 seconds and Bulb mode. The camera is powered by four LR44 batteries and includes a built-in light meter for accurate exposures. Its durable design and compatibility with various FD lenses make it a versatile tool for photographers.

2.2 Unique Features of the Canon AE-1

The Canon AE-1 stands out for its advanced features‚ including programmed AE mode‚ aperture priority‚ and manual override. It offers a built-in light meter for precise exposures and compatibility with a wide range of FD lenses; The camera’s intuitive design‚ durability‚ and versatility made it a favorite among both professionals and hobbyists‚ ensuring its enduring popularity in the world of photography.

Understanding the Canon AE-1 Camera Components

The Canon AE-1 features a robust design with essential components like the exterior controls‚ viewfinder‚ and metering system. These elements work together to provide intuitive navigation and precise control over camera settings‚ ensuring a seamless photography experience for users of all skill levels.

3.1 Overview of the Camera’s Exterior and Controls

The Canon AE-1 features a durable‚ ergonomic design with intuitive controls. The top plate includes the mode dial‚ shutter button‚ and film advance lever. The aperture ring is located on the lens‚ and the camera’s exterior includes a clear LCD panel displaying key settings. The layout is user-friendly‚ ensuring easy access to all primary functions‚ making it ideal for both beginners and experienced photographers.

3.2 Detailed Explanation of the Viewfinder and Metering System

The Canon AE-1’s viewfinder features a split-image microprism rangefinder for precise focusing and a 3-step LED exposure display. The built-in light meter uses a center-weighted averaging system‚ providing accurate exposure readings. The viewfinder also displays aperture‚ shutter speed‚ and exposure warnings‚ ensuring efficient composition and control. This system simplifies achieving optimal exposures‚ making it a reliable tool for photographers of all skill levels.

3.3 Mode Dial and Shooting Modes Explained

The Canon AE-1 features a mode dial offering Programmed AE‚ Shutter-Speed Priority‚ Aperture Priority‚ and Manual modes. Programmed AE provides fully automatic exposure control‚ while Shutter-Speed Priority allows users to set the shutter speed for motion effects. Aperture Priority enables control over the aperture for depth of field. Manual mode offers full control over both aperture and shutter speed‚ providing maximum creative flexibility for photographers.

Loading Film into the Canon AE-1

Open the camera back‚ align the film with the spool‚ and advance the film lever to load. Ensure the film is securely seated and properly aligned for correct operation.

4.1 Step-by-Step Guide to Film Loading

  • Open the camera back by sliding the release latch downward.
  • Insert the film cartridge into the spool‚ ensuring it clicks into place.
  • Align the film leader with the red mark on the spool for proper seating.
  • Gently advance the film lever to move the film to the next frame.
  • Close the camera back and check the frame counter to confirm loading.

4.2 Film Advance and Winding Process

  • After loading‚ advance the film by turning the lever clockwise until it stops.
  • The frame counter will move from “S” to “1” to confirm the first frame is ready.
  • For subsequent shots‚ advance the lever to the next frame stop.
  • After the last exposure‚ wind the film completely using the rewind knob.

Shooting Modes of the Canon AE-1

The Canon AE-1 offers four shooting modes: Programmed AE‚ Shutter-Speed Priority‚ Aperture Priority‚ and Manual. Each mode provides flexibility for different shooting scenarios and photographer preferences.

5.1 Programmed AE Mode

In Programmed AE Mode‚ the Canon AE-1 automatically selects both aperture and shutter speed for optimal exposure‚ offering effortless point-and-shoot functionality. This mode is ideal for beginners or quick shooting situations. It also allows for manual override‚ enabling photographers to adjust settings if desired‚ providing a balance between convenience and creative control.

5.2 Shutter-Speed Priority Mode

In Shutter-Speed Priority Mode‚ photographers manually set the desired shutter speed‚ while the Canon AE-1 automatically adjusts the aperture for proper exposure. This mode is ideal for controlling motion effects‚ such as freezing fast-moving subjects or creating artistic blur. It offers creative flexibility‚ allowing users to prioritize shutter speed while relying on the camera for aperture adjustments‚ ensuring well-balanced exposures in various lighting conditions.

Okay‚ so I’ve been given a task to generate a specific section of an article about the Canon AE-1 camera’s Aperture Priority Mode. The user has set some strict guidelines‚ so I need to make sure I follow them carefully.

I should start by recalling what Aperture Priority Mode does. In this mode‚ the photographer sets the aperture‚ and the camera automatically adjusts the shutter speed to achieve the correct exposure. This is useful for controlling the depth of field‚ which is the area in focus in the image.
Next‚ I need to ensure that I don’t repeat any information that might be covered in other sections‚ like the introduction or other modes. I should focus solely on Aperture Priority Mode.

Looking at the provided example from the internet‚ it mentions that the AE-1 can be used in three automatic exposure modes: programmed AE‚ shutter-speed priority‚ and aperture priority. It also notes that manual override is possible. I can use this information to craft a concise explanation.

I’ll structure the paragraph to explain what Aperture Priority Mode is‚ how it works‚ and why it’s beneficial. I should mention that the user sets the aperture and the camera adjusts the shutter speed‚ and highlight the advantage of controlling depth of field.

Let me draft it:

“In Aperture Priority Mode‚ users manually set the aperture‚ and the Canon AE-1 automatically adjusts the shutter speed for optimal exposure. This mode is ideal for photographers who want precise control over depth of field‚ allowing for creative decisions about which elements of the image should be in focus. It’s particularly useful in portrait and landscape photography‚ where depth of field is crucial.”

Now‚ I’ll count the words to ensure it’s exactly 60. Let’s see:

In
Aperture
Priority
Mode‚
users
manually
set
the
aperture‚
and
the
Canon
AE-1
automatically
adjusts
the
shutter
speed
for
optimal
exposure.
This
mode
is
ideal
for
photographers
who
want
precise
control
over
depth
of
field‚
allowing
for
creative
decisions
about
which
elements
of
the
image
should
be
in
focus.
It’s
particularly

useful
in
portrait
and
landscape
photography‚
where
depth
of
field
is
crucial.

Oops‚ that’s . I need to trim it down. Maybe I can remove “It’s particularly useful in portrait and landscape photography‚ where depth of field is crucial” and replace it with a more concise statement.

Let me try again:

“In Aperture Priority Mode‚ users manually set the aperture‚ and the Canon AE-1 automatically adjusts the shutter speed for optimal exposure. This mode offers precise control over depth of field‚ ideal for creative decisions on focus elements. It’s particularly useful in portrait and landscape photography‚ where depth of field is crucial for artistic effects.”

Counting the words:

In
Aperture
Priority
Mode‚
users
manually
set
the
aperture‚
and
the
Canon
AE-1
automatically
adjusts
the
shutter
speed
for
optimal
exposure.
This
mode
offers
precise
control
over
depth
of
field‚
ideal
for
creative
decisions
on
focus
elements.
It’s
particularly
useful
in
portrait
and
landscape
photography‚
where
depth
of
field
is
crucial
for
artistic
effects.
Still a bit over. Maybe remove “artistic effects” and just say “crucial.”

Final version:

“In Aperture Priority Mode‚ users manually set the aperture‚ and the Canon AE-1 automatically adjusts the shutter speed for optimal exposure. This mode offers precise control over depth of field‚ ideal for creative decisions on focus elements. It’s particularly useful in portrait and landscape photography‚ where depth of field is crucial.”

Now‚ let’s count:

In
Aperture
Priority
Mode‚
users
manually
set
the
aperture‚
and
the
Canon
AE-1
automatically
adjusts
the
shutter
speed
for
optimal
exposure.
This
mode
offers
precise
control
over
depth
of
field‚
ideal
for
creative
decisions
on
focus
elements.
It’s
particularly
useful
in
portrait
and
landscape
photography‚
where
depth
of
field
is
crucial.

That’s . I need to reach 60. Maybe add a bit more detail.

“In Aperture Priority Mode‚ users manually set the aperture‚ and the Canon AE-1 automatically adjusts the shutter speed for optimal exposure. This mode offers precise control over depth of field‚ ideal for creative decisions on focus elements. It’s particularly useful in portrait and landscape photography‚ where depth of field is crucial for achieving desired visual effects.”
Counting:

In
Aperture
Priority
Mode‚
users
manually
set
the
aperture‚
and
the
Canon
AE-1
automatically
adjusts
the
shutter
speed
for
optimal
exposure.
This
mode
offers
precise
control
over
depth
of
field‚
ideal
for
creative
decisions
on
focus
elements.
It’s
particularly
useful
in
portrait
and
landscape
photography‚
where
depth
of
field
is
crucial
for
achieving
desired
visual
effects.

Now‚ it’s . Still need 4 more. Maybe add “allowing photographers to guide the viewer’s attention effectively.”

Final version:

“In Aperture Priority Mode‚ users manually set the aperture‚ and the Canon AE-1 automatically adjusts the shutter speed for optimal exposure; This mode offers precise control over depth of field‚ ideal for creative decisions on focus elements. It’s particularly useful in portrait and landscape photography‚ where depth of field is crucial for achieving desired visual effects‚ allowing photographers to guide the viewer’s attention effectively.”

Counting:

In
Aperture
Priority
Mode‚
users
manually
set
the
aperture‚
and
the
Canon
AE-1
automatically
adjusts
the
shutter
speed
for
optimal
exposure.
This
mode
offers
precise
control
over
depth
of
field‚
ideal
for
creative
decisions
on
focus
elements.
It’s
particularly
useful
in
portrait
and
landscape
photography‚
where
depth
of
field
is
crucial
for
achieving
desired
visual
effects‚
allowing
photographers
to
guide
the
viewer’s
63

5.4 Manual Mode

In Manual Mode‚ photographers have complete control over both aperture and shutter speed‚ allowing for precise adjustments to achieve the desired exposure. This mode is ideal for experienced users who prefer full creative freedom. It’s particularly useful in challenging lighting conditions or when specific artistic effects are desired‚ thus giving the photographer ultimate control over the image’s depth of field.

Exposure Control on the Canon AE-1

The Canon AE-1 offers precise exposure control through ISO settings‚ aperture‚ and shutter speed adjustments. Its built-in light meter ensures accurate readings‚ enabling optimal image exposure;

6.1 Understanding ISO Settings

ISO settings on the Canon AE-1 determine the film’s sensitivity to light. Lower ISOs (100-400) are ideal for bright conditions‚ producing sharp images with minimal grain. Higher ISOs (800-1600) are suited for low-light situations but may result in visible grain. The camera reads the ISO from the film canister via a dedicated dial‚ ensuring proper exposure settings are maintained automatically or manually as needed.

6.2 Adjusting Aperture and Shutter Speed

Aperture and shutter speed on the Canon AE-1 are adjusted to control exposure. The aperture is set using the lens aperture ring‚ while the shutter speed is adjusted with the dial on the camera’s top. These adjustments allow for creative control over depth of field and motion blur. In manual mode‚ both can be set independently for precise exposure‚ or in priority modes‚ one can be automated for ease of use. Proper balancing ensures optimal image quality in various lighting conditions. Experimenting with these settings enhances photographic creativity and technical accuracy‚ making the AE-1 a versatile tool for photographers of all skill levels.