Cabinet handles are essential for both functionality and aesthetics, elevating a room’s style while ensuring easy access․ Proper placement and selection of knobs, pulls, or other hardware can transform your space, making it crucial to choose wisely for a cohesive and practical design․
Types of Cabinet Handles
Cabinet handles come in various styles, including knobs, pulls, latches, and bin pulls․ Knobs are ideal for doors, while pulls suit drawers, offering a grip for easy opening․ Each type enhances functionality and aesthetics, catering to different design preferences and needs․

Knobs
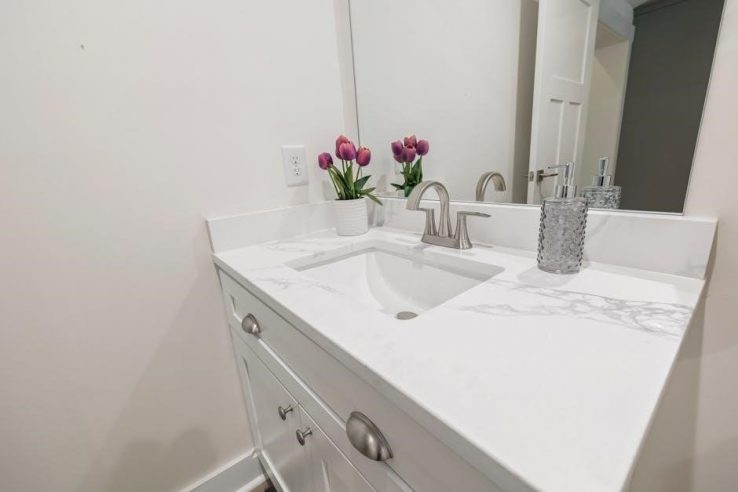
Cabinet knobs are a classic and versatile choice, offering a sleek, compact option for doors․ Available in various shapes, sizes, and materials, they suit traditional, contemporary, and minimalist designs․ Rounded or square knobs are popular, while decorative options like crystal or vintage styles add unique flair․ Knobs are typically small, making them ideal for smaller doors or cabinets, and are easy to install․ They can be crafted from metals like brass, bronze, or stainless steel, or from glass, ceramic, or wood for a natural look․ Knobs are often used in combination with pulls for a mixed hardware aesthetic, allowing for a personalized touch․ Their compact size ensures they won’t overwhelm the design, while their variety ensures they can complement any style․ Whether modern or rustic, knobs provide functionality and elegance, making them a timeless choice for cabinetry․ Proper sizing and placement are key to ensuring they enhance both usability and visual appeal, making knobs a practical and stylish option for any space․
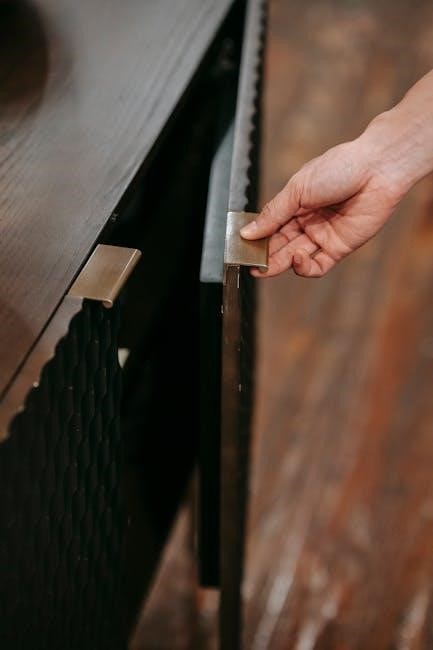
Pulls
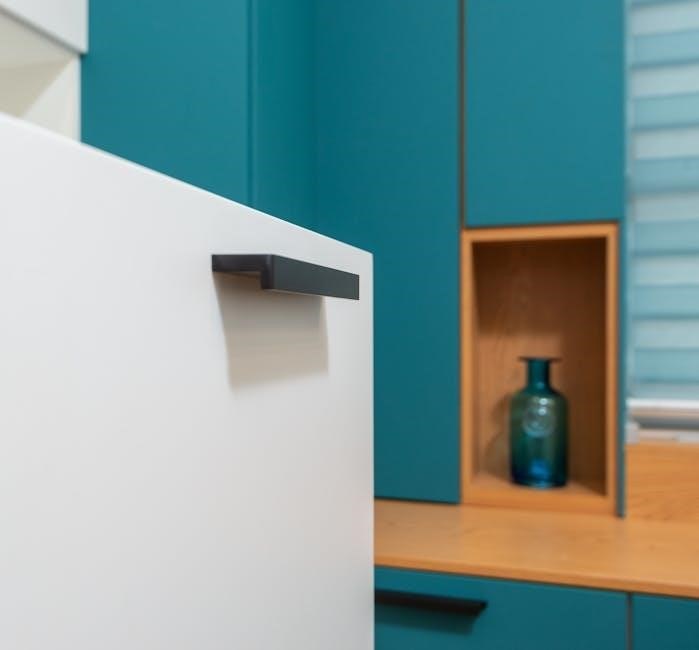
Cabinet pulls are a popular choice for their sleek, modern appearance and ease of use․ Unlike knobs, pulls are designed with a handle or grip, making them ideal for larger drawers or doors․ They come in various styles, such as bar pulls, recessed pulls, or bin pulls, each offering a unique aesthetic․ Bar pulls are long and minimalist, while recessed pulls are flush-mounted for a clean look․ Pulls are often preferred for their ergonomic design, providing a comfortable grip and ease of operation․ They are typically placed 1 to 4 inches from the top or bottom edge of the drawer or door, depending on personal preference and the size of the cabinet․ Longer pulls, especially those measuring about one-third of the cabinet door’s height, create a contemporary and streamlined appearance․ Mixing pulls with knobs can add visual interest and layering to your design․ Proper sizing and placement ensure both functionality and visual appeal, making pulls a versatile and practical choice for any cabinetry style․
Cabinet Handle Placement Guide
Proper placement of cabinet handles ensures functionality and aesthetics․ Pulls are typically positioned 1–4 inches from the top or bottom edge, while knobs are often centered․ Handles on doors are placed opposite the hinges for easy access․ Alignment and consistency are key for a polished look․
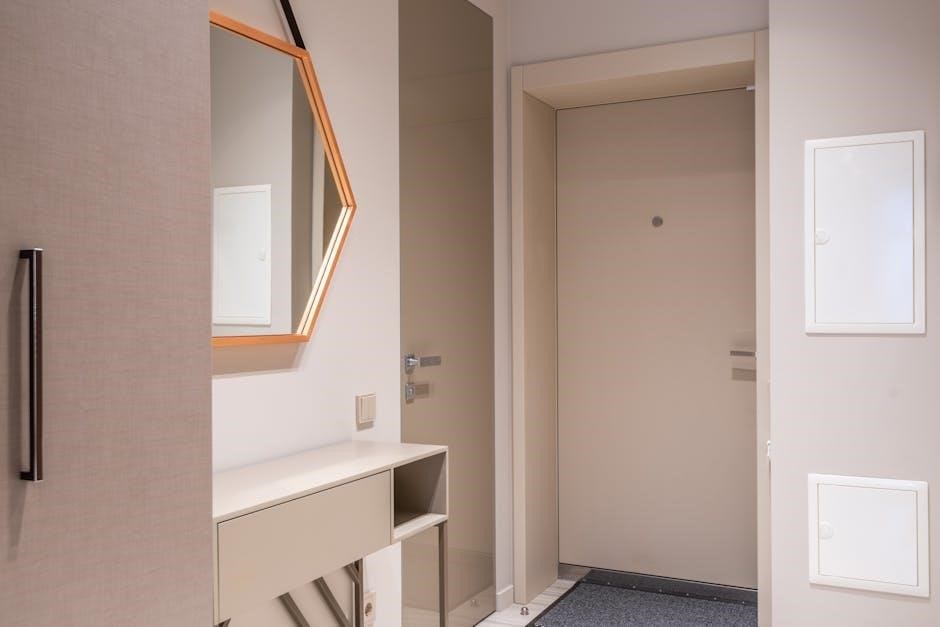
Door Handles
Door handles are a crucial element in cabinetry, offering both functionality and style․ They are typically placed on the opposite side of the door hinges, ensuring easy access and a balanced appearance․ The placement depends on the door’s height and design, with pulls often positioned 1–4 inches from the top or bottom edge for ergonomic access․ Knobs, on the other hand, are usually centered, creating a symmetrical look․ Proper alignment is essential to maintain a cohesive design, as misaligned handles can disrupt the overall aesthetic․ Additionally, the size and style of the handle should complement the door’s dimensions and the room’s decor․ For instance, longer pulls can give a sleek, contemporary feel, while smaller knobs may suit a traditional look․ Ensuring the handle’s proportions match the door’s size is key to achieving a polished and functional result․ This attention to detail enhances both usability and visual appeal, making door handles a vital component of cabinetry design․
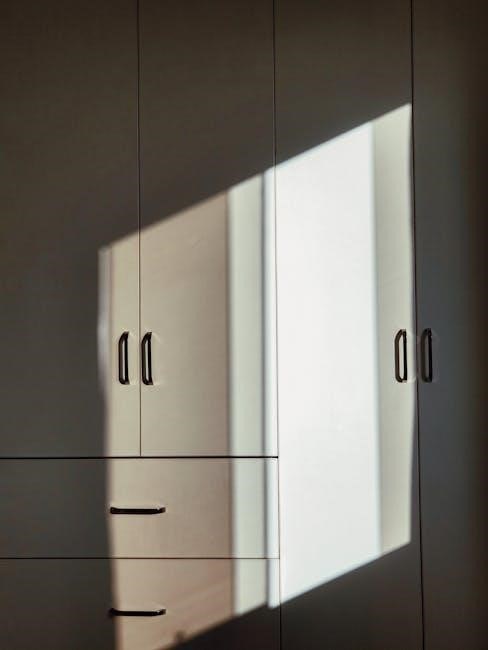
Drawer Handles
Drawer handles play a significant role in both the functionality and aesthetic appeal of cabinetry․ Their placement and design are crucial for creating a cohesive and practical space․ Generally, drawer handles are positioned between 1–4 inches from the top or bottom edge, depending on personal preference and the drawer’s height․ For taller drawers, longer pulls are often recommended, as they provide a better grip and a balanced look․ The size of the handle should be proportional to the drawer’s dimensions, ensuring harmony in the design․ Knobs, while smaller, are a popular choice for their versatility and can be centered for a symmetrical appearance․ The material and finish of drawer handles should complement the overall style of the cabinetry, whether it’s modern, traditional, or minimalist․ Properly chosen drawer handles not only enhance the usability of the space but also contribute to the visual flow of the room․ By selecting the right size, style, and placement, drawer handles can elevate the functionality and beauty of your cabinetry, making them a key element in achieving a polished and functional design․
Cabinet Hardware Jig and Tools
A cabinet hardware jig and tools are essential for precise installation․ They ensure accurate alignment and consistent results when mounting knobs, pulls, or other hardware․ These tools simplify the process, saving time and effort while achieving professional-level precision and functionality․
Jig Tool

A jig tool is an indispensable accessory for installing cabinet hardware accurately and efficiently․ Designed to ensure precise alignment, it simplifies the process of drilling holes for knobs, pulls, and other handles․ The jig tool typically features adjustable settings, allowing it to accommodate various hardware sizes and spacing requirements․
- It often includes a quick-release mechanism for easy setup and repeated use․
- The tool is usually made from durable materials, such as aluminum alloy, to withstand frequent use․
- Many jig tools come with a drill guide to prevent errors and ensure consistent results․
By using a jig tool, you can achieve professional-level precision, saving time and effort․ It’s especially useful for DIY projects or large-scale installations, ensuring that all hardware is evenly spaced and properly aligned․ This tool is a must-have for anyone looking to achieve a polished and cohesive look in their cabinetry․
Drill Guide
A drill guide is a crucial tool for ensuring precise and consistent hole placement when installing cabinet hardware․ It works in conjunction with a jig tool, helping to maintain accuracy and avoid costly mistakes․ The guide typically attaches to the jig, providing a stable platform for drilling․
- It often features adjustable settings to accommodate different hardware sizes and spacing requirements․
- The drill guide is designed to prevent misalignment, ensuring that holes are drilled straight and level every time․
- Many models include markings or measurements to simplify the process of positioning hardware correctly․
- Some guides are universal, working with various types of drills and jig systems, while others are specific to certain brands or models․
Using a drill guide not only saves time but also enhances the overall quality of the installation․ It’s particularly useful for beginners or those tackling complex projects, as it eliminates much of the guesswork involved in hardware placement․ With a drill guide, achieving a professional finish becomes much more accessible and efficient․
Sizing and Proportion
Proper sizing and proportion are key to ensuring cabinet hardware complements the design․ Pull lengths should be about 1/3 of the door’s height for a sleek look, while knobs are smaller and more subtle․ Larger pulls enhance contemporary styles, creating visual balance and functionality․
General Guidelines
When selecting and installing cabinet hardware, there are several general guidelines to ensure a balanced and functional design․ First, consider the size and proportion of the hardware relative to the cabinet doors or drawers․ For pulls, the length should generally align with the width of the drawer or door, while knobs are typically smaller and more subtle․ The placement of hardware also matters; pulls are often centered horizontally, and their vertical position depends on the door or drawer height․ For knobs, a common rule is to place them 2-3 inches above the hinge․ Mixing hardware types, such as knobs and pulls, can add visual interest but should be done thoughtfully to maintain a cohesive look․ Additionally, consider the material and finish to match the overall aesthetic of the room․ Durability is another factor, especially in high-traffic areas․ By following these guidelines, you can achieve a harmonious and practical design for your cabinetry․ Always measure carefully and plan ahead to avoid costly mistakes․ The right hardware can elevate the entire space, making it both functional and stylish․ Balancing form and function ensures your cabinets are both beautiful and user-friendly․ Proper alignment and spacing are key to a polished appearance․ Finally, test your hardware choices before final installation to ensure satisfaction with the look and feel․ This approach guarantees a result that enhances your home’s decor while meeting your practical needs․
Specific Measurements
When it comes to cabinet hardware placement, precise measurements are crucial for a polished look․ For pulls on cabinet doors, a common rule is to choose a length that is approximately one-third of the door’s height․ For example, a 24-inch tall door typically pairs well with an 8-inch pull․ Knobs, on the other hand, are often placed 2-3 inches above the hinge, creating a balanced appearance․ For drawers, the length of the pull should align with the width of the drawer front․ A 12-inch drawer, for instance, looks best with a 4-6 inch pull․ Vertical placement for pulls is generally 1-4 inches from the top or bottom edge, depending on personal preference․ Horizontal alignment should always be centered for a professional finish․ Additionally, spacing between hardware on multi-drawer units should be consistent to maintain visual harmony․ These specific measurements ensure functionality and aesthetics are seamlessly integrated, creating a cohesive design that enhances the overall look of your cabinetry․ By adhering to these guidelines, you can achieve a professional-grade installation that elevates your space․ Proper sizing and alignment are key to a polished, high-end appearance․ Always double-check measurements before drilling to avoid errors; The right proportions ensure your hardware complements the cabinetry perfectly․
Materials and Finishes
Cabinet handles come in a wide variety of materials and finishes, each offering unique aesthetic and functional benefits․ Brass, stainless steel, and bronze are popular choices for their durability and timeless appeal, while glass or ceramic knobs add a touch of elegance․ Acrylic or resin handles provide a modern, lightweight option․ When selecting materials, consider the overall style of your space—traditional, contemporary, or minimalist—and ensure the hardware complements it․ Finishes like polished chrome, matte black, or brushed nickel can enhance the visual harmony of your cabinetry․ Additionally, some materials are better suited for high-traffic areas or moisture-prone environments, such as kitchens or bathrooms․ For instance, stainless steel and brushed finishes are resistant to fingerprints and corrosion, making them practical choices․ Always match the hardware finish to other fixtures in the room for a cohesive look․ By choosing the right material and finish, you can elevate your cabinet design while ensuring long-lasting performance․ Proper selection balances style, functionality, and durability, making it a critical decision in your cabinetry project․
Design and Style Trends

Current trends emphasize blending functionality with aesthetics, featuring sleek lines, minimalist designs, and a mix of contemporary finishes․ Hardware styles range from modern pulls to classic knobs, allowing for personalized expression․ Mixing materials and finishes creates a cohesive yet unique look, enhancing any room’s ambiance and design appeal․
Contemporary Design
Contemporary design focuses on clean lines, minimalistic aesthetics, and functional simplicity․ Modern cabinet handles often feature sleek profiles, such as long, flat pulls or streamlined knobs in finishes like stainless steel, chrome, or matte black․ This style emphasizes proportionality, with handle lengths typically around one-third of the cabinet door height for a balanced look․ Mixing hardware types, like combining pulls with knobs or latches, adds layered interest while maintaining a cohesive modern vibe․ The use of adjustable jigs and drill guides ensures precise installation, aligning with the precision expected in contemporary designs․ Additionally, materials like glass or acrylic knobs offer a touch of sophistication, blending seamlessly with modern interiors․ Contemporary hardware also prioritizes durability, with finishes resistant to fingerprints and wear, making it ideal for busy spaces․ By integrating these elements, contemporary cabinet hardware creates a sleek, functional, and visually appealing solution for modern homes․
Traditional Design
Traditional design emphasizes classic elegance and timeless appeal, often featuring ornate details and symmetrical patterns․ Cabinet handles in this style frequently include knobs with rounded or oval shapes, adorned with intricate designs, or pulls with curved lines and decorative finishes like brass or bronze․ These hardware pieces are typically placed in alignment with the door hinges, creating a balanced and harmonious look․ For knobs, placement is often at the top third of the door, while pulls are positioned slightly lower on drawers for easy grip․ The use of materials like polished nickel or oil-rubbed bronze enhances the traditional aesthetic, offering a warm and inviting feel․ Mixing hardware types, such as combining knobs with latches, adds depth and character to the design․ Proper installation using a jig tool ensures alignment and functionality, preserving the classic charm of traditional cabinetry․ This style is ideal for creating a cohesive and enduring look that complements traditional interiors, blending seamlessly with other classic elements in the room․
Minimalist Design
Minimalist design focuses on simplicity, clean lines, and functionality, often avoiding ornate details․ Cabinet handles in this style are sleek and understated, with an emphasis on seamless integration into the cabinetry․ Knobs are commonly small and unobtrusive, while pulls are typically linear and low-profile, such as bar pulls or recessed handles․ These hardware pieces are designed to blend into the surrounding surface, creating a modern and uncluttered appearance․ Placement is usually centered on the door or drawer, ensuring a balanced and symmetrical look․ Materials like stainless steel, matte black, or frosted glass are popular for their subtle elegance․ The minimalist approach often involves using a single type of hardware throughout the space for consistency․ Proper installation with a jig tool ensures precise alignment, maintaining the sleek aesthetic; This style is perfect for contemporary spaces, offering a clean and functional look that enhances the overall minimalism of the room․ By focusing on simplicity and functionality, minimalist cabinet handles create a sophisticated and enduring design statement․
Mixing Hardware Types for Aesthetic Appeal
Mixing hardware types can add depth and visual interest to your cabinetry, creating a unique and personalized aesthetic․ By combining knobs, pulls, and other hardware, you can layer different styles and finishes, crafting a look that reflects your design vision․ For instance, pairing sleek bar pulls with subtle knobs can create a balanced contrast between modern and traditional elements․ This approach works particularly well in eclectic or transitional spaces, where blending styles is key․ When mixing, consider the proportions and scale of each piece to ensure harmony․ For example, larger pulls on drawers can complement smaller knobs on doors, maintaining a cohesive look․ Materials and finishes should also be coordinated; pairing polished brass knobs with matte black pulls can add sophistication․ Proper placement, guided by a cabinet hardware jig, ensures alignment and avoids a cluttered appearance․ Mixing hardware types allows for creativity, enabling you to tailor your cabinetry to suit your personal taste and the room’s overall style․ This versatile approach makes it easy to refresh or redefine your space without a complete overhaul․