Oikiture Bed Frame Assembly Instructions: A Comprehensive Guide
Welcome! This guide provides detailed, step-by-step instructions for assembling your Oikiture bed frame, ensuring a smooth and successful setup experience for all models.
Understanding Your Oikiture Bed Frame
Before you begin, familiarize yourself with the core components of your Oikiture bed frame. These frames are designed for ease of assembly and lasting durability, offering a stylish foundation for your mattress. Understanding the interplay between the headboard, footboard, side rails, and support systems is crucial.
The BF-B-COTI-KS/D/Q model, like others in the Oikiture collection, prioritizes a blend of aesthetic appeal and structural integrity. Note the initial spacing requirements between components during assembly – avoiding full tightening of M8 bolts allows for necessary adjustments. This ensures proper alignment and prevents stress on the frame. A successful assembly relies on recognizing each part’s role in creating a stable and comfortable sleep experience.
Unboxing and Inventory
Carefully unpack all components from the Oikiture bed frame packaging. Lay out each piece on a protected surface to prevent scratches or damage. Begin a thorough inventory, cross-referencing the contents with the parts list included in your documentation – accessible online as well.
Verify you have all necessary hardware, including M8 bolts (A), and any additional fasteners specific to your model (BF-B-COTI-KS/D/Q). Missing hardware can halt the assembly process, so confirm everything is present before proceeding. Document any discrepancies immediately. A complete inventory ensures a smooth, frustration-free assembly, setting the stage for a well-built and comfortable bed frame.
Identifying Components: Hardware Checklist
Confirming your hardware is crucial before starting. Your Oikiture bed frame kit should include M8 bolts (A) – these are key for initial connections, allowing for adjustments during assembly. Check for the correct quantity as specified in your model’s documentation (BF-B-COTI-KS/D/Q).
Beyond the bolts, verify the presence of any accompanying washers, nuts, or specialized fasteners. A detailed parts list, available for download, illustrates each component. Familiarize yourself with each item’s appearance and purpose. Proper identification prevents using incorrect hardware, which could compromise the frame’s structural integrity. A complete checklist ensures a secure and stable bed frame.
Tools Required for Assembly
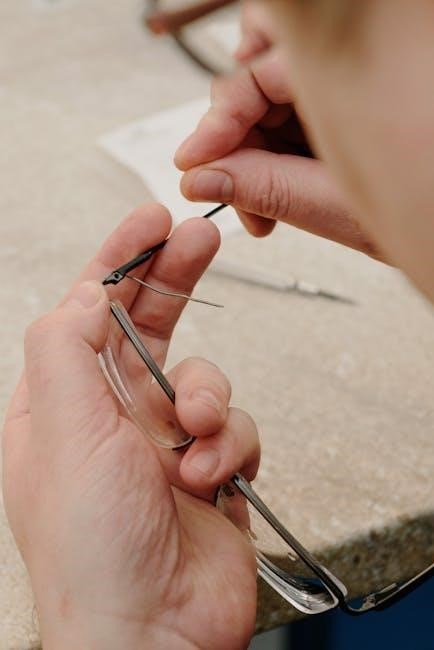
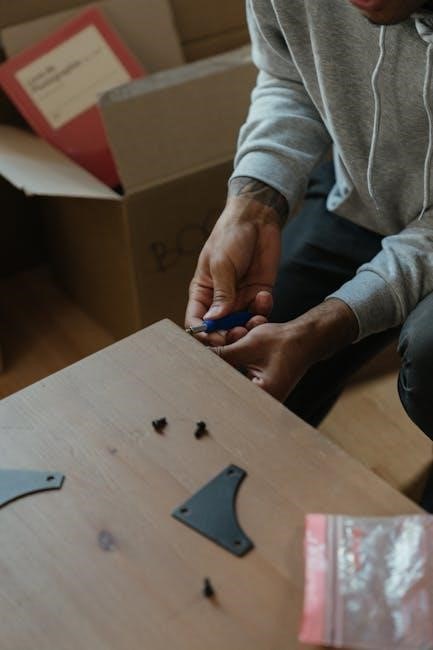
Successful assembly hinges on having the right tools readily available. While the Oikiture bed frame is designed for relatively straightforward setup, a few key items will significantly streamline the process. A standard Allen wrench, often included with the hardware, is essential for tightening the M8 bolts (A).
However, a ratchet set with appropriate sockets can expedite tightening. A Phillips head screwdriver may be needed for certain models or optional components. Consider a rubber mallet for gently tapping pieces into place, avoiding damage. Finally, a soft cloth protects surfaces during assembly. Having these tools prepared beforehand ensures a smooth and efficient build.

Step-by-Step Assembly Process
Begin by carefully following the instructions, attaching side rails to the headboard, then the footboard, installing the center support, and finally securing the slats.
Attaching the Side Rails to the Headboard
Begin the assembly by connecting the side rails to the headboard. Carefully align the pre-drilled holes on the side rails with those on the headboard. Insert the appropriate bolts – typically M8 bolts (A) as referenced in model BF-B-COTI-KS/D/Q instructions – and hand-tighten them initially.
Crucially, do not fully tighten these bolts at this stage. This allows for necessary adjustments when connecting the footboard and ensuring proper alignment of all frame components. Maintaining some spacing between the headboard and the metal frame is essential for a smooth assembly process.
Ensure the side rails are securely positioned before proceeding to the next step, verifying a flush connection with the headboard for optimal stability.
Connecting the Footboard to the Side Rails
Now, attach the footboard to the assembled side rails, mirroring the process used for the headboard connection. Align the pre-drilled holes on the footboard with those on the side rails, and insert the M8 bolts (A). Again, hand-tighten these bolts initially, avoiding full tightening to allow for adjustments.
Remember, maintaining spacing between the footboard, headboard, and metal frames is vital during this stage. This flexibility ensures proper alignment and prevents binding when the entire frame is assembled.
Double-check that the footboard is securely positioned and flush with the side rails before moving forward. A stable connection here is crucial for the overall integrity of the bed frame.
Installing the Center Support Beam
Next, position the center support beam lengthwise down the middle of the bed frame, spanning between the headboard and footboard. This beam provides essential reinforcement, particularly for larger bed sizes, preventing sagging and ensuring even weight distribution.
Secure the beam to the headboard and footboard using the appropriate hardware – typically bolts or screws included in your kit. Ensure the beam is centered and level before fully tightening the fasteners.
Proper installation of the center support beam significantly enhances the bed frame’s stability and longevity. It’s a critical step for a comfortable and safe sleep experience.
Securing the Slats or Platform
Now, carefully position the wooden slats or platform evenly across the bed frame, resting on the side rails and center support beam. These components directly support your mattress, so even spacing is crucial for optimal comfort and preventing uneven wear.
Attach the slats or platform using the provided screws or fasteners, ensuring they are securely fastened to the frame. For slat systems, maintain consistent gaps between each slat for adequate airflow and support.
A properly secured platform or slat system is vital for mattress stability and overall bed frame integrity, contributing to a restful night’s sleep.

Specific Model Considerations (BF-B-COTI-KS/D/Q)
For BF-B-COTI-KS/D/Q models, initial M8 bolt adjustments are key; avoid full tightening to allow for headboard, footboard, and frame alignment.
Headboard and Footboard Alignment
Achieving proper alignment between the headboard and footboard is crucial for a stable and aesthetically pleasing bed frame. Begin by loosely attaching the side rails to both the headboard and footboard using the provided M8 bolts (A).
It’s important at this stage not to fully tighten these bolts. This deliberate looseness allows for necessary adjustments as you connect all components. Observe the spacing between the headboard, footboard, and the metal frame – a small gap is expected and facilitates easier alignment.
Ensure the headboard and footboard are flush with the side rails before proceeding to the next assembly step. Consistent spacing contributes to the overall structural integrity and prevents potential wobbling or instability later on. Careful attention to this detail will save you time and frustration during the final stages of assembly.
M8 Bolt Adjustment – Initial Tightening
When initially connecting the headboard, footboard, and side rails, focus on achieving a snug fit with the M8 bolts (A) – do not fully tighten them at this stage. This is a critical step for allowing flexibility during the assembly process.
The purpose of this initial, partial tightening is to enable adjustments for proper alignment. Over-tightening prematurely can hinder your ability to correct any misalignments between the frame components.
Gradually tighten each bolt a little at a time, alternating between opposite sides to ensure even pressure distribution. This prevents warping or stressing the frame. Remember, the goal is secure connection with room for minor adjustments before the final tightening phase.
Spacing Between Frame Components
During the initial assembly phases, it’s normal – and even desirable – to observe some spacing between the headboard, footboard, and the metal frame components. This gap isn’t a defect; it’s intentionally designed to facilitate easier alignment and adjustment.
This spacing allows for slight movements as you connect the various parts, preventing undue stress on the frame. Don’t attempt to eliminate this gap immediately.
Instead, focus on ensuring all connections are snug but not fully tightened. The gap will naturally diminish as you progress through the assembly and perform the final tightening of all bolts, resulting in a stable and secure bed frame structure.

Troubleshooting Common Issues
Encountering difficulties? This section addresses common assembly problems like alignment issues, missing parts, and squeaking, offering solutions for a hassle-free experience.
Difficulty Aligning Components
If you’re struggling to align the headboard, footboard, and side rails, remember not to fully tighten the M8 bolts (A) initially. This allows for necessary adjustments during the assembly process. Ensure there’s some deliberate spacing between these components – don’t force them together!
Double-check that all parts are oriented correctly, referencing the diagrams in the assembly manual. Sometimes, a simple reversal of a component can resolve alignment issues. Gently apply pressure while maneuvering the pieces into position, avoiding excessive force that could damage the frame. If problems persist, loosen all bolts and begin the connection process again, carefully following each step.

Missing Hardware
Discovering missing hardware can halt assembly, but don’t panic! First, meticulously re-check the packaging and all included boxes – small parts can easily be overlooked. Compare the contents against the hardware checklist provided in the manual to confirm exactly what’s absent;
If a component is genuinely missing, contact Oikiture’s customer support immediately. Have your bed frame model number (BF-B-COTI-KS/D/Q) and a description of the missing part ready. They will typically ship replacements promptly. Avoid using substitute hardware, as this could compromise the bed frame’s structural integrity and void any warranty.
Squeaking Noises After Assembly
Annoying squeaks after assembly often indicate loose connections. Begin by systematically re-tightening all bolts, particularly the M8 bolts used in the headboard and footboard connections. Ensure even pressure while tightening – avoid over-tightening, which can damage the frame.
If squeaking persists, identify the source; Applying a small amount of lubricant (like WD-40) to the joints where metal components connect can often resolve the issue. Check the slats or platform supports, ensuring they are securely in place. Regularly inspect hardware and re-tighten as needed to prevent future squeaks and maintain a quiet, comfortable sleep.

Safety Precautions During Assembly
Prioritize safety! Two-person assembly is recommended, utilizing proper lifting techniques and avoiding over-tightening bolts to prevent damage or injury during setup.
Two-Person Assembly Recommended
Teamwork makes the dream work! Assembling your Oikiture bed frame is significantly easier and safer with two people. Certain components, like the headboard and footboard, can be quite large and unwieldy to manage alone. Having a partner allows for better control during alignment and connection, reducing the risk of accidental drops or strains.
One person can stabilize components while the other secures them with hardware. This collaborative approach minimizes frustration and ensures a more efficient assembly process. Attempting to assemble the bed frame solo could lead to misaligned parts or potential injury. Remember, safety and a smooth setup are paramount – enlist a helping hand!
Proper Lifting Techniques
Protect your back! When handling the various components of your Oikiture bed frame, prioritize proper lifting techniques. Always bend at your knees, keeping your back straight, and avoid twisting while lifting. Maintain a firm grip and keep the load close to your body for better balance and control.
Communicate with your assembly partner to coordinate lifts, ensuring both individuals are prepared before moving any heavy pieces. If a component feels too heavy or awkward to lift safely, ask for assistance or break down the assembly into smaller, more manageable steps. Prioritizing safe lifting prevents injuries and ensures a more pleasant assembly experience.
Avoiding Over-Tightening Bolts
Protect your frame! A common mistake during assembly is over-tightening the bolts, particularly the M8 bolts used in connecting the headboard, footboard, and metal frame. Initially, avoid fully tightening these bolts to allow for necessary adjustments during the assembly process. Over-tightening can strip the threads or damage the frame components.
Instead, tighten the bolts gradually and evenly, checking for proper alignment and stability as you go. Once the entire frame is assembled and aligned correctly, then proceed with the final tightening, ensuring a secure but not excessively forceful connection. This prevents damage and maintains the structural integrity of your Oikiture bed frame.

Post-Assembly Checks and Maintenance
Ensure stability! After assembly, finalize bolt tightening and regularly inspect hardware for looseness; clean the frame with appropriate methods for lasting quality.
Final Tightening of All Bolts
Critical Step: Once the entire bed frame is assembled, and you’ve verified all components are correctly aligned, proceed with the final tightening of all bolts. This is paramount for ensuring the structural integrity and long-term stability of your Oikiture bed frame.
Systematically go around the frame, checking each bolt – including those connecting the side rails, headboard, footboard, and center support beam. Use the appropriate tool (typically an Allen wrench or socket wrench, depending on the bolt type) and apply firm, even pressure.
Avoid over-tightening, as this can strip the threads or damage the frame itself. A snug fit is sufficient. Double-check each bolt to confirm it’s securely fastened. This final tightening step prevents wobbling, squeaking, and potential structural failures down the line, guaranteeing a safe and comfortable sleep experience.
Regular Inspection of Hardware
Maintain Stability: To ensure the continued safety and stability of your Oikiture bed frame, implement a routine inspection schedule for all hardware components. We recommend checking all bolts – those connecting the headboard, footboard, side rails, and center support – at least every three months.
Look for any signs of loosening, stripping, or corrosion. Gently attempt to wiggle each bolt; if there’s movement, tighten it immediately. Pay close attention to areas experiencing higher stress, such as the joints connecting the side rails.
Early detection of loose or damaged hardware prevents more significant issues from developing, extending the lifespan of your bed frame and guaranteeing a secure and comfortable sleep environment. A small amount of preventative maintenance goes a long way!
Cleaning and Care Instructions
Preserving Your Frame: To maintain the beauty and longevity of your Oikiture bed frame, regular cleaning is essential. Dust the frame weekly with a soft, dry cloth to prevent buildup. For more thorough cleaning, use a slightly damp cloth with mild soap, ensuring you wipe dry immediately afterward to avoid water damage.
Avoid abrasive cleaners or harsh chemicals, as these can damage the finish. Periodically check for and remove any debris lodged within the frame’s structure. If you notice any scratches, consider using a furniture touch-up pen matching the frame’s color.
Proper care ensures your Oikiture bed frame remains a stylish and supportive centerpiece in your bedroom for years to come, offering both comfort and aesthetic appeal.

Oikiture Bed Frame Collections & Documentation
Explore Resources: Access all assembly instruction documents online, grouped by collection, for consumer information purposes – enhancing your Oikiture experience!
Accessing Assembly Documents Online
Convenient Digital Access: Oikiture provides readily available assembly documents directly through our online platform. These resources are designed to assist you throughout the setup process, offering clarity and support whenever you need it. Simply navigate to the Oikiture website and locate the “Support” or “Assembly Instructions” section.
From there, you can easily browse and download the specific manual corresponding to your bed frame model – in this case, the BF-B-COTI-KS/D/Q. Documents are categorized by collection for streamlined navigation.
These digital manuals are provided for consumer information, ensuring you have the latest guidance at your fingertips. Having the correct documentation ensures a smooth and efficient assembly, maximizing your satisfaction with your new Oikiture bed frame.
Consumer Information Resources
Dedicated Support: Oikiture is committed to providing comprehensive resources for our customers. Beyond assembly instructions, we offer a wealth of information to enhance your ownership experience. Our website features a detailed FAQ section addressing common queries and troubleshooting tips.
For personalized assistance, our customer support team is readily available via email or phone. We strive to respond promptly and effectively to all inquiries.
Explore our online platform for information on warranty details, care instructions, and additional product documentation. Oikiture’s popular furniture collections cater to diverse tastes, offering stylish solutions for bedrooms, living rooms, and beyond – a piece for everyone!

Prime Big Deal Days & Furniture Discounts
Don’t miss out! Amazon’s Prime Big Deal Days offer substantial savings on Oikiture products, including bed frames, making it the perfect time to buy!
Finding Deals on Oikiture Products
Maximize your savings during Prime Big Deal Days! Begin by visiting Amazon’s website and searching directly for “Oikiture bed frames” or specific model numbers like BF-B-COTI-KS/D/Q. Regularly check the “Today’s Deals” section, as Oikiture products are frequently featured with limited-time discounts.
Utilize price tracking extensions for your browser to monitor price fluctuations and receive alerts when your desired bed frame reaches your target price. Don’t forget to explore lightning deals, which offer significant discounts for a short duration. Consider checking other online retailers besides Amazon, as they may also participate in similar sales events, potentially offering competitive pricing on Oikiture furniture. Remember to compare prices before making a purchase!
Maximizing Savings During Sales Events
Strategic shopping is key! During Prime Big Deal Days, add your desired Oikiture bed frame to your cart before the sale officially begins. This allows for a faster checkout process when discounts are applied. Look for bundled offers – sometimes Oikiture products are sold with complementary items at a reduced price.
Check for available coupons or promotional codes that can be applied at checkout. Don’t hesitate to compare prices across different sizes (King, Queen, Double) as discounts may vary. Be mindful of shipping costs, and consider Amazon Prime for free shipping benefits. Finally, remember that sales events often have limited stock, so act quickly to secure your desired Oikiture bed frame at the best possible price!