Firefighter I Study Guide: Comprehensive Preparation
Preparing for the Firefighter I certification demands a focused approach. Resources like Norman Hall’s guide and practice tests are vital‚ alongside tutorials on computer-based testing – mastering mouse skills and screen navigation is key for success.
Understanding the Firefighter I Certification
The Firefighter I certification represents a crucial first step for individuals aspiring to a career in the fire service. This foundational level equips candidates with the essential knowledge and skills to safely and effectively perform basic firefighting duties. Successful completion demonstrates competency in areas like hazard recognition‚ fire suppression techniques‚ and rescue operations‚ all under supervised conditions;
Achieving this certification isn’t merely about passing an exam; it’s about demonstrating a commitment to public safety and a willingness to adhere to established protocols. The curriculum is designed to build a strong base for future advancement within the fire service hierarchy.
Preparation is paramount. Resources such as comprehensive study guides‚ like those offered by Norman Hall‚ are invaluable. Furthermore‚ understanding the exam format‚ including the computer-based testing (CBT) environment‚ is critical. Familiarity with basic computer operations – mouse usage‚ screen reading‚ and navigating digital exhibits – is now a necessary skill‚ as highlighted by the Department of Citywide Administrative Services tutorials.
Ultimately‚ the Firefighter I certification signifies a dedication to serving the community and a readiness to respond to emergencies with courage and competence.
Exam Overview and Structure
The Firefighter I exam is primarily administered as a Computer-Based Test (CBT). This format necessitates not only a strong grasp of firefighting principles but also proficiency in navigating a digital testing environment. The Department of Citywide Administrative Services provides valuable tutorials specifically designed to familiarize candidates with the CBT interface – covering mouse operation‚ screen interpretation‚ and multimedia exhibit interaction.
Expect a diverse range of question types‚ assessing both theoretical knowledge and practical application. The exam structure typically encompasses multiple-choice questions‚ potentially supplemented by simulations or scenario-based assessments. Thorough preparation using resources like Norman Hall’s Firefighter Exam Preparation book is essential for success.
Focus areas include fire behavior‚ building construction‚ suppression tactics‚ hazardous materials awareness‚ and emergency medical care. A solid understanding of the Incident Command System (ICS) is also crucial. The exam isn’t simply a memorization test; it evaluates your ability to apply learned concepts to real-world firefighting situations.
Prioritize practice tests to build confidence and identify areas needing further study. Mastering the CBT format will significantly reduce test-day anxiety and optimize performance.
Computer-Based Testing (CBT) Familiarization
Success on the Firefighter I exam increasingly hinges on comfort with Computer-Based Testing (CBT). The Department of Citywide Administrative Services recognizes this and offers dedicated tutorials to bridge the digital gap for candidates. These tutorials aren’t merely optional; they are strongly encouraged to ensure you’re not disadvantaged by unfamiliarity with the testing platform.
Key areas covered include mastering the computer mouse‚ accurately interpreting information displayed on the computer screen‚ and effectively interacting with various media formats – videos‚ audio files‚ and visual exhibits. The ability to seamlessly navigate through the exam interface‚ moving between questions and sections‚ is paramount.
Pro Tip: Utilize the full-screen display option (accessed via the icon in the bottom right-hand corner during the tutorial) to replicate the actual exam environment. This immersive experience will minimize surprises on test day.
Don’t underestimate the importance of these skills. Even seasoned firefighters can benefit from a refresher. A confident grasp of the CBT format allows you to focus entirely on the exam content‚ maximizing your chances of success. Practice with the tutorials until you feel completely at ease.
Essential Math Skills for Firefighters
While not explicitly detailed in the provided resources‚ a solid foundation in mathematics is crucial for Firefighter I candidates. The demands of the job require quick and accurate calculations in high-pressure situations. Expect to encounter problems related to hydraulics – calculating pump pressures‚ flow rates‚ and friction loss – all relying on mathematical principles.
Beyond hydraulics‚ firefighters frequently need to perform conversions between units of measurement (gallons to liters‚ feet to meters)‚ determine angles for ladder placement‚ and calculate quantities of foam concentrate needed for fire suppression. Understanding percentages is vital for mixing solutions and assessing fire growth rates.

Furthermore‚ incident command often involves calculating resource needs‚ determining safe zones‚ and estimating time to completion. While the exam may not feature complex equations‚ a strong grasp of basic arithmetic‚ algebra‚ and geometry is essential.
Preparation should include reviewing fundamental mathematical concepts and practicing real-world firefighting scenarios. Resources like study guides often incorporate practice problems‚ but supplementing with dedicated math review materials is highly recommended to ensure competency.
Verbal Ability and Reading Comprehension
Strong verbal skills are paramount for firefighters‚ extending beyond simply communicating with the public. The Firefighter I exam assesses your ability to understand complex written materials‚ interpret technical manuals‚ and follow detailed instructions – crucial for safety protocols and operational procedures.
Reading comprehension is tested through passages relating to firefighting scenarios‚ building construction‚ and hazardous materials. Expect questions that require you to identify main ideas‚ draw inferences‚ and understand the author’s intent. The ability to quickly and accurately process information is vital during emergencies.
Verbal ability also encompasses vocabulary and grammar. Understanding technical terminology and using precise language in reports and communications are essential. Practice exercises focusing on reading speed‚ vocabulary building‚ and identifying grammatical errors will prove beneficial.
Furthermore‚ the exam may include questions assessing your ability to understand and interpret diagrams‚ charts‚ and other visual aids often accompanying written instructions. Dedicated study materials and practice tests will help refine these skills‚ ensuring you’re well-prepared for the verbal challenges.
Fire Science Fundamentals
A solid grasp of fire science is foundational for any aspiring firefighter. This encompasses understanding the chemical processes involved in combustion‚ the properties of fire‚ and the factors influencing fire behavior. The Firefighter I curriculum delves into the fire triangle – fuel‚ oxygen‚ and heat – and how disrupting any element extinguishes a fire.
Key concepts include the different states of matter and how they relate to fire development‚ heat transfer mechanisms (conduction‚ convection‚ and radiation)‚ and the various products of combustion – smoke‚ gases‚ and particulate matter. Understanding these fundamentals is crucial for predicting fire spread and implementing effective suppression strategies.
Furthermore‚ you’ll need to learn about different types of fires (Class A‚ B‚ C‚ D‚ and K) and the appropriate extinguishing agents for each. This knowledge informs tactical decisions and ensures firefighter safety. Studying the principles of fire dynamics and the impact of ventilation on fire behavior is also essential.
Mastering these core scientific principles provides the basis for understanding more complex topics like fire behavior and building construction‚ ultimately leading to more informed and effective firefighting practices.
Fire Behavior and Combustion
Understanding fire behavior is paramount for firefighter safety and effective incident management. This goes beyond the fire triangle‚ exploring how fuel characteristics‚ ventilation‚ and building construction influence fire development. The Firefighter I curriculum emphasizes recognizing the stages of fire growth: incipient‚ growth‚ fully developed‚ and decay.
Key concepts include flame spread‚ heat release rate‚ and smoke production. Learning to identify indicators of fire behavior – such as smoke color and volume – allows for accurate size-up and prediction of fire spread. Understanding how different materials contribute to fuel load and combustion products is also vital.
Ventilation’s impact is significant; coordinated ventilation can improve visibility and facilitate fire suppression‚ but improper ventilation can accelerate fire growth. Recognizing fire patterns and their implications for origin and cause determination is another crucial skill.
Furthermore‚ firefighters must understand the principles of thermal layering and the potential for flashover and backdraft – rapid fire events posing extreme danger. A thorough understanding of these concepts enables informed decision-making and proactive safety measures.
Building Construction Basics
A solid grasp of building construction is essential for firefighter safety and operational effectiveness. Firefighter I training introduces common construction types – wood frame‚ heavy timber‚ masonry‚ and steel – and their inherent fire resistance characteristics. Understanding how buildings are assembled dictates fire behavior and potential collapse hazards;
Key areas of focus include building components like walls‚ floors‚ and roofs‚ and their ability to withstand fire exposure. Recognizing the purpose of structural elements – load-bearing walls‚ beams‚ and columns – is crucial for assessing stability; Firefighters learn to identify potential collapse indicators‚ such as sagging roofs and cracked walls.
Different construction materials react differently to fire; wood chars‚ steel loses strength at high temperatures‚ and masonry can spall. Understanding these reactions informs tactical decisions. The impact of concealed spaces – voids in walls and ceilings – on fire spread is also emphasized.
Furthermore‚ firefighters must learn to interpret building plans and identify key features like firewalls and stairwells. This knowledge allows for safer and more efficient search and rescue operations‚ as well as effective fire suppression strategies.
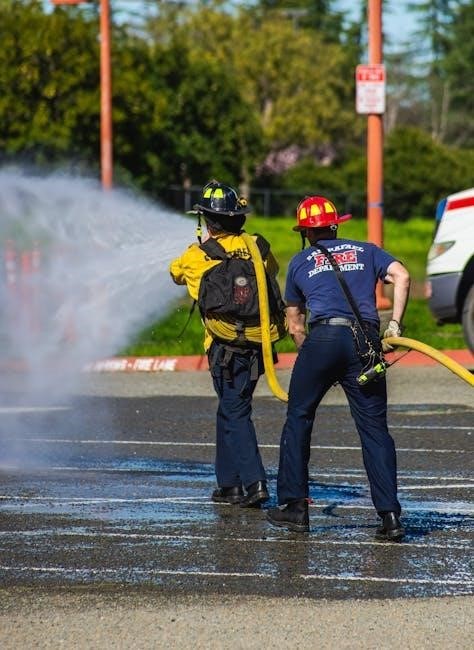
Fire Suppression Tactics and Strategies
Effective fire suppression relies on a systematic approach and understanding core tactics. Firefighter I training emphasizes the principles of fire stream application – reach‚ pattern‚ and volume – tailored to different fire scenarios. Initial attack lines‚ forward and reverse lays‚ and relay pumping are fundamental skills.
Tactical considerations include fire behavior‚ building construction‚ and potential hazards. Firefighters learn to assess the fire’s location‚ size‚ and rate of growth to determine the appropriate strategy. Ventilation‚ both natural and mechanical‚ plays a critical role in controlling fire spread and improving visibility.
Search and rescue is paramount; firefighters are trained in primary and secondary search techniques to locate and remove occupants. Coordinated teamwork and clear communication are essential for safe and effective operations. Establishing a water supply and maintaining situational awareness are ongoing priorities.
Furthermore‚ firefighters learn to utilize different extinguishing agents – water‚ foam‚ and dry chemical – based on the fire type and circumstances. Understanding the limitations of each agent is crucial for achieving effective suppression and preventing re-flash.
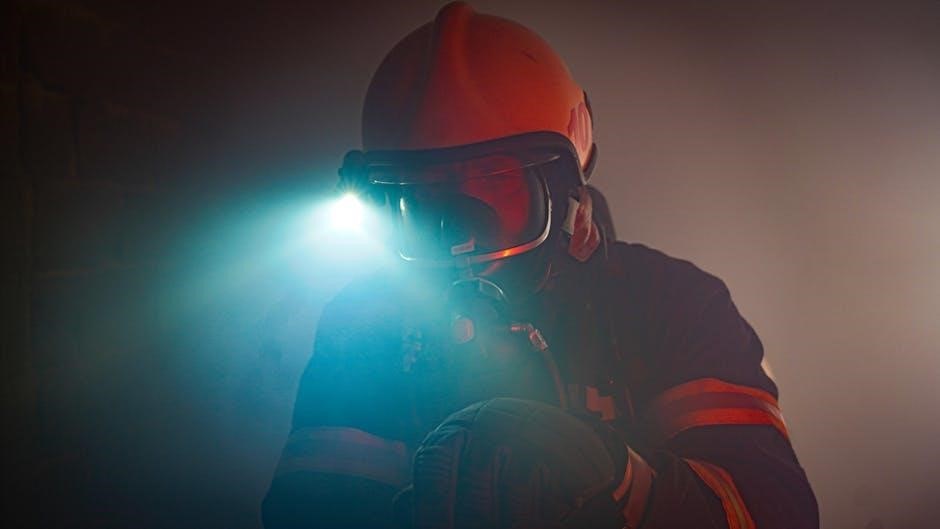
Personal Protective Equipment (PPE)
Personal Protective Equipment (PPE) is the cornerstone of firefighter safety. Firefighter I training places significant emphasis on the proper selection‚ use‚ and maintenance of all PPE components; This includes the helmet‚ coat‚ trousers‚ boots‚ gloves‚ and eye protection‚ all designed to withstand extreme heat‚ flames‚ and physical hazards.
Understanding the limitations of PPE is crucial. While providing substantial protection‚ it doesn’t eliminate all risks. Regular inspection for damage – tears‚ burns‚ or compromised materials – is mandatory before and after each use. Proper cleaning and decontamination are essential to remove contaminants and maintain PPE effectiveness.
Donning and doffing procedures are strictly followed to prevent contamination and ensure a proper seal. Firefighters learn to perform a comprehensive self-check and buddy check to verify all components are correctly in place. Proper sizing and adjustment are vital for freedom of movement and optimal protection.
Furthermore‚ training covers the importance of wearing all PPE during live fire exercises and actual emergencies‚ reinforcing the habit of complete protection. PPE is a critical investment in firefighter wellbeing and must be treated with respect.
Respiratory Protection Program
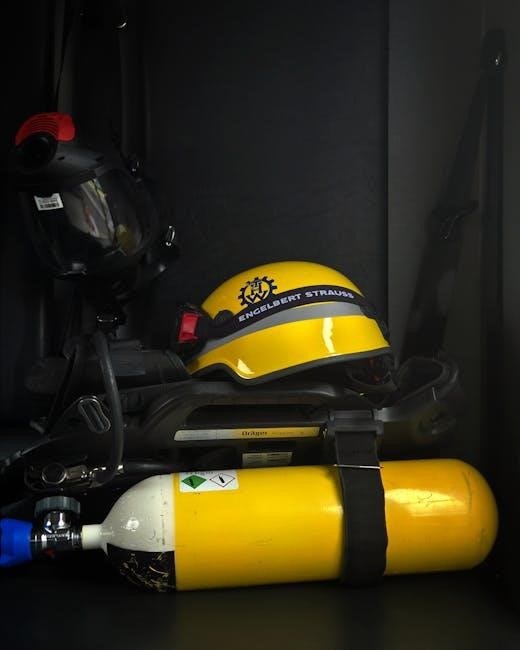
A comprehensive Respiratory Protection Program is paramount for firefighter safety‚ addressing the inherent dangers of smoke inhalation and exposure to hazardous gases during fire incidents. Firefighter I training dedicates substantial time to understanding the principles of respiratory protection and the proper use of Self-Contained Breathing Apparatus (SCBA).
The program encompasses several key elements: medical evaluation to ensure fitness for SCBA use‚ proper fit testing to guarantee a secure facepiece seal‚ and thorough training on SCBA operation‚ maintenance‚ and limitations. Firefighters learn to recognize signs of SCBA malfunction and emergency procedures for rapid intervention.
Understanding the hazards of Immediately Dangerous to Life or Health (IDLH) atmospheres is critical. SCBA provides the only reliable means of protection in these environments. Regular practice drills‚ including simulated emergency scenarios‚ reinforce proper SCBA donning‚ doffing‚ and usage techniques.
Moreover‚ the program emphasizes the importance of air management‚ conserving air supply during prolonged operations. Consistent adherence to the Respiratory Protection Program is non-negotiable‚ safeguarding firefighters from long-term health risks.
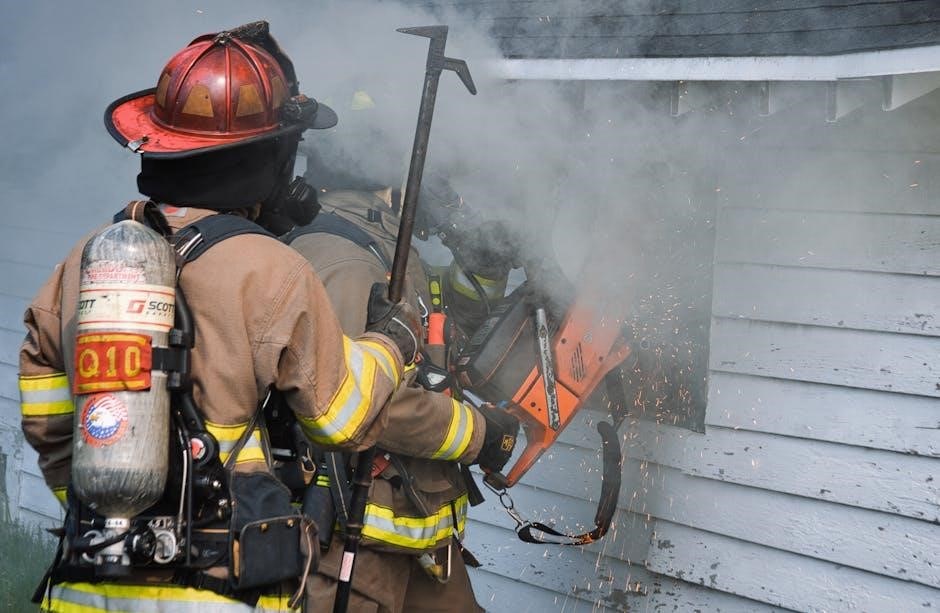
Firefighter Tools and Equipment
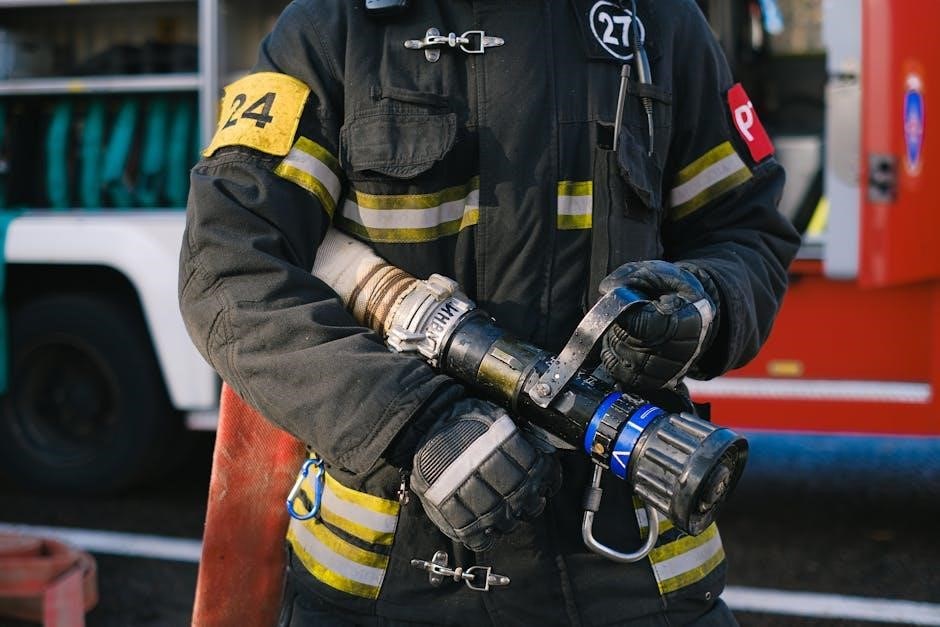
Proficiency with firefighter tools and equipment is fundamental to effective fireground operations. The Firefighter I curriculum provides extensive hands-on training‚ ensuring competency in the use of both hand tools and power equipment. This includes mastering the operation and limitations of each piece of gear.
Essential tools covered include: forcible entry tools like halligan bars and axes‚ ventilation equipment such as fans and saws‚ hose appliances for controlling water flow‚ and salvage tools for protecting property. Firefighters learn proper techniques for tool maintenance‚ inspection‚ and safe handling.
Understanding the purpose and application of each tool is crucial. For example‚ firefighters must know how to effectively use a halligan bar for door breaching and a ventilation fan to remove smoke and heat. They also learn about specialized equipment like thermal imaging cameras for locating victims in low-visibility conditions.
Regular drills and scenario-based training reinforce tool proficiency and promote teamwork. Proper tool selection and utilization are vital for a safe and successful fireground operation‚ minimizing risks to both firefighters and civilians.
Hazardous Materials Awareness
Firefighter I training incorporates a crucial component: hazardous materials awareness. While not requiring a full HazMat Technician certification‚ the curriculum equips firefighters to recognize‚ identify‚ and initially respond to incidents involving hazardous substances. This awareness is paramount for scene safety and protecting responders.
Key areas of focus include: understanding the different classes of hazardous materials‚ recognizing placards and labels on transport vehicles‚ and identifying potential hazards based on shipping papers. Firefighters learn to approach suspected HazMat incidents with caution‚ establishing safe zones and initiating appropriate notifications.
The training emphasizes the importance of the Emergency Response Guidebook (ERG)‚ a vital resource for quickly identifying hazards and recommended actions. Firefighters learn to interpret the ERG’s coding system and utilize it to determine initial isolation distances and protective measures.
Initial scene size-up is critical. Recognizing leaking containers‚ unusual odors‚ or sick/injured individuals are all indicators of a potential HazMat situation. Firefighters are trained to avoid direct contact and prioritize life safety while awaiting the arrival of specialized HazMat teams.
Emergency Medical Care – Basic First Aid
A foundational element of Firefighter I training is emergency medical care‚ specifically basic first aid. While not intended to create Emergency Medical Technicians (EMTs)‚ this component provides firefighters with the skills to provide immediate assistance to injured individuals until advanced medical personnel arrive.
Core competencies include: patient assessment‚ controlling bleeding‚ treating burns‚ splinting fractures‚ and managing shock. Firefighters learn to establish and maintain a clear airway‚ administer oxygen (if trained and authorized)‚ and provide basic life support measures.
Training emphasizes the importance of scene safety and utilizing appropriate personal protective equipment (PPE) when providing medical care. Firefighters are taught to follow standard precautions to minimize the risk of exposure to infectious diseases.
Understanding medical-legal considerations is also crucial. Firefighters learn about consent‚ confidentiality‚ and documentation requirements. They are trained to work effectively as part of a team‚ communicating effectively with dispatchers‚ EMTs‚ and other responders to ensure optimal patient care.
Incident Command System (ICS) Overview

A critical component of Firefighter I training is a thorough understanding of the Incident Command System (ICS). ICS is a standardized‚ on-scene‚ all-hazard incident management concept designed to enable effective and efficient incident operations.
Firefighters learn the core principles of ICS‚ including the roles and responsibilities of key positions like Incident Commander‚ Operations Section Chief‚ and Planning Section Chief. They’ll understand the importance of establishing a clear chain of command and maintaining effective communications.
ICS emphasizes the use of common terminology to avoid confusion and ensure interoperability between different agencies. Firefighters are taught how to develop Incident Action Plans (IAPs) that outline objectives‚ strategies‚ and tactics for managing an incident.
The system promotes a collaborative approach to incident management‚ fostering teamwork and coordination among responders. Understanding ICS is vital for ensuring a safe and effective response to any emergency‚ from small-scale incidents to large-scale disasters.
Firefighter Physical Fitness
Maintaining a high level of physical fitness is non-negotiable for aspiring firefighters. The demands of the job require strength‚ endurance‚ agility‚ and cardiovascular health. Firefighter I training emphasizes the importance of a comprehensive fitness regimen.
Candidates must prepare for physically challenging tasks such as carrying heavy equipment‚ climbing stairs while wearing gear‚ performing rescues‚ and working in extreme conditions. Training programs focus on exercises that mimic these real-world scenarios.
Resources like “Firefighter Functional Fitness” provide essential guidance on optimal performance and longevity. This includes strength training‚ cardiovascular workouts‚ and flexibility exercises tailored to the specific needs of firefighters.
Physical agility tests are a standard part of the selection process‚ assessing a candidate’s ability to perform essential job functions. Consistent training and dedication to fitness are crucial for success in the academy and throughout a firefighter’s career.
Study Resources and Practice Tests
Effective preparation for the Firefighter I exam relies heavily on utilizing available study resources and practice tests. A comprehensive study guide‚ such as Norman Hall’s “Firefighter Exam Preparation‚” is invaluable‚ offering detailed content review and proven strategies.
Practice tests are essential for familiarizing yourself with the exam format and identifying areas needing improvement. These tests simulate the actual exam environment‚ helping to build confidence and reduce test anxiety.
Numerous resources offer practice questions‚ ranging from general firefighter exams to those specifically tailored to the Firefighter I certification. Supplementing core study materials with these tests is highly recommended.
Online platforms and study groups can also provide valuable support‚ offering opportunities to collaborate with other candidates and access additional practice materials. Remember to prioritize resources aligned with the exam’s content outline and focus on consistent‚ focused study sessions.
Norman Hall’s Firefighter Exam Preparation
Norman Hall’s “Firefighter Exam Preparation” book stands as a cornerstone resource for aspiring firefighters. This comprehensive guide‚ identified by ISBN 9781580629324 and available on Amazon.com‚ is designed to thoroughly prepare candidates for the demands of the Firefighter I certification exam.
The book’s strength lies in its complete coverage of essential topics‚ coupled with a wealth of practice questions. It doesn’t just present information; it equips students with proven strategies and confidence-boosting techniques to maximize their performance.
Hall’s approach extends beyond the core exam content‚ incorporating elements of functional fitness – recognizing the importance of physical preparedness for a firefighter’s career. This holistic perspective sets it apart from other study materials.
Furthermore‚ the book often includes practice tests and study plans‚ helping candidates structure their preparation effectively. It’s a highly recommended resource for anyone serious about achieving success on the Firefighter I exam and building a solid foundation for their firefighting journey.