canon digital rebel xt manual

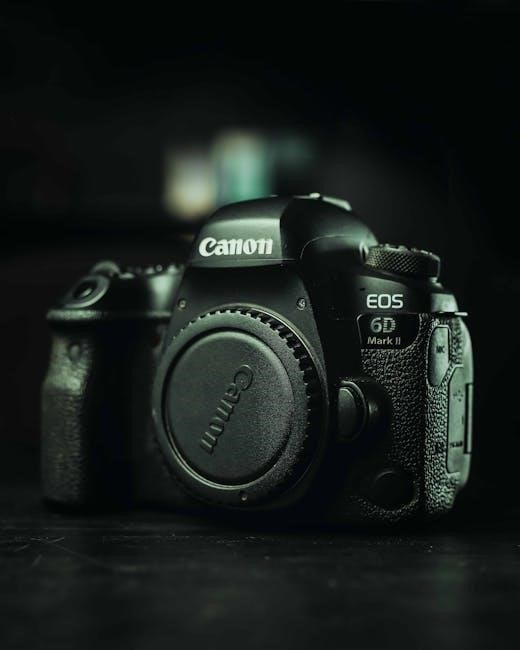
The Canon Digital Rebel XT, released in 2005, is a high-performance DSLR camera featuring an 8․0-megapixel CMOS sensor and EF-S lens compatibility․ Popular among photography enthusiasts, it offers versatile shooting modes and user-friendly design, making it an excellent choice for both beginners and advanced photographers․

1․1 Overview of the Camera and Its Importance

The Canon Digital Rebel XT, introduced in 2005, marked a significant step in DSLR technology, offering an 8․0-megapixel CMOS sensor and EF-S lens compatibility․ Its compact design and intuitive interface made it accessible to both beginners and professionals․ The camera’s versatility in shooting modes and compatibility with a wide range of lenses solidified its importance in the photography world, making it a popular choice for capturing high-quality images with ease and precision․

1․2 Key Features of the Canon Digital Rebel XT

The Canon Digital Rebel XT boasts an 8․0-megapixel CMOS sensor, delivering high-resolution images with excellent detail․ It features the EF-S lens mount, expanding compatibility with a wide range of Canon lenses․ The camera offers various shooting modes, including manual and automatic options, catering to both beginners and advanced users․ Additionally, it supports custom functions, enabling personalized settings for enhanced creativity․ Its compact design, fast shutter speed, and compatibility with memory cards like CF/MD ensure versatility and efficiency, making it a reliable choice for photographers․

Understanding the Canon Digital Rebel XT Manual

The Canon Digital Rebel XT manual provides detailed guidance on camera setup, shooting modes, and troubleshooting․ It covers features, customization options, and maintenance tips, ensuring optimal performance․

2․1 Structure and Content of the Manual

The Canon Digital Rebel XT manual is a comprehensive guide structured to help users master the camera’s features․ It begins with an overview of the camera’s components and setup, followed by detailed explanations of shooting modes, customization options, and troubleshooting․ The manual also covers technical specifications, maintenance tips, and software updates․ Appendices provide quick references and error solutions, ensuring users can optimize their photography experience effectively․

2․2 How to Navigate the Manual Effectively

To navigate the Canon Digital Rebel XT manual effectively, start with the table of contents for quick access to specific topics․ Use the index to locate detailed explanations of features like shooting modes or custom functions․ Begin with the setup guide for initial configurations, then explore sections on advanced features such as white balance and autofocus․ Visual aids like diagrams and charts help clarify complex settings․ Always refer to the troubleshooting section for resolving common errors and updating firmware․ Regularly review the appendices for quick references and error solutions․ This structured approach ensures you maximize the camera’s potential and enhance your photography skills․

Key Features and Specifications

The Canon Digital Rebel XT features an 8․0-megapixel CMOS sensor, EF-S lens compatibility, and various shooting modes․ It supports custom functions and offers versatile photography options․

3․1 8․0-Megapixel CMOS Sensor

The Canon Digital Rebel XT is equipped with an 8․0-megapixel CMOS sensor, delivering high-resolution images with excellent detail and color accuracy․ This sensor ensures crisp and vibrant photos, even in challenging lighting conditions․ Its high sensitivity allows for effective low-light photography, making it suitable for a wide range of shooting scenarios․ The CMOS technology also contributes to efficient power consumption, enhancing battery life during extended use․

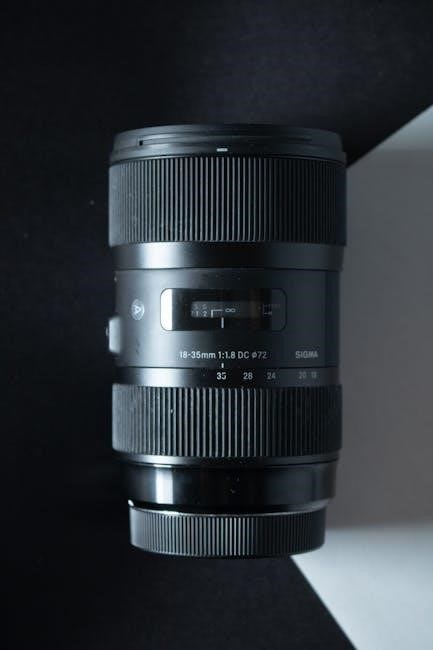
3․2 Canon EF-S Lens Mount Compatibility

The Canon Digital Rebel XT features an EF-S lens mount, ensuring compatibility with Canon’s extensive range of EF-S and EF lenses․ This versatility allows photographers to explore various focal lengths and specialized optics, from wide-angle to telephoto and macro lenses․ The EF-S mount is designed to optimize lens performance for the APS-C sensor size, providing enhanced image quality and creative flexibility for both amateur and professional photographers․ This compatibility expands the camera’s potential for diverse shooting scenarios․

3․3 Shooting Modes and Custom Functions

The Canon Digital Rebel XT offers a variety of shooting modes, including Auto, Manual, Aperture Priority (AV), Shutter Priority (TV), and Program (P), catering to both beginners and advanced users․ Custom functions allow photographers to tailor settings to their preferences, such as ISO, autofocus, and metering modes․ The camera also features six custom functions, enabling precise control over image capture, ensuring versatility and personalized shooting experiences for diverse photography needs and styles․

Setting Up the Camera

The Canon Digital Rebel XT requires initial setup, including inserting the battery, attaching the lens, and formatting the memory card․ Follow on-screen instructions to set the date, time, and language, ensuring proper camera functionality․ Review settings to confirm everything is correctly configured for optimal performance․

4․1 Initial Setup and Configuration

Insert the battery and memory card, ensuring they are securely locked in place․ Attach the lens by aligning the mount and turning clockwise until it clicks․ Turn the camera on and select your language, date, and time using the LCD screen․ Navigate through the menu to set additional preferences, such as image quality and autofocus options․ Refer to the manual for detailed guidance on configuring these settings to optimize your camera’s performance․ Proper setup ensures a smooth shooting experience․

4․2 Charging and Battery Management

Insert the NB-2LH battery into the charger, ensuring it aligns with the contacts․ Charge until the indicator turns green, typically taking 90-120 minutes․ Avoid using third-party batteries to prevent damage․ Store the battery in a cool, dry place when not in use․ For optimal performance, avoid fully depleting the battery before recharging․ Proper charging and storage extend the battery’s lifespan and ensure reliable camera operation․ Always use Canon-approved chargers for safety․

4․3 Memory Card Selection and Formatting

Use a compatible CompactFlash (CF) card with the Canon Digital Rebel XT․ Select a card with sufficient storage capacity based on your needs․ Before first use, format the memory card in the camera to ensure proper operation․ Formatting deletes all data, so transfer important files to a computer beforehand․ Regular formatting helps maintain card performance and prevents errors․ Always use a compatible CF card to avoid issues during shooting;

Shooting Modes and Techniques

The Canon Digital Rebel XT offers various shooting modes, from Auto to Manual, catering to both beginners and advanced photographers․ Explore techniques to enhance your photography skills and adapt to different scenarios with customizable settings․

5․1 Auto Mode for Beginners

The Canon Digital Rebel XT’s Auto Mode is designed for beginners, simplifying photography by automatically adjusting settings like exposure, focus, and white balance․ This mode allows users to focus on composition and creativity without worrying about technical details․ It’s ideal for those new to DSLR cameras, providing point-and-shoot convenience while delivering high-quality images․ The camera’s advanced sensor ensures sharp, detailed photos, making it a great starting point for learning photography fundamentals․

5․2 Manual Mode for Advanced Users

Manual Mode on the Canon Digital Rebel XT offers advanced users full control over camera settings, enabling precise adjustments to aperture, shutter speed, ISO, and white balance․ This mode is ideal for those who want to explore creative photography techniques, such as depth of field manipulation or low-light shooting․ With manual control, users can achieve customized results tailored to their artistic vision, making it a powerful tool for refining photographic skills and capturing unique moments․

5․3 Customizing Shooting Settings

Customizing shooting settings on the Canon Digital Rebel XT allows users to tailor the camera to their preferences․ Through the menu system, photographers can adjust exposure compensation, white balance, and focusing modes․ Custom Functions enable advanced tweaks, such as adjusting the behavior of autofocus or metering․ These features empower users to personalize their shooting experience, ensuring optimal results in various lighting conditions and creative scenarios․ This level of customization caters to both novice and experienced photographers․

Advanced Features and Functions

The Canon Digital Rebel XT offers advanced features like White Balance, ISO settings, and Autofocus modes, allowing precise control over imaging․ Flash and external lighting options enhance versatility․

6․1 White Balance and ISO Settings

The Canon Digital Rebel XT allows precise control over White Balance and ISO settings to enhance image quality․ White Balance ensures accurate color representation in various lighting conditions, with options like Auto, Daylight, Shade, and Tungsten․ The ISO range (100-1600) adjusts sensitivity for low-light shooting․ Lower ISOs reduce noise, while higher settings enable shooting in dim environments․ These features provide flexibility for capturing vibrant, detailed images in diverse situations, making the camera versatile for creative photography․

6․2 Autofocus and Metering Modes

The Canon Digital Rebel XT features a 7-point autofocus system for precise subject tracking and sharp images․ It offers One-Shot AF for stationary subjects and AI Servo AF for moving objects․ The camera also includes 35-zone evaluative metering for balanced exposures․ Users can choose between Evaluative, Center-Weighted, and Partial metering modes to suit their shooting needs․ These features ensure accurate focus and exposure, delivering high-quality results in various photography scenarios․

6․3 Using Flash and External Lighting

The Canon Digital Rebel XT features a built-in flash for low-light conditions and supports external Speedlite flashes like the 580EX II․ The camera offers red-eye reduction and flash exposure compensation․ When using external lighting, the E-TTL II autoflash system ensures accurate flash metering․ For optimal results, sync the flash with the camera’s shutter speed and adjust settings to avoid overexposure․ Proper use of flash and external lighting enhances image quality in challenging lighting scenarios․

Maintenance and Troubleshooting

Regularly clean the sensor and lens to maintain image quality․ Refer to the manual for troubleshooting common errors and updating firmware for optimal performance․

7․1 Cleaning the Sensor and Lens

Regular cleaning of the sensor and lens is essential for maintaining image quality․ Use a soft, dry brush or microfiber cloth to remove dust․ For stubborn smudges, apply a few drops of cleaning solution to the cloth, not the lens․ Avoid harsh chemicals or tissues, as they may scratch the surface․ Refer to the manual for detailed cleaning guidelines to ensure optimal camera performance and prevent damage․ Proper maintenance ensures sharper, clearer photos․

7․2 Resolving Common Errors and Issues

Common issues with the Canon Digital Rebel XT include error messages like “Error 99” and connectivity problems․ Check camera settings, clean the sensor, and ensure proper lens alignment․ For connection errors, verify cable compatibility and restart the camera․ Refer to the manual for troubleshooting guides or update firmware to resolve software-related issues․ Regular maintenance and firmware updates help prevent errors and ensure smooth operation․ Always follow Canon’s recommended procedures to avoid further complications․

7․3 Updating Firmware and Software

Updating the Canon Digital Rebel XT’s firmware and software ensures optimal performance and fixes issues․ Download the latest firmware from Canon’s official website, ensuring compatibility with your camera model․ Use a fully charged battery and avoid interruptions during the update․ Follow the step-by-step instructions in the manual or Canon’s support page to complete the process successfully․ Regular updates enhance functionality and maintain camera efficiency․

Downloading and Accessing the Manual

The Canon Digital Rebel XT manual is available for free download as a PDF from Canon’s official website․ It provides detailed guidance for optimal camera use․

8․1 Official Canon Website and Resources

The official Canon website offers comprehensive resources for the Digital Rebel XT, including the user manual, drivers, and software updates․ Users can easily navigate to the support section, search for their camera model, and download the necessary files․ The manual is provided in PDF format, ensuring accessibility across various devices․ Additionally, Canon’s website features troubleshooting guides and FAQs to assist users in resolving common issues and optimizing their camera’s performance․

8․2 PDF Download and Viewing Tips

Download the Canon Digital Rebel XT manual from the official Canon website as a PDF file․ Ensure you use Adobe Acrobat Reader for optimal viewing․ A “COPY” watermark may appear when opened with Reader 5․x or later versions․ Printing the manual will also include this watermark․ Save the PDF to your device for easy access and reference․ This format allows you to navigate and search the document effortlessly, ensuring a smooth user experience․

honeywell pro series thermostat install manual

The Honeywell Pro Series Thermostat offers a user-friendly interface and advanced features for optimal temperature control. Designed for energy efficiency, it supports smart home integration and is compatible with various HVAC systems.

Overview of Features and Benefits

The Honeywell Pro Series Thermostat offers a user-friendly interface, programmable scheduling, and energy-saving modes. It features a backlit keypad for easy navigation and compatibility with various HVAC systems. The thermostat supports Wi-Fi connectivity for smart home integration, allowing remote temperature control via smartphone apps. Its adaptive learning capabilities optimize heating and cooling cycles, enhancing efficiency and comfort while reducing energy consumption.

Why Choose the Honeywell Pro Series?

The Honeywell Pro Series Thermostat is a top choice for its user-friendly design, energy-saving features, and seamless smart home integration. It offers advanced programmability, adaptive learning, and compatibility with various HVAC systems. With Wi-Fi connectivity, remote access, and a clear digital display, it provides unmatched convenience and efficiency, making it an excellent option for modern homes seeking comfort and energy savings.

Downloading the Honeywell Pro Series Thermostat Manual

The Honeywell Pro Series Thermostat manual is essential for proper installation, configuration, and troubleshooting; Visit the Honeywell Home website, navigate to Support, and download the PDF guide for your specific model.

Importance of the Manual for Installation and Setup

The Honeywell Pro Series Thermostat manual is crucial for successful installation and setup. It provides detailed, step-by-step instructions tailored to your specific model, ensuring proper wiring and configuration. The guide includes troubleshooting tips and essential information for optimizing performance, making it indispensable for both DIY enthusiasts and professionals to achieve efficient and reliable operation.

Step-by-Step Guide to Downloading the PDF Manual

To download the Honeywell Pro Series Thermostat manual, visit the official Honeywell Home website. Navigate to the Support section and select “Product Manuals.” Enter your thermostat model number, such as T6 Pro or T4 Pro. Verify the download by ensuring the file is labeled for your specific model. This ensures you receive accurate instructions for installation and setup.

Key Sections of the Manual

The Honeywell Pro Series manual includes essential sections like installation instructions, wiring diagrams, and programming guides. It also covers troubleshooting tips, energy-saving features, and Wi-Fi setup. Detailed diagrams ensure clarity, while step-by-step guides simplify the setup process. This comprehensive resource helps users optimize their thermostat’s performance and integrate it seamlessly with smart home systems for enhanced convenience and efficiency.

Honeywell Pro Series Thermostat System Compatibility

The Honeywell Pro Series Thermostat is compatible with most HVAC systems, including gas, oil, electric, heat pumps, and multi-stage systems. It also supports Wi-Fi and smart home integration.

Compatible HVAC Systems

The Honeywell Pro Series Thermostat is designed to work seamlessly with a variety of HVAC systems, including gas, oil, electric, and heat pump configurations. It is also compatible with single-stage and multi-stage heating and cooling systems, ensuring flexibility for different home setups. This versatility makes it a reliable choice for homeowners with diverse heating and cooling needs.

Wi-Fi and Smart Home Integration

The Honeywell Pro Series Thermostat features Wi-Fi connectivity, enabling remote control through smartphone apps like Honeywell Home and Total Connect Comfort. It seamlessly integrates with smart home systems, allowing users to adjust settings, monitor energy usage, and receive alerts. This integration enhances convenience and energy efficiency, making it a modern solution for smart home environments.

Tools and Materials Needed for Installation

Essential tools include a screwdriver, drill, and wire strippers. Additional materials like anchors, screws, and a level ensure secure installation of your Honeywell Pro Series Thermostat.

Essential Tools Required

A screwdriver, drill, and wire strippers are necessary for installation. Additionally, pliers and a voltage tester are recommended to ensure safe and proper wiring of your Honeywell Pro Series Thermostat.

Additional Materials for a Secure Installation

Wall anchors, screws, and a level ensure proper mounting. Insulation for wires and a voltage tester prevent electrical issues. The UWP mounting system and decorative cover plate, included in the package, enhance installation security and provide a polished finish.

Step-by-Step Installation Guide

Start by turning off power to your HVAC system. Remove the old thermostat, then connect wires to the new Honeywell Pro Series Thermostat, ensuring correct wiring.

Pre-Installation Checks

Before installing your Honeywell Pro Series Thermostat, ensure the power to your HVAC system is turned off. Verify compatibility with your HVAC system type, such as gas, oil, or heat pump. Gather all necessary tools and materials, including a screwdriver and batteries. Review the manual to understand system requirements and safety precautions. Ensure the thermostat’s wiring matches your system’s configuration for a smooth setup process.

Wiring and Mounting the Thermostat

Mount the thermostat base to the wall using the provided screws and anchors. Connect the wires according to the wiring diagram in the manual, ensuring correct terminal assignments. Secure the thermostat faceplate to the base, and insert the batteries. Double-check all connections for accuracy and safety before restoring power to the system to ensure proper functionality.

Powering the Thermostat

Connect the thermostat to your HVAC system’s wiring, ensuring compatibility with your specific model. Insert 2 AA batteries for backup power or hardwire directly for continuous operation. Turn off the furnace or HVAC system before connecting to avoid damage. Follow the manual’s wiring diagram to ensure correct power connections and safe installation. Verify power status after setup.

Final Installation Checks

After installation, turn on your HVAC system and verify proper operation. Check the thermostat display for accurate temperature readings and ensure all buttons function correctly. Test the schedule settings and energy-saving modes. Confirm wiring connections are secure and test Wi-Fi connectivity if applicable. Ensure the thermostat powers on and responds to adjustments. Review the manual for any final setup steps.

Programming Your Honeywell Pro Series Thermostat

Program daily and weekly schedules to optimize heating and cooling. Utilize energy-saving modes to reduce consumption without compromising comfort.

Setting Up Daily and Weekly Schedules

Set custom temperature schedules for your Honeywell Pro Series Thermostat to optimize comfort and energy use. Program daily and weekly settings via the touchscreen or app. Choose specific times for heating and cooling cycles, ensuring energy efficiency. The thermostat allows flexibility for unique weekday and weekend plans, adapting to your lifestyle seamlessly.

Understanding Energy-Saving Modes

The Honeywell Pro Series Thermostat features energy-saving modes that adapt to your system’s performance. These modes optimize heating and cooling cycles to reduce energy consumption. The thermostat learns your home’s thermal characteristics, adjusting operations to maintain comfort while minimizing waste. Smart features like adaptive recovery ensure efficient temperature control, helping you save energy without sacrificing convenience or performance.

Connecting to Wi-Fi and Smart Home Integration

The Honeywell Pro Series Thermostat seamlessly connects to Wi-Fi, enabling remote control via smartphone apps like Honeywell Home. It integrates with smart home systems, ensuring voice command compatibility and enhanced energy tracking for optimal performance.

Setting Up Wi-Fi Connectivity

Seamlessly connect your Honeywell Pro Series Thermostat to Wi-Fi by downloading the Honeywell Lyric app. Open the app, select your thermostat model, and follow the in-app instructions to link it to your network. Ensure your thermostat is in setup mode and enter your Wi-Fi password when prompted. If issues arise, reset the thermostat or check your network settings for troubleshooting.

Integrating with Smart Home Systems

The Honeywell Pro Series Thermostat seamlessly integrates with smart home systems like Amazon Alexa and Google Assistant, enabling voice control. Use the Honeywell Home app to connect your thermostat to your smart home network. This integration allows remote temperature adjustments and energy tracking. For setup, enable the Honeywell skill in your smart home app and link your account for enhanced functionality and convenience.

Troubleshooting Common Issues

The Honeywell Pro Series Thermostat may face connectivity or display issues. Use the Honeywell Home app for diagnostics and software updates to resolve these problems quickly.

Resolving Connectivity Problems

  • Restart your router and ensure stable internet connection.
  • Check if the thermostat is connected to the correct Wi-Fi network.
  • Use the Honeywell Home app to diagnose and resolve connectivity issues.
  • Reset the thermostat by removing batteries or powering it off temporarily.
  • Ensure firmware is updated to the latest version for optimal performance.

Addressing Display or Sensor Issues

Check for loose connections or power issues causing display problems. Clean the screen gently with a soft cloth. Calibrate sensors if temperature readings are inaccurate. Ensure proper installation of sensors for accurate data. Reset the thermostat by removing batteries or cycling power. If issues persist, update firmware or contact Honeywell support for assistance. Always refer to the manual for detailed troubleshooting steps.

FAQs About the Honeywell Pro Series Thermostat

  • Q: Is it compatible with all HVAC systems? A: Yes, it works with most standard systems, including heat pumps and multi-stage units.
  • Q: Can I install it myself? A: Yes, with basic wiring knowledge and the manual’s guidance.
  • Q: Does it support smart home integration? A: Yes, it integrates with systems like Honeywell Home for remote control.

Frequently Asked Questions

Q: Is the Honeywell Pro Series Thermostat compatible with all HVAC systems?
A: Yes, it supports most standard systems, including single-stage, multi-stage, heat pumps, and gas or oil systems.

Q: Do I need professional help to install the thermostat?
A: No, installation is DIY-friendly with basic wiring knowledge and the manual’s step-by-step guide.

Q: How often should I update the thermostat’s software?
A: Check for updates every few months or enable automatic updates through the Honeywell Home app.

Q: Can the thermostat be controlled remotely?
A: Yes, through the Honeywell Home app, allowing users to adjust settings from their smartphone.

Q: Does it require a C-wire for installation?
A: Some models may require a C-wire, while others are battery-powered, depending on the specific Honeywell Pro Series model.

Clarifying Common Misconceptions

Some believe the Honeywell Pro Series Thermostat is overly complex to install, but it’s designed for DIY installation with clear manual guidance. Another myth is that it requires a C-wire for all models, though some are battery-powered. Additionally, many think it’s incompatible with older HVAC systems, but it supports most standard systems, including single-stage and multi-stage setups.

Regularly update your Honeywell Pro Series Thermostat for optimal performance. Ensure proper installation and follow manual guidelines to maximize energy efficiency and comfort. Check batteries annually.

Best Practices for Maintenance

Regular maintenance ensures your Honeywell Pro Series Thermostat performs optimally. Check and replace batteries annually, clean the display, and update software periodically. Inspect wiring connections and ensure proper installation. Schedule regular system checks to maintain energy efficiency and prolong lifespan. Refer to the manual for detailed maintenance guidelines to keep your thermostat functioning smoothly and efficiently.

Maximizing Energy Efficiency

Maximizing energy efficiency with the Honeywell Pro Series Thermostat involves utilizing its smart scheduling and energy-saving modes. Program daily and weekly schedules to align with your lifestyle, and enable features like adaptive learning to optimize heating and cooling cycles. Remote access via the Honeywell Home app allows adjustments on the go, ensuring energy isn’t wasted. Regular software updates and proper maintenance further enhance efficiency, helping you save energy and reduce costs while maintaining comfort.

charge 3 jbl manual

Product Overview

The JBL Charge 3 is a portable Bluetooth speaker featuring IPX7 waterproof design, 6000mAh battery for up to 20 hours of playtime, and a built-in power bank․ It delivers stereo sound with passive bass radiators, ensuring robust audio quality․ The durable fabric and rugged housing make it ideal for outdoor use, while JBL Connect allows linking multiple speakers for enhanced sound experiences․

1․1 Release Date and Design

The JBL Charge 3 was released in 2016, featuring a cylindrical design with durable fabric and sturdy housing․ It measures 9․1 inches tall and 3․4 inches wide, weighing 1․76 pounds․ The speaker includes a waterproof cap for ports and passive bass radiators for enhanced sound․ Its rugged design ensures durability, making it suitable for outdoor use, while the sleek aesthetics appeal to a wide range of users seeking a portable audio solution․

1․2 Key Features and Specifications

The JBL Charge 3 boasts a 6000mAh battery, offering up to 20 hours of continuous playtime․ It features IPX7 waterproofing, ensuring protection against water immersion․ The speaker delivers stereo sound with dual 50mm drivers and passive bass radiators for enhanced low-frequency response․ It supports Bluetooth connectivity and includes a USB port for charging external devices․ Built with durable fabric and rugged housing, it combines portability with robust performance, making it ideal for outdoor and indoor use․

Key Features of the JBL Charge 3

The JBL Charge 3 offers a waterproof IPX7 design, 6000mAh battery, and built-in power bank․ It features stereo sound, passive bass radiators, and Bluetooth connectivity․

2․1 Waterproof Design (IPX7 Rating)

The JBL Charge 3 boasts an IPX7 waterproof rating, making it resistant to water immersion up to 1 meter for 30 minutes․ To maintain its water resistance, ensure all cable connections are removed and the port cap is tightly closed before exposure․ Charging the speaker while wet is not recommended, as it may cause permanent damage to the device or its power source․

2․2 High-Capacity Battery (6000mAh)

The JBL Charge 3 is equipped with a high-capacity 6000mAh Li-ion battery, offering up to 20 hours of continuous music playback․ It also functions as a portable power bank, allowing users to charge smartphones, tablets, or other devices via its USB output․ This feature makes it ideal for extended outdoor adventures, ensuring both music and device connectivity remain uninterrupted for a long duration․

2․3 Stereo Sound and Passive Bass Radiators

The JBL Charge 3 delivers robust stereo sound through its dual 50mm drivers, producing 20W of rated power․ Passive bass radiators enhance low-frequency response, ensuring deep and resonant bass․ This combination creates a balanced and immersive audio experience, making it suitable for both indoor and outdoor settings․ The speaker’s design optimizes sound dispersion, providing clear and powerful sound across various music genres and environments․

Setup and Initial Configuration

The JBL Charge 3 setup involves unboxing, connecting via Bluetooth, and initial configuration․ It ensures a seamless and quick start with your new speaker․

3․1 Unboxing and First Impressions

Unboxing the JBL Charge 3 reveals a sleek, durable design with a rugged fabric exterior and waterproof construction․ The speaker feels solid and well-built, with a satisfying weight that reflects its high-quality components․ Included in the box are the speaker, a micro-USB charging cable, and a quick-start guide․ Initial impressions highlight its portability and premium finish, making it ready for immediate use straight out of the box․

3․2 Pairing the Speaker with Bluetooth Devices

To pair the JBL Charge 3 with a Bluetooth device, ensure the speaker is turned on and in pairing mode․ The Bluetooth button will flash blue․ On your device, enable Bluetooth and select “JBL Charge 3” from the available options․ Once connected, the LED indicator will turn solid blue․ The speaker supports up to two devices simultaneously and remembers previously connected devices for easy reconnection․ Use the JBL Connect feature to link multiple speakers for amplified sound․

3․3 Software and Firmware Updates

Regular software and firmware updates ensure optimal performance of the JBL Charge 3․ To update, download the JBL Connect app for iOS or Android․ Connect the speaker to the app via Bluetooth, then follow in-app prompts to check for and install updates․ Ensure the speaker is fully charged and connected to a stable Wi-Fi network during the process․ Updates enhance functionality, improve connectivity, and add new features to the speaker․

Usage and Functionality

The JBL Charge 3 is a portable Bluetooth speaker offering up to 20 hours of playtime with its 6000mAh battery․ It features a built-in power bank for charging devices, supports both Bluetooth and Aux input for music playback, and connects multiple speakers via JBL Connect for enhanced stereo sound and passive bass radiators․

4;1 Playing Music via Bluetooth and Aux Input

The JBL Charge 3 supports seamless music playback via Bluetooth and 3․5mm Aux input․ Pair your device wirelessly via Bluetooth for a stable connection, or use the Aux port for wired playback․ The speaker automatically switches between inputs, ensuring uninterrupted listening․ With clear sound reproduction and intuitive controls for play, pause, and volume adjustment, the Charge 3 offers versatile and high-quality music playback options for any setting or preference․

4․2 Using the Built-In Power Bank

The JBL Charge 3 features a built-in 6000mAh power bank, allowing you to charge smartphones, tablets, or other USB devices on the go․ Simply connect your device using a USB cable to the speaker’s USB port․ The power bank provides convenient charging without interrupting music playback․ This dual functionality makes the Charge 3 a versatile companion for outdoor adventures, ensuring your devices stay powered up all day long․

4․3 Connecting Multiple Speakers via JBL Connect

The JBL Charge 3 supports JBL Connect, enabling wireless connection of multiple speakers․ Press the JBL Connect button on each speaker to pair them, ensuring they play the same music source simultaneously․ This feature amplifies your audio experience, creating a synchronized sound system perfect for larger gatherings or outdoor settings․ The connection is seamless and maintains high-quality audio across all linked devices․

Maintenance and Care

Regularly clean the speaker with a soft cloth and avoid water exposure․ Ensure the charging port is dry before use to prevent damage and optimize battery life․ Store it in a cool, dry place․

5․1 Cleaning the Speaker and Charging Port

To maintain your JBL Charge 3, use a soft, dry cloth to wipe the speaker and housing․ Avoid liquids or harsh chemicals, as they may damage the fabric or electronics․ For the charging port, gently clean with a dry cotton swab to remove dust or debris․ Ensure the port is dry before charging to prevent damage․ Regular cleaning ensures optimal performance and extends the speaker’s lifespan․

5․2 Protecting the Speaker from Water Damage

The JBL Charge 3 is IPX7 waterproof, but proper care is essential․ Before exposing it to water, remove all cable connections and ensure the charging port cap is tightly closed․ Avoid submerging the speaker in water while charging, as this may cause permanent damage; Regularly inspect the cap for a secure seal to maintain water resistance and ensure optimal functionality over time․

5․3 Optimizing Battery Life

To maximize the JBL Charge 3’s battery life, avoid using the USB port for charging other devices while playing music, as this drains the battery faster․ Keep the firmware updated, as newer versions often improve power management․ Turn off unnecessary features like Bluetooth discovery when not in use to conserve energy․ Store the speaker in a cool, dry place to prevent battery degradation․ Finally, avoid overcharging by unplugging once the battery is fully charged․

Troubleshooting Common Issues

Address common issues like no sound, distorted audio, or Bluetooth disconnections by restarting the speaker, checking volume levels, or resetting Bluetooth connections․ For charging problems, ensure the port is clean and the cable is functional․ Refer to the manual for detailed troubleshooting steps to resolve these issues effectively and maintain optimal performance․

6․1 No Sound or Distorted Audio

If the JBL Charge 3 produces no sound or distorted audio, ensure the speaker is properly connected to the Bluetooth device and the volume is adjusted․ Check for dirt or debris in the charging port, as this can affect sound quality․ Restart the speaker and ensure it is not in power-saving mode․ If issues persist, reset the speaker by pressing and holding the volume and Bluetooth buttons simultaneously for 5 seconds․

6․2 Bluetooth Connection Problems

If experiencing Bluetooth connection issues with the JBL Charge 3, ensure the speaker is in pairing mode and within range of the device․ Restart both devices and check for firmware updates․ Clear previous pairings and reset the speaker by pressing and holding the Bluetooth button for 5 seconds․ If problems persist, perform a factory reset by pressing the volume and Bluetooth buttons simultaneously for 10 seconds․ Refer to the manual for detailed guidance․

6․3 Battery Charging Issues

If the JBL Charge 3 fails to charge, ensure the charging cable is undamaged and the port is clean․ Use the original charger and avoid charging near water․ If the battery doesn’t charge, reset the speaker by pressing the volume up and Bluetooth buttons for 10 seconds․ If issues persist, check for firmware updates or contact JBL support․ Avoid using damaged cables or third-party chargers to prevent further damage․

Accessories and Compatibility

Recommended accessories include a carrying case, USB cable, and aux cable․ Compatible with Bluetooth-enabled devices, smartphones, tablets, and laptops, supporting various operating systems․

7․1 Recommended Accessories

Recommended accessories for the JBL Charge 3 include a durable carrying case for protection, a USB charging cable, and an aux cable for wired connections․ A wall adapter is also suggested for faster charging․ These accessories enhance portability and convenience, ensuring optimal performance and longevity of the speaker․ They are designed to complement the Charge 3’s rugged design and waterproof functionality, making it ideal for outdoor use and travel․

7․2 Compatible Devices and Operating Systems

The JBL Charge 3 is compatible with a wide range of devices, including smartphones, tablets, and laptops, via Bluetooth or aux input․ It supports Android and iOS operating systems, ensuring seamless connectivity․ The speaker also works with any device equipped with Bluetooth technology, making it versatile for various setups․ Its compatibility extends to devices with 3․5mm audio jacks, providing flexibility for non-Bluetooth connections and ensuring universal accessibility․

Warranty and Customer Support

The JBL Charge 3 comes with a one-year limited warranty covering manufacturing defects․ For support, contact JBL via phone, email, or live chat on their official website․

8․1 Warranty Terms and Conditions

The JBL Charge 3 is backed by a one-year limited warranty covering manufacturing defects․ The warranty does not apply to damage caused by water exposure, misuse, or unauthorized repairs․ To claim warranty, register your product on JBL’s official website and provide proof of purchase․ The warranty is void if the speaker is tampered with or modified․ For details, refer to the manual or contact JBL support․

8․2 Contacting JBL Customer Service

The JBL Charge 3 is a top choice for portable audio, offering a waterproof design, long battery life, and a built-in power bank․ Its manual ensures easy use․

9․1 Final Thoughts on the JBL Charge 3

The JBL Charge 3 stands out as a top-tier portable speaker, blending durability, versatility, and impressive audio performance․ Its IPX7 waterproof design and 6000mAh battery make it perfect for outdoor adventures․ The speaker delivers robust stereo sound with deep bass, while its built-in power bank adds convenience․ With JBL Connect, users can amplify their experience by linking multiple speakers․ Overall, it’s a reliable and feature-packed choice for music lovers seeking a portable, high-quality sound solution․

9․2 User Feedback and Reviews

Users praise the JBL Charge 3 for its sturdy build, waterproof design, and long battery life․ Many highlight its clear, balanced sound and deep bass as standout features․ The ability to charge devices on the go is a big plus․ Some note that while it’s slightly heavy, the durability and performance justify the weight․ Overall, it’s a favorite among outdoor enthusiasts and music lovers seeking a reliable, high-quality portable speaker․