frigidaire range manual

Frigidaire Range Manual: A Comprehensive Guide

This manual details Frigidaire range operation‚ safety‚ and maintenance‚ covering freestanding electric stoves with smooth tops․ It addresses potential heating element issues․

Welcome to the world of Frigidaire ranges! Frigidaire has a long-standing reputation for innovation and reliability in home appliances‚ and their ranges are no exception; This guide focuses on modern Frigidaire electric ranges‚ specifically those featuring smooth cooktops and freestanding designs․ These appliances are engineered to provide efficient and convenient cooking experiences for users of all skill levels․

Hamdan Bin Mohammed Smart University (HBMSU) highlights the importance of adaptable learning environments‚ mirroring Frigidaire’s commitment to user-friendly design․ Like HBMSU’s focus on advanced technology‚ Frigidaire integrates sophisticated heating systems․ Understanding your range’s features‚ as detailed in this manual‚ will unlock its full potential‚ ensuring years of dependable performance․ This manual will help you navigate the features and troubleshoot common issues․

Understanding Your Range Model

Identifying your specific Frigidaire range model is crucial for accessing accurate support and troubleshooting information․ Locate the model number‚ typically found on a label on the frame of the range when the oven door is open‚ or on the back panel․ This number unlocks access to detailed specifications and diagrams․

Like HBMSU’s tailored educational programs‚ Frigidaire offers a variety of range models with differing features․ Some models may have spontaneous heating or temperature inconsistencies‚ as noted in online reports․ Knowing your model allows you to understand its unique capabilities and potential quirks․ Refer to the model number when contacting Frigidaire customer service or searching for online resources․

Safety Precautions

Prioritize safety by understanding carbon monoxide and electrical risks․ Ensure proper ventilation and follow all guidelines to prevent hazards during range operation․

General Safety Guidelines

Always supervise children near the Frigidaire range․ Never allow them to touch the cooktop or oven during or immediately after use‚ as surfaces become extremely hot․ Exercise caution when cooking with flammable materials․ Avoid wearing loose-fitting clothing that could ignite․

Ensure the range is properly installed and grounded by a qualified technician․ Regularly inspect the power cord for damage and replace if necessary․ Do not use extension cords or adapters․ Keep the area around the range clear of combustible materials like curtains‚ paper‚ and aerosols․

Never attempt to repair the range yourself; contact Frigidaire authorized service for assistance․ Disconnect the power supply before cleaning or performing maintenance․ Be mindful of hot surfaces and use oven mitts or pot holders when handling cookware․

Carbon Monoxide Poisoning Risk

While Frigidaire electric ranges do not produce carbon monoxide like gas appliances‚ maintaining proper ventilation is still crucial․ Ensure the kitchen is adequately ventilated during and after cooking‚ especially when using the self-cleaning oven function․ Although electric‚ malfunctions could potentially create unusual odors․

Recognize the symptoms of carbon monoxide poisoning: headache‚ dizziness‚ weakness‚ nausea‚ vomiting‚ chest pain‚ and confusion․ If anyone experiences these symptoms‚ immediately get fresh air and seek medical attention․

Install carbon monoxide detectors near bedrooms and living areas as a preventative measure‚ even with an electric range․ Regularly test the detectors to ensure they are functioning correctly․ Never ignore a carbon monoxide alarm; treat every alarm as a potential emergency․ Prioritize safety and awareness․

Electrical Safety

Your Frigidaire range operates on a high-voltage electrical current; therefore‚ strict adherence to electrical safety guidelines is paramount․ Never attempt to repair the range yourself; always contact a qualified technician for any repairs․ Ensure the range is properly grounded to prevent electrical shock․

Do not operate the range with a damaged power cord or plug․ If the cord is damaged‚ it must be replaced by a qualified technician․ Avoid using extension cords or adapters‚ as they can overheat and create a fire hazard․ Keep the area around the range clear of flammable materials․

Always disconnect the power supply before cleaning or performing any maintenance․ Never touch electrical components with wet hands․ If the range malfunctions‚ immediately disconnect the power and contact Frigidaire support․

Range Features & Components

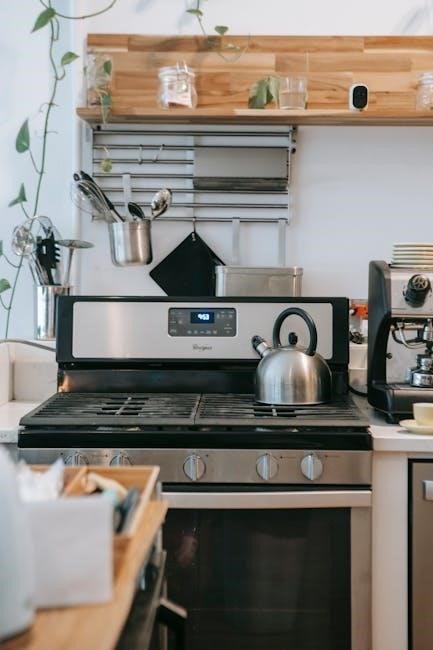
Frigidaire ranges boast smooth cooktops‚ intuitive control panels‚ and versatile oven features․ Understanding these components ensures optimal performance and safe operation․

Control Panel Overview

The Frigidaire range control panel is designed for intuitive operation‚ offering easy access to various cooking functions․ Typically‚ you’ll find digital displays showing selected settings‚ temperature controls for both the cooktop and oven‚ and dedicated buttons for features like baking‚ broiling‚ and self-cleaning․

Many models include timer settings‚ allowing precise cooking duration control․ Some advanced panels feature pre-programmed cooking modes for specific dishes‚ simplifying meal preparation․ The panel may also incorporate lock-out functions for safety‚ preventing accidental operation‚ especially important in households with children․ Familiarizing yourself with the specific layout and functions of your Frigidaire range’s control panel is crucial for maximizing its capabilities and ensuring a seamless cooking experience․

Heating Elements Explained

Frigidaire ranges utilize different heating element types depending on the model․ Smooth top ranges employ radiant elements beneath the glass surface‚ distributing heat evenly for consistent cooking․ These elements can sometimes appear to turn on or off spontaneously‚ or heat inconsistently – a potential issue to troubleshoot․

Older or some current models may feature coil elements‚ which are visible metal coils that directly heat cookware․ Coil elements offer rapid heating but may require more careful temperature adjustment․ Understanding the characteristics of your range’s heating elements is vital for optimal performance․ Proper element care‚ including cleaning‚ ensures efficient heat transfer and prolongs the lifespan of your Frigidaire range․
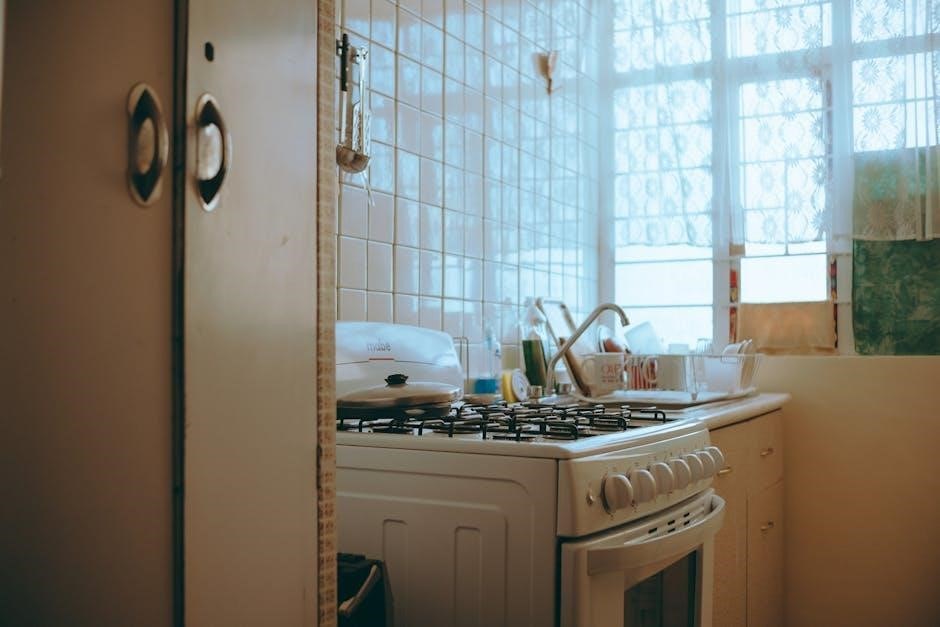
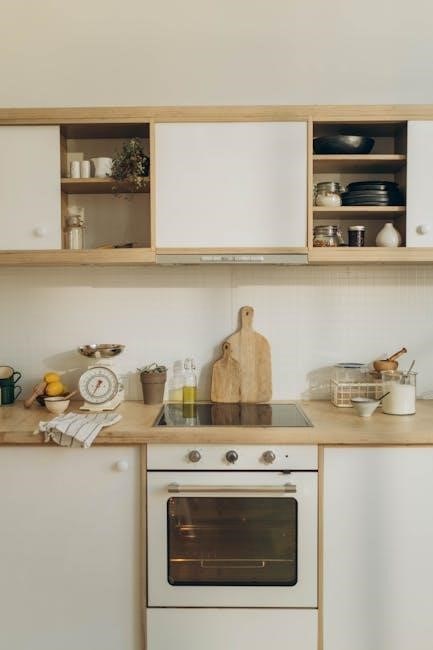
Smooth Top Elements

Frigidaire smooth top ranges utilize radiant heating elements positioned beneath a ceramic-glass surface․ These elements generate heat by passing electricity through a resistive coil‚ radiating warmth upwards to cook your food․ The glass cooktop distributes heat evenly‚ offering consistent cooking results․

However‚ smooth top elements can sometimes exhibit issues like failing to heat‚ turning on/off unexpectedly‚ or displaying inconsistent temperatures․ Proper cookware is crucial; use flat-bottomed pots and pans for optimal contact․ Avoid sliding cookware across the surface to prevent scratches․ Regular cleaning with a specialized cooktop cleaner maintains performance and appearance․

Coil Elements (if applicable)

Some older Frigidaire range models feature traditional coil heating elements․ These elements consist of a metal coil that heats up when electricity passes through it․ They are a more basic heating technology compared to smooth top elements‚ offering direct and visible heat․

Coil elements can sometimes become damaged or worn over time‚ leading to uneven heating or failure․ Ensure the coils are properly seated and clean to maintain optimal performance․ Avoid excessive weight or impact on the coils․ If a coil appears broken or significantly corroded‚ it requires replacement․ Always disconnect power before attempting any maintenance on coil elements․

Oven Features

Frigidaire ovens are designed with user convenience and efficient cooking in mind․ Key features include adjustable oven racks for versatile placement of dishes‚ and a variety of baking and broiling settings to accommodate different recipes․ Understanding these features is crucial for optimal performance․

The oven’s temperature control ensures precise heating‚ while the broil function provides intense top-down heat for browning and searing․ Many models also include a self-cleaning function for easy maintenance․ Proper rack positioning impacts cooking results; consult recipe guidelines for best practices․

Oven Racks & Positions

Frigidaire ovens typically feature multiple rack positions to accommodate various cooking needs․ The lowest position is ideal for baking casseroles and larger items‚ ensuring even heat distribution․ Middle rack placement suits most general baking tasks‚ like cookies and cakes․

For broiling‚ position the rack closer to the heating element for direct‚ intense heat․ Always consult your recipe for specific rack recommendations․ Adjusting rack height impacts cooking speed and browning; lower positions generally result in slower cooking and less browning․

Baking & Broiling Settings

Frigidaire ovens offer diverse baking settings‚ including conventional bake for standard recipes and convection bake for faster‚ more even cooking․ Convection utilizes a fan to circulate heat‚ reducing cooking times․ Broil settings provide direct‚ high heat from the top element‚ perfect for searing and browning․

Temperature control is crucial; ensure accurate oven temperature for optimal results․ Some models feature pre-programmed settings for specific foods like pizza or roast․ Always preheat the oven before baking or broiling․ Monitor food closely during broiling to prevent burning․

Self-Cleaning Oven Function

Frigidaire ranges often include a self-cleaning oven cycle‚ utilizing high temperatures to burn off food residue․ Before initiating‚ remove oven racks‚ cookware‚ and any loose debris․ Ensure proper ventilation by opening windows‚ as the process can produce odors․

Select the desired cleaning cycle length – typically light‚ medium‚ or heavy – based on soil level․ The door automatically locks during the cycle for safety and remains locked until cool down․ Avoid opening the door prematurely․ After completion‚ wipe away any remaining ash with a damp cloth․

Operating Instructions

Follow these steps for cooktop and oven use‚ including timer settings․ Ensure proper element selection and temperature control for optimal cooking results․

Using the Cooktop

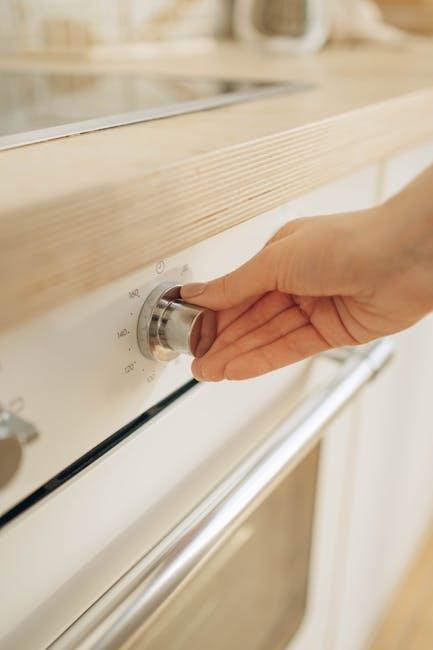
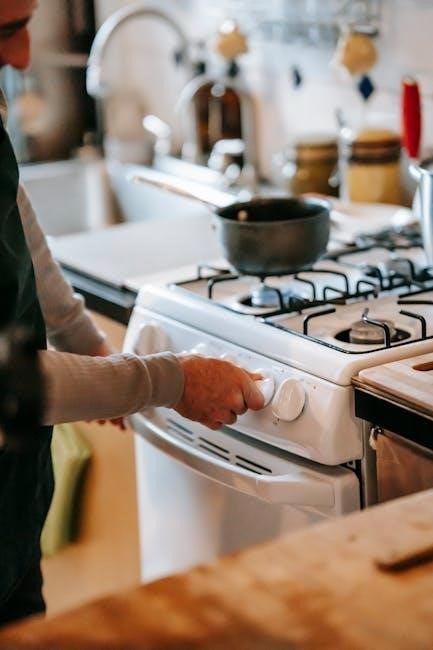
To operate the Frigidaire cooktop‚ first ensure the surface is clean and dry․ Select the appropriate element for your cookware size – larger pots require larger elements for efficient heating․ Utilize the control panel to adjust heat levels‚ ranging from low simmer to high heat․

Be mindful of potential spontaneous element activation or failure to turn off‚ as reported with some models․ Always supervise cooking and never leave a hot cooktop unattended․ If an element behaves unexpectedly‚ immediately turn off the range and consult the troubleshooting section․

For smooth top ranges‚ use cookware with flat bottoms for optimal contact and heat transfer․ Avoid dragging cookware across the surface to prevent scratches․ Remember to allow the cooktop to cool completely before cleaning․

Using the Oven

To begin using your Frigidaire oven‚ ensure the oven racks are positioned correctly for your baking or broiling needs․ Refer to the ‘Oven Racks & Positions’ section for guidance․ Select the desired cooking mode – Bake‚ Broil‚ or other available settings – using the control panel․

Set the oven temperature accurately‚ as some models may exhibit temperature discrepancies․ Preheat the oven fully before placing food inside for consistent results․ Monitor cooking progress through the oven window‚ avoiding frequent door openings to maintain temperature․

Always use oven-safe cookware and follow recommended cooking times and temperatures for your recipes; Be cautious when using the broil function‚ as it generates intense heat․

Setting the Timer

Your Frigidaire range features a timer function to assist with cooking management․ Access the timer controls on the control panel – typically designated with a ‘Timer’ or ‘Clock’ button․ You can set the timer for cooking duration or as a delayed start function․

To set a cooking duration timer‚ input the desired time using the number pad and select ‘Start’․ The timer will count down‚ and an audible alert will sound when the time expires․

For a delayed start‚ set the desired start time and the cooking duration․ The oven will automatically begin cooking at the specified time․ Ensure the oven is properly set up before initiating a delayed start․

Troubleshooting Common Issues

This section addresses frequent problems like heating element failures‚ ovens failing to reach temperature‚ and control panel malfunctions‚ offering solutions․

Element Not Heating

If a cooktop element isn’t heating‚ first ensure the control is set correctly and the range is receiving power․ Check the household circuit breaker or fuse box to confirm the circuit hasn’t tripped or blown․ A faulty element is a common cause; testing with a multimeter (consult a qualified technician if unfamiliar) can confirm this․

Sometimes‚ elements may appear to not heat but are cycling on and off․ This is a normal function for some models to manage temperature․ However‚ spontaneous element activation or failure to turn off requires immediate attention and professional repair․ Inspect the element for visible breaks or damage․ If the issue persists after these checks‚ contact Frigidaire support for further assistance or schedule a service appointment with a qualified appliance repair technician․

Oven Not Reaching Temperature

If your Frigidaire oven isn’t reaching the set temperature‚ several factors could be at play․ Verify the oven mode is correctly selected (Bake‚ Broil‚ etc․)․ Ensure the oven racks are positioned correctly‚ as improper placement can affect air circulation․ A malfunctioning oven temperature sensor is a frequent culprit; this component requires professional diagnosis and replacement․

Also‚ check for obstructions blocking the oven vents․ These vents are crucial for proper heat distribution․ If the self-clean cycle was recently used‚ allow sufficient cool-down time before attempting to bake․ If the problem continues‚ a faulty heating element or control board could be the cause‚ necessitating a service call to a qualified appliance repair technician for accurate assessment and repair․

Control Panel Malfunctions

If your Frigidaire range’s control panel is unresponsive or displaying errors‚ begin by ensuring the appliance is properly connected to a functioning power outlet․ A simple power cycle – unplugging the range for several minutes and then plugging it back in – can often resolve minor glitches․ If the display is frozen or buttons aren’t working‚ avoid forceful pressing‚ as this could cause further damage․

Persistent issues likely indicate a faulty control board or display panel․ These components require professional diagnosis and replacement․ Do not attempt to repair these parts yourself․ Contact Frigidaire customer support or a certified appliance repair technician for assistance․ Note any error codes displayed for quicker troubleshooting․

Self-Clean Cycle Problems

If your Frigidaire range’s self-clean cycle isn’t functioning correctly‚ first ensure the oven door is completely locked․ The cycle won’t initiate if the door isn’t securely sealed․ A common issue is a blown thermal fuse‚ preventing the oven from reaching the high temperatures needed for self-cleaning․ This requires professional replacement․

Excessive smoke during the cycle can indicate a large buildup of food debris․ Remove any significant remnants before running the cycle․ If the cycle fails to complete or displays an error code‚ consult the manual for specific troubleshooting steps․ Never interrupt a self-clean cycle mid-process‚ as this could damage the oven․

Maintenance & Cleaning

Regular cleaning of the cooktop‚ oven‚ and control panel ensures optimal performance and longevity of your Frigidaire range․ Follow the detailed instructions provided․

Cleaning the Cooktop

For daily spills on a smooth cooktop‚ allow the surface to cool completely before wiping with a damp cloth and mild detergent․ Avoid abrasive cleaners‚ as they can scratch the glass surface․ For baked-on food‚ use a ceramic cooktop cleaner and a non-abrasive cleaning pad‚ applying gentle pressure in a circular motion․

Stubborn residue may require a cooktop scraper held at a 45-degree angle․ After cleaning‚ rinse thoroughly with a clean‚ damp cloth and dry with a soft towel․ Ensure all cleaner residue is removed to prevent discoloration during subsequent heating․ Regularly cleaning prevents buildup and maintains the cooktop’s sleek appearance and efficient operation․ Always disconnect power before deep cleaning․

Cleaning the Oven

For regular oven maintenance‚ wipe down interior surfaces with a damp cloth and mild detergent after each use‚ once cooled․ Avoid abrasive cleaners that can damage the oven lining․ If using the self-clean cycle‚ remove oven racks and any cookware beforehand․ Ensure proper ventilation during the self-clean process‚ as it generates high temperatures and fumes․

For manual cleaning‚ a paste of baking soda and water can effectively loosen baked-on food․ Apply‚ let sit‚ then scrub gently․ Rinse thoroughly‚ ensuring no residue remains․ Regularly cleaning prevents smoke and odors during cooking․ Always disconnect power before deep cleaning or using self-clean function․

Cleaning the Control Panel

To maintain the appearance and functionality of your Frigidaire range’s control panel‚ regularly wipe it down with a soft‚ damp cloth․ Avoid using abrasive cleaners‚ scouring pads‚ or harsh chemicals‚ as these can damage the surface and lettering․ For stubborn stains or spills‚ a mild soap solution can be used‚ followed by a clean‚ damp cloth to remove any residue․

Ensure the control panel is completely dry before operating the range․ Avoid spraying liquids directly onto the panel; instead‚ apply to the cloth first․ Gentle cleaning preserves the responsiveness of the buttons and display‚ ensuring continued ease of use․ Disconnect power if performing a more thorough cleaning․

Warranty Information

Frigidaire range warranties cover defects in materials and workmanship for a specified period․ Registration is crucial to validate coverage and streamline support requests․

Frigidaire Range Warranty Details

Your Frigidaire range is protected by a warranty against defects in materials and workmanship‚ beginning from the original purchase date․ The limited warranty typically covers one year for parts and labor․ Specific components‚ like the surface elements or oven racks‚ may have differing coverage durations․

The warranty excludes normal wear and tear‚ improper installation‚ misuse‚ abuse‚ or alterations․ Commercial use voids the warranty․ To obtain warranty service‚ contact Frigidaire customer support with your model and serial number‚ and proof of purchase․ Unauthorized repairs may invalidate your warranty․ Carefully review the complete warranty documentation included with your appliance for full terms and conditions․

How to Register Your Appliance

Registering your new Frigidaire range is crucial for efficient warranty service and important product updates․ Registration confirms your purchase date and allows Frigidaire to contact you regarding safety notifications or recalls․ You can typically register online through the official Frigidaire website‚ using your model and serial number‚ found on the appliance itself․

Alternatively‚ you may be able to register via a mailed-in registration card included with your range․ Keep your purchase receipt and registration confirmation in a safe place․ Registering doesn’t automatically extend the warranty‚ but it streamlines the claims process should you need it․ Prompt registration ensures a smoother ownership experience․

Contacting Frigidaire Support

For assistance‚ utilize Frigidaire’s customer service numbers or explore their comprehensive online support resources․ Quick access to help is readily available․

Frigidaire Customer Service Numbers

When encountering issues with your Frigidaire range‚ direct assistance is crucial․ While specific numbers weren’t explicitly provided in the source text‚ Frigidaire generally offers support through their official website․ Typically‚ you can find a “Contact Us” section detailing phone numbers for various departments‚ including appliance support․

Be prepared to have your model number and serial number readily available when calling; this information helps the support team quickly diagnose your specific range’s problem․ Additionally‚ many manufacturers offer dedicated lines for warranty claims or parts inquiries․ Checking the Frigidaire website is the most reliable way to obtain the current and accurate contact information for your region․ Expect potential wait times during peak hours‚ and consider utilizing online chat options if available for faster assistance․

Online Support Resources

Frigidaire provides extensive online resources to assist with your range’s operation and troubleshooting․ The official Frigidaire website is the primary hub‚ offering downloadable manuals – crucial for understanding your specific model’s features; Frequently Asked Questions (FAQs) sections address common issues‚ potentially resolving problems without needing direct contact with support․

Many ranges have diagnostic tools accessible online‚ allowing you to input error codes for targeted solutions․ Furthermore‚ Frigidaire’s website often hosts video tutorials demonstrating repairs or maintenance procedures․ Online communities and forums dedicated to appliances can also provide peer-to-peer support and advice․ Remember to always verify information from unofficial sources with the official Frigidaire documentation to ensure accuracy and safety when attempting any repairs yourself․

foundations for superior performance pdf

Understanding Tartar and Its Removal

Tartar‚ a hardened form of dental plaque‚ presents a significant challenge to oral health. Its removal is crucial‚ as accumulated deposits can lead to various dental issues and discomfort.

Plaque‚ a sticky film of bacteria‚ initially forms on teeth; without proper oral hygiene‚ it mineralizes into tartar‚ a hard‚ yellowish or brownish substance.

Removing tartar is vital because it harbors bacteria‚ contributing to gum disease‚ cavities‚ and bad breath. Ignoring its presence can escalate into more serious health concerns.

Dental cleanings focus on eliminating both plaque and tartar‚ ensuring a healthier mouth and preventing future complications. Saliva continually bathes the teeth.

Significant tartar build-up‚ noticeable as falling debris‚ indicates a substantial accumulation requiring professional dental intervention for thorough removal and assessment.

What is Tartar?

Tartar‚ clinically known as calculus‚ is hardened dental plaque that firmly attaches to the teeth. It’s not merely a cosmetic issue; it’s a complex buildup with significant implications for oral health. Initially‚ a sticky film called plaque forms constantly on teeth‚ comprised of bacteria‚ food particles‚ and saliva.

If this plaque isn’t removed through diligent brushing and flossing‚ it undergoes a process called mineralization. Minerals in saliva cause the plaque to harden‚ transforming it into tartar. This hardened substance is considerably more difficult to remove than plaque‚ requiring professional dental intervention.

Tartar appears as a yellowish or brownish deposit on the teeth‚ often concentrated along the gumline or in areas difficult to reach with a toothbrush. It’s porous and rough‚ providing an ideal surface for further plaque accumulation‚ creating a vicious cycle. Some individuals may experience tartar breaking off‚ which isn’t necessarily harmful but signals a substantial buildup needing attention.

Essentially‚ tartar represents a failure of consistent oral hygiene‚ leading to a persistent bacterial colony and potential for dental problems.

The Formation of Tartar: Plaque to Calculus

The journey from soft plaque to hard calculus‚ or tartar‚ is a multi-stage process driven by bacterial activity and mineral deposition. It begins with the continuous formation of a biofilm – plaque – on tooth surfaces. This film is a complex community of bacteria thriving on sugars and food debris.

Initially‚ plaque is easily disrupted by brushing and flossing. However‚ if left undisturbed for even 24-72 hours‚ the process of mineralization begins. Calcium phosphate from saliva precipitates onto the plaque‚ initiating hardening. This process isn’t immediate; it’s gradual‚ with the plaque becoming increasingly resistant to removal.

Over time‚ this mineral deposition intensifies‚ transforming the soft‚ sticky plaque into a rigid‚ cement-like substance – tartar. The rate of tartar formation varies between individuals‚ influenced by saliva composition‚ diet‚ and oral hygiene practices. Once formed‚ tartar provides a rough surface‚ attracting even more plaque and accelerating the cycle.

Essentially‚ tartar is calcified plaque‚ a testament to prolonged bacterial colonization and mineral accumulation‚ demanding professional removal.

Why is Tartar Removal Important?

Tartar removal is paramount for maintaining optimal oral health and preventing a cascade of dental problems. Unlike plaque‚ tartar adheres strongly to teeth‚ resisting removal through routine brushing and flossing. This tenacious grip allows bacteria to flourish‚ triggering inflammation and infection.

The primary concern is gum disease – gingivitis‚ initially‚ characterized by red‚ swollen‚ and bleeding gums. Untreated‚ gingivitis progresses to periodontitis‚ a severe infection damaging the soft tissue and bone supporting teeth‚ potentially leading to tooth loss.

Beyond gum disease‚ tartar contributes to cavities. Bacteria within tartar produce acids that erode tooth enamel. Furthermore‚ the rough surface of tartar creates crevices where bacteria thrive‚ exacerbating decay. Bad breath‚ or halitosis‚ is another common consequence of tartar accumulation.

Ultimately‚ regular tartar removal safeguards not only your teeth and gums but also contributes to overall health‚ as oral health is linked to systemic conditions.

Professional Tartar Removal Procedures

Dental cleanings expertly remove plaque and hardened tartar deposits. Scaling and root planing are key methods‚ utilizing hand instruments or ultrasonic devices for thorough cleaning.

Scaling: The Primary Method of Tartar Removal

Scaling represents the foundational technique in professional tartar removal‚ meticulously addressing deposits both above and below the gumline. This procedure involves carefully dislodging hardened plaque – the tartar – from tooth surfaces. Dentists and dental hygienists employ various tools to achieve this‚ primarily utilizing either hand instruments or ultrasonic scalers.

Hand scaling involves the use of specialized instruments‚ like curettes and scalers‚ to physically scrape away tartar. This method offers precision and control‚ particularly in areas requiring delicate maneuvering. Conversely‚ ultrasonic scaling employs vibrations and water spray to break apart and flush away tartar‚ often proving more efficient for larger deposits.

The choice between these methods often depends on the extent and location of the tartar‚ as well as patient sensitivity. Regardless of the technique‚ the goal remains consistent: to create a smooth‚ clean tooth surface‚ free from the harmful bacteria harbored within tartar‚ and to establish a foundation for improved oral health.

Root Planing: Addressing Tartar Below the Gumline

Root planing‚ often performed alongside scaling‚ is a deeper cleaning procedure targeting tartar that has accumulated beneath the gumline. This is crucial because tartar in these areas contributes significantly to gum disease and can be difficult to reach with standard cleaning methods. Often referred to as “deep cleaning‚” root planing aims to remove not only tartar but also bacterial toxins and rough spots on the tooth roots.

The process involves carefully smoothing the root surfaces‚ creating a clean and even texture that discourages future tartar and bacterial adhesion. This smoothing also helps the gums reattach to the teeth‚ reducing pocket depth and improving gum health. It’s a more intensive procedure than routine scaling‚ often requiring local anesthesia to ensure patient comfort.

Effectively addressing subgingival tartar through root planing is vital in managing and preventing the progression of gum disease‚ safeguarding the long-term health and stability of teeth.

Ultrasonic Scaling vs. Hand Scaling

Ultrasonic scaling utilizes high-frequency vibrations from a specialized instrument with a water jet to dislodge tartar from teeth. This method is generally faster and more effective for removing large deposits‚ particularly above the gumline. The water spray simultaneously cools the instrument and flushes away debris‚ enhancing visibility and comfort.

Hand scaling‚ conversely‚ employs manual instruments like scalers and curettes to meticulously scrape away tartar. This technique offers greater precision and control‚ making it ideal for reaching difficult areas and addressing tartar beneath the gumline where ultrasonic tools may be less effective. It requires significant skill and dexterity from the dental professional.

Often‚ dentists combine both methods to achieve a comprehensive cleaning. Ultrasonic scaling efficiently removes bulk tartar‚ while hand scaling refines the cleaning and addresses sensitive areas‚ ensuring thorough tartar removal and optimal gum health.

Managing Discomfort During Tartar Removal

Local anesthesia effectively numbs the treatment area‚ minimizing discomfort during scaling and root planing. Topical anesthetics can also reduce sensitivity before injections.

Dentists employ techniques for anxious patients‚ like distraction or communication‚ to create a more relaxed experience during the procedure and ensure comfort.

Local Anesthesia: Numbing the Treatment Area

Local anesthesia is a cornerstone of comfortable tartar removal‚ effectively blocking pain signals in the specific area being treated. This allows the dental professional to thoroughly remove tartar and address any underlying gum issues without causing the patient undue discomfort. The process typically involves a small injection near the treatment site‚ delivering an anesthetic solution.

The solution contains medications that temporarily numb the nerves‚ preventing pain sensations from reaching the brain. While the injection itself might cause a brief‚ mild pinch‚ the subsequent numbing effect ensures a virtually painless experience during the scaling and root planing procedures. The dentist will carefully assess the area and administer the appropriate dosage to achieve complete numbness.

Multiple injections may be necessary to fully numb larger areas or areas with particularly sensitive nerves. It’s important to inform your dentist of any allergies or medical conditions before receiving local anesthesia. The effects of local anesthesia typically wear off within a few hours‚ leaving no lasting side effects. Patients often report feeling a slight tingling sensation as the numbness subsides.

Topical Anesthetics: Reducing Sensitivity

Topical anesthetics offer an additional layer of comfort during tartar removal‚ particularly for patients with sensitive teeth or gums. These are typically applied as a gel‚ ointment‚ or liquid directly to the treatment area before the procedure begins. Unlike local anesthesia which numbs deeper tissues‚ topical anesthetics work on the surface‚ reducing initial sensitivity and discomfort.

They contain a lower concentration of anesthetic medication‚ providing a numbing effect that helps to minimize the sensation of scraping or ultrasonic vibrations. This can be especially beneficial for individuals who experience anxiety about dental procedures or have a low pain threshold. Topical anesthetics don’t eliminate pain entirely‚ but they significantly reduce it‚ making the experience more tolerable.

Often‚ topical anesthetics are used in conjunction with local anesthesia for comprehensive pain management. They can also be reapplied during the procedure if sensitivity increases. The effects of topical anesthetics are short-lived‚ typically lasting only a few minutes‚ and they have minimal side effects. They are a safe and effective way to enhance patient comfort.

Techniques for Anxious Patients

Dental anxiety is common‚ and numerous techniques exist to help patients feel more comfortable during tartar removal. Open communication with your dentist is paramount; discussing your fears allows them to tailor the experience to your needs. Dentists may offer a “tell-show-do” approach‚ explaining each step before performing it‚ reducing uncertainty.

Distraction techniques‚ such as listening to music or focusing on a visual point‚ can divert attention from the procedure. Some patients find comfort in bringing a friend or family member for support. Requesting the dentist to use a hand signal to indicate when they are about to use an instrument can provide a sense of control.

Furthermore‚ asking for blacked-out glasses to avoid seeing the instruments can be incredibly helpful for visually sensitive individuals. Topical or local anesthetics‚ as discussed previously‚ are also crucial for minimizing discomfort. Deep breathing exercises and progressive muscle relaxation can help manage anxiety before and during the appointment. Remember‚ your dentist wants you to have a positive experience.

Post-Removal Care and Prevention

Post-procedure sensitivity is common; use desensitizing toothpaste. Maintaining gum health involves diligent brushing and flossing; Preventative measures are key to avoiding future tartar build-up.

Post-Procedure Sensitivity: What to Expect

Following tartar removal‚ experiencing some degree of tooth sensitivity is entirely normal and should be anticipated. This sensitivity arises from the temporary exposure of the dentin‚ the layer beneath the enamel‚ during the cleaning process. The removal of tartar can leave microscopic irregularities on the tooth surface‚ making it more susceptible to stimuli.

Common triggers for this sensitivity include hot‚ cold‚ sweet‚ or acidic foods and beverages. The intensity and duration of sensitivity vary from person to person‚ typically subsiding within a few days to a couple of weeks. Utilizing a desensitizing toothpaste containing potassium nitrate can significantly alleviate discomfort by blocking the transmission of pain signals.

Gentle oral hygiene practices are crucial during this period. Avoid abrasive brushing and harsh mouthwashes. If sensitivity persists or becomes severe‚ consult your dentist‚ as it could indicate an underlying issue requiring further evaluation. Remember‚ temporary discomfort is a small price to pay for improved oral health!

Maintaining Gum Health After Cleaning

Post-tartar removal‚ consistent and diligent oral hygiene is paramount for sustaining healthy gums. The professional cleaning provides a fresh start‚ but long-term gum health relies heavily on your daily routine. Brushing at least twice a day with fluoride toothpaste is essential to remove plaque and prevent tartar re-accumulation.

Flossing daily is equally crucial‚ reaching areas your toothbrush can’t‚ effectively disrupting plaque buildup between teeth and below the gumline. Consider incorporating an antimicrobial mouthwash into your routine to further reduce bacteria and freshen breath. Regular dental check-ups and professional cleanings‚ typically every six months‚ are vital for monitoring gum health and addressing any emerging issues.

A balanced diet low in sugar and processed foods also contributes to gum health. Remember‚ healthy gums are foundational to overall oral health and well-being‚ preventing future complications and maintaining a confident smile.

Preventative Measures: Brushing and Flossing

Effective brushing is the cornerstone of preventative dental care. Utilize a soft-bristled toothbrush and fluoride toothpaste‚ employing gentle circular motions to clean all tooth surfaces. Brush for a minimum of two minutes‚ twice daily‚ ensuring you reach every area‚ including along the gumline. Proper technique dislodges plaque‚ preventing its hardening into tartar.

Flossing complements brushing by cleaning between teeth where bristles can’t reach. Use approximately 18 inches of floss‚ wrapping it around your middle fingers and gently guiding it between each tooth‚ curving it around the side. This removes plaque and food particles‚ preventing gum inflammation and decay.

Consistency is key; make brushing and flossing non-negotiable parts of your daily routine. These simple habits significantly reduce the risk of tartar buildup‚ gum disease‚ and maintain optimal oral health.

The Connection Between Tartar and Gum Disease

Tartar accumulation fosters bacterial growth‚ initiating gingivitis – early gum inflammation characterized by redness and bleeding. Untreated‚ it progresses to periodontitis‚ causing tissue damage.

Tartar contributes to gum recession‚ weakening tooth support and potentially leading to tooth loss. Addressing tartar is vital for gum health preservation.

Gingivitis: The Early Stage of Gum Disease

Gingivitis represents the initial inflammatory response to the buildup of plaque and tartar around the gumline. This early stage of gum disease is often reversible with diligent oral hygiene practices and professional dental cleanings. Key indicators of gingivitis include red‚ swollen‚ and tender gums that bleed easily during brushing or flossing.

The presence of tartar significantly contributes to gingivitis‚ as it provides a rough surface for plaque to adhere to and harbors bacteria that irritate the gums. While discomfort may be minimal at this stage‚ ignoring gingivitis allows it to progress to more severe forms of gum disease. Maintaining consistent brushing and flossing routines is paramount in preventing and reversing gingivitis.

Regular dental check-ups and professional cleanings are also essential for removing hardened tartar that cannot be eliminated through home care alone. Early intervention is crucial to prevent the escalation of gingivitis into periodontitis‚ a more destructive and potentially irreversible condition. Addressing gingivitis proactively safeguards long-term oral health.

Periodontitis: Advanced Gum Disease and Tartar

Periodontitis signifies an advanced stage of gum disease‚ developing from untreated gingivitis. It’s characterized by significant inflammation that damages the soft tissues and bone supporting the teeth. Tartar accumulation plays a critical role in the progression of periodontitis‚ fostering a persistent bacterial infection.

Unlike gingivitis‚ periodontitis isn’t easily reversible; The inflammation leads to the formation of pockets between the teeth and gums‚ which become infected. Over time‚ this infection destroys the bone and tissues holding teeth in place‚ potentially leading to tooth loss. Symptoms include receding gums‚ loose teeth‚ and persistent bad breath.

Professional treatment for periodontitis often involves scaling and root planing to remove tartar and smooth the root surfaces‚ encouraging gum reattachment. In severe cases‚ surgical interventions may be necessary to restore damaged tissues. Consistent oral hygiene and regular dental visits are vital for managing periodontitis and preventing further damage.

The Role of Tartar in Gum Recession

Gum recession‚ the exposure of tooth roots due to receding gum tissue‚ is frequently linked to the presence of tartar. The persistent inflammation caused by tartar build-up weakens the gums‚ making them susceptible to receding over time. This process isn’t merely cosmetic; it can lead to increased tooth sensitivity and a higher risk of cavities in the exposed root surfaces.

Tartar‚ particularly when located near the gumline‚ creates a chronic inflammatory environment. This inflammation gradually destroys the tissues that anchor the gums to the teeth. As the gums pull back‚ more of the tooth is exposed‚ exacerbating the problem and creating a cycle of further recession.

Preventing tartar accumulation through diligent brushing‚ flossing‚ and regular professional cleanings is crucial for safeguarding against gum recession. Early detection and treatment of gingivitis‚ before it progresses‚ can also help preserve gum tissue and maintain a healthy smile. Ignoring tartar allows it to contribute significantly to this damaging process.

Advanced Tartar Removal Techniques

Laser tartar removal offers precision‚ while air polishing provides a gentle cleaning experience. Both methods represent innovative approaches to effectively eliminate stubborn deposits.

These techniques complement traditional scaling and root planing‚ enhancing comfort and achieving superior results for optimal oral health maintenance.

Laser Tartar Removal

Laser tartar removal represents a cutting-edge advancement in periodontal care‚ offering a precise and often more comfortable alternative to traditional methods. Utilizing focused light energy‚ lasers effectively disrupt and vaporize tartar deposits‚ even in hard-to-reach areas. This technique minimizes trauma to the surrounding gum tissue‚ reducing discomfort and promoting faster healing.

Unlike ultrasonic scalers‚ lasers don’t rely on vibrations‚ which can sometimes cause sensitivity. The laser’s energy also possesses antibacterial properties‚ potentially reducing the bacterial load within periodontal pockets. This can be particularly beneficial for patients with gum disease. While not universally available‚ laser tartar removal is becoming increasingly popular as dental professionals recognize its benefits.

However‚ it’s important to note that laser treatment may not be suitable for all patients‚ and a thorough evaluation is necessary to determine candidacy. The cost can also be higher than traditional scaling‚ but the improved comfort and potential long-term benefits often justify the investment.

Air Polishing: A Gentle Cleaning Method

Air polishing is a modern dental cleaning technique employing a mixture of water‚ air‚ and a fine powder – typically sodium bicarbonate or erythritol – to remove surface stains‚ plaque‚ and soft tartar deposits. This method offers a gentler approach compared to traditional scaling‚ making it an excellent option for patients with sensitive teeth or gums.

The pressurized stream effectively dislodges debris without causing significant discomfort. It’s particularly effective at removing extrinsic stains caused by coffee‚ tea‚ red wine‚ and tobacco. Air polishing can also reach areas that are difficult to access with hand instruments or ultrasonic scalers.

While generally safe‚ precautions are taken to protect the patient’s eyes and respiratory system. It’s not typically recommended for individuals with respiratory conditions or certain types of restorations. Following air polishing‚ a fluoride treatment is often recommended to strengthen enamel and reduce sensitivity.

project closure report sample pdf

Project Closure Report Sample PDF: A Comprehensive Plan

Project management tools like Microsoft Project‚ alongside Excel for task lists‚ are vital. Compatibility issues between Office versions (like 365 and Project Professional) can hinder installation.

ProjectLibre offers a free‚ open-source alternative‚ compatible with Microsoft Project’s .mpp format. Effective closure requires aligning planned and actual task timelines‚ ensuring logical project flow.

PDF formats are crucial for archiving documentation‚ and accessible templates aid in comprehensive reporting‚ reflecting performance and stakeholder satisfaction.

Project closure reports represent a formal‚ documented culmination of project endeavors. They signify more than just task completion; they encapsulate a comprehensive review of the entire project lifecycle‚ from initial conception to final delivery. These reports‚ often finalized as a PDF for archival and distribution‚ serve as critical learning tools for future initiatives.

The creation of a robust closure report isn’t merely an administrative formality. It’s a strategic process that facilitates knowledge transfer‚ identifies areas for improvement‚ and validates the project’s success – or‚ crucially‚ highlights where adjustments are needed in subsequent projects. Tools like Microsoft Project aid in tracking progress‚ but the closure report synthesizes that data into actionable insights.

Considering compatibility – ensuring Office versions align – is important even during report creation. Alternatives like ProjectLibre can provide data if Project isn’t accessible; A well-structured PDF report should detail not only what was achieved‚ but how it was achieved‚ including challenges overcome and lessons learned‚ ultimately contributing to organizational growth and efficiency. The report’s accessibility is also paramount‚ ensuring all stakeholders can readily understand its contents.

The Importance of a Project Closure Report

Project closure reports are fundamentally important for organizational learning and continuous improvement. They move beyond simply marking a project as “complete” and instead provide a structured analysis of performance‚ identifying both successes and areas needing refinement. A well-crafted report‚ often distributed as a PDF‚ serves as a valuable historical record.

Without a formal closure process‚ valuable insights are lost‚ potentially leading to repeated mistakes in future projects. Tools like Microsoft Project generate data‚ but the closure report provides the context and interpretation of that data. Compatibility concerns with Office suites shouldn’t impede report creation; alternatives like ProjectLibre offer viable solutions.

Furthermore‚ a thorough report demonstrates accountability and transparency to stakeholders. It validates the project’s outcomes against initial objectives and provides a clear justification for resource allocation. The report’s accessibility – ensuring it’s easily understood – is crucial for fostering trust and buy-in. Ultimately‚ a robust closure report transforms a finished project into a strategic asset‚ driving future success and minimizing risks.

Key Components of a Project Closure Report

A comprehensive project closure report‚ frequently delivered as a PDF‚ necessitates several key elements. Firstly‚ a detailed project summary outlining objectives‚ scope‚ and deliverables is essential. This should be followed by a rigorous performance assessment‚ evaluating schedule adherence‚ budget compliance‚ and quality of outcomes.

Financial performance analysis‚ including actual versus planned costs‚ is critical. Similarly‚ a schedule performance review‚ potentially leveraging data from tools like Microsoft Project‚ should highlight variances and their causes. Formal scope verification‚ confirming stakeholder acceptance of deliverables‚ is non-negotiable.

Crucially‚ the report must include a “lessons learned” section‚ documenting both positive practices and areas for improvement. Stakeholder satisfaction assessments‚ gathered through surveys or interviews‚ provide valuable qualitative data. Finally‚ administrative closure details – confirming contract completion and resource release – and a plan for archiving project documentation are vital. Compatibility with Office formats and alternatives like ProjectLibre should be considered during document creation.

Project Summary & Overview

The project summary and overview‚ a foundational component of any closure report – often a PDF document – provides a concise encapsulation of the entire undertaking. It begins with a clear statement of the original project objectives‚ outlining the intended goals and desired outcomes. A detailed description of the project scope‚ defining boundaries and deliverables‚ follows‚ ensuring alignment with initial plans.

This section should also briefly describe the methodology employed‚ whether Agile‚ Waterfall‚ or a hybrid approach. Key deliverables‚ such as completed products‚ reports‚ or implemented systems‚ are listed. The initial budget allocation and planned timeline are stated for comparative analysis later in the report.

Furthermore‚ a high-level overview of the project team structure and key stakeholders is included. Mentioning tools used‚ like Microsoft Project for scheduling or Excel for task management‚ provides context. This overview serves as a readily accessible reference point for understanding the project’s core elements‚ setting the stage for a more detailed evaluation.

Project Performance Assessment

The Project Performance Assessment within a closure report – typically a PDF – critically evaluates how well the project achieved its stated objectives. This section moves beyond simple completion and delves into the quality of the results. It begins by revisiting the Key Performance Indicators (KPIs) established during the planning phase‚ comparing actual results against those targets.

Were deliverables completed to the required standard? Were quality gates successfully passed? This assessment should objectively analyze successes and failures‚ avoiding subjective opinions. Tools like Microsoft Project‚ with its tracking capabilities‚ provide valuable data for this analysis.

A discussion of any significant deviations from the original plan is crucial‚ explaining the reasons behind them and their impact on the overall project outcome. Were there unforeseen challenges? Were risks effectively mitigated? This section should also highlight areas where the team excelled‚ demonstrating best practices for future endeavors. Ultimately‚ this assessment provides a clear picture of the project’s overall effectiveness.

Financial Performance Analysis

The Financial Performance Analysis‚ a core component of a project closure report – often delivered as a PDF – provides a detailed review of the project’s budgetary performance. This section meticulously compares planned versus actual costs‚ identifying any variances and explaining their causes. It’s more than just stating the final cost; it’s about understanding why the project cost what it did.

Key metrics include total project cost‚ cost performance index (CPI)‚ and earned value. Were there unexpected expenses? Were cost-saving measures effective? A thorough analysis should categorize costs (labor‚ materials‚ etc.) to pinpoint areas of overspending or underspending.

The report should also address the return on investment (ROI) if applicable‚ demonstrating the value generated by the project. Compatibility issues with software like Office and Project impacting resource allocation should be noted if they influenced costs. Finally‚ this section should offer recommendations for improving cost management in future projects‚ ensuring financial accountability and efficiency.

Schedule Performance Review

The Schedule Performance Review‚ a critical section within a project closure report – frequently distributed as a PDF – assesses how well the project adhered to its planned timeline. This isn’t simply a comparison of start and finish dates; it’s a detailed examination of schedule variances and their underlying causes.

Key performance indicators (KPIs) include the schedule performance index (SPI)‚ tracking whether the project was ahead‚ on‚ or behind schedule. The report should identify critical path delays and analyze their impact on the overall project completion date. Were delays due to unforeseen issues‚ resource constraints‚ or inaccurate initial estimates?

Tools like Microsoft Project‚ while sometimes complex‚ are designed to aid in schedule management. If issues arose during installation or usage of such tools‚ impacting schedule adherence‚ this should be documented. The review should also highlight successful schedule management strategies and offer recommendations for improving timeline accuracy and efficiency in future endeavors‚ ensuring projects are delivered on time.

Scope Verification and Acceptance

Scope Verification and Acceptance forms a cornerstone of a comprehensive project closure report‚ often finalized as a PDF document. This section meticulously confirms that all deliverables outlined in the project’s initial scope statement have been completed and meet the defined requirements. It’s more than just a checklist; it’s formal validation.

Evidence of acceptance‚ such as signed-off requirement documents or user acceptance testing (UAT) results‚ should be included as appendices. Any deviations from the original scope – scope creep – must be clearly documented‚ along with the rationale for the changes and their impact on the project’s timeline and budget.

The report should detail the process used for verification‚ including who was involved and the criteria used for acceptance. If tools like Microsoft Project were used to manage requirements‚ a summary of how these were tracked and verified should be included. Formal stakeholder sign-off signifies complete acceptance‚ officially closing out the project’s defined deliverables.

Lessons Learned Documentation

Lessons Learned Documentation is a critical component of any project closure report‚ frequently compiled and distributed as a PDF. This section transcends simply listing what went wrong; it’s a structured analysis of both successes and failures throughout the project lifecycle. The goal is to capture actionable insights for future endeavors.

Documentation should categorize lessons learned – for example‚ technical challenges‚ communication breakdowns‚ or resource allocation issues. Each lesson should include a clear description of the situation‚ the root cause‚ the impact on the project‚ and recommended actions to prevent recurrence.

Consider incorporating feedback from the team and stakeholders. Tools like Excel‚ while not as specialized as Microsoft Project‚ can be used to initially gather and organize this information. The PDF report should present these lessons in a concise‚ accessible format‚ fostering a culture of continuous improvement within the organization. This ensures knowledge isn’t lost when the project concludes.

Stakeholder Satisfaction Assessment

Stakeholder Satisfaction Assessment forms a vital part of a comprehensive project closure report‚ often presented within a PDF document. This evaluation gauges how well the project met the expectations of those invested in its outcome – clients‚ sponsors‚ team members‚ and end-users.

Methods for assessment can range from formal surveys and interviews to informal feedback sessions. Questions should focus on key areas like communication‚ responsiveness‚ quality of deliverables‚ and overall value delivered. While sophisticated project management software like Microsoft Project aids in tracking progress‚ it doesn’t directly measure satisfaction.

Excel can be a useful tool for compiling and analyzing survey data. The PDF report should summarize the findings‚ highlighting areas of strong satisfaction and identifying areas for improvement in future projects. Addressing negative feedback transparently demonstrates accountability and a commitment to continuous enhancement. A high level of stakeholder satisfaction is a key indicator of project success.

Team Performance Evaluation

Team Performance Evaluation is a critical component of a project closure report‚ frequently documented in a PDF format. This assessment analyzes the collective and individual contributions of the project team‚ identifying strengths and areas for development. It’s distinct from simply tracking task completion‚ as seen in tools like Microsoft Project or Excel-based task lists.

Evaluations should be based on pre-defined criteria‚ such as adherence to timelines‚ quality of work‚ collaboration‚ problem-solving skills‚ and initiative. Feedback should be constructive and specific‚ focusing on behaviors rather than personalities. While Project software manages schedules‚ it doesn’t assess individual performance.

The PDF report should summarize key findings‚ acknowledging outstanding contributions and identifying training needs. This evaluation isn’t about assigning blame‚ but about fostering a learning environment for future projects. Recognizing team achievements boosts morale and encourages continued high performance. A thorough evaluation contributes to improved team dynamics and project outcomes.

Administrative Closure Procedures

Administrative Closure Procedures represent the formal steps to finalize a project‚ often detailed within a comprehensive project closure report‚ typically in PDF format. These procedures extend beyond simply completing tasks tracked in tools like Microsoft Project or Excel. They involve verifying all contractual obligations are met‚ including final invoices and payments.

Key steps include obtaining formal sign-off from stakeholders‚ confirming all deliverables have been accepted‚ and settling any outstanding issues or disputes. This process ensures all financial accounts are reconciled and closed‚ preventing future discrepancies. Proper documentation‚ archived securely‚ is paramount.

The PDF report should list all administrative tasks completed‚ along with supporting documentation. This includes legal agreements‚ warranties‚ and any relevant permits. A checklist format is helpful for ensuring nothing is overlooked. Thorough administrative closure minimizes risk and provides a clear audit trail‚ demonstrating responsible project management.

Archiving Project Documentation

Archiving Project Documentation is a critical component of project closure‚ often formalized within a project closure report‚ frequently delivered as a PDF. This process ensures long-term accessibility and preservation of vital project information‚ moving beyond simple task lists managed in Excel or schedules created in Microsoft Project.

The archive should include all project deliverables‚ communication records‚ risk assessments‚ and financial documents. Utilizing a standardized naming convention and folder structure is essential for efficient retrieval. PDF format is preferred for its portability and preservation qualities‚ ensuring documents remain viewable regardless of future software updates.

Consider both digital and physical archiving‚ adhering to relevant legal and regulatory requirements. Access controls should be implemented to protect sensitive information. A clear archiving policy‚ documented within the closure report‚ outlines retention periods and responsible parties. Proper archiving facilitates future audits‚ lessons learned analysis‚ and knowledge transfer.

PDF Format & Accessibility Considerations

PDF format is the standard for distributing project closure reports‚ offering portability and consistent rendering across platforms – crucial when sharing documentation created with tools like Microsoft Project or Excel. However‚ simply creating a PDF isn’t sufficient; accessibility must be prioritized.

Consider color contrast ratios for readability and avoid relying solely on color to convey information. Interactive elements‚ like form fields‚ should be accessible via keyboard navigation. Testing the PDF with accessibility checkers is recommended. A truly comprehensive project closure report PDF caters to all audiences‚ promoting inclusivity and compliance.

Sample Project Closure Report PDF Resources & Templates

Finding suitable project closure report PDF templates can significantly streamline the documentation process. While a direct resource wasn’t explicitly stated‚ understanding the key components – performance assessments‚ financial analysis‚ lessons learned – guides template selection.

Numerous online resources offer generic project report templates adaptable for closure purposes. Searching for “project closure report template” yields options in Word format‚ easily converted to PDF. Consider templates designed for specific methodologies (Agile‚ Waterfall) if applicable.

Organizations utilizing Microsoft Project may find internal templates or examples. Remember to customize any template to reflect the unique aspects of your project. Ensure the chosen template facilitates clear communication of project outcomes‚ including schedule adherence and stakeholder satisfaction. Prioritize templates that support accessibility standards for wider distribution.

Excel can also be used to create a basic report‚ then exported to PDF.

property and casualty license texas study guide

Texas Property and Casualty License Study Guide: An Overview

Preparing for the Texas Property & Casualty (PC) license exam requires dedicated study, utilizing resources like practice tests, study guides, and updated materials for success.

Understanding the Texas Department of Insurance (TDI)

The Texas Department of Insurance (TDI) is the regulatory body overseeing the insurance industry within the state. A thorough understanding of TDI’s role is crucial for license candidates. TDI enforces state insurance laws, protects consumers, and ensures the financial stability of insurance companies.

Familiarize yourself with TDI’s structure, including its divisions and their specific responsibilities. Key areas to focus on include licensing, examinations, enforcement, and consumer protection. The TDI website is a vital resource, offering access to regulations, bulletins, and other important information.

Understanding TDI’s mission and how it operates will provide a solid foundation for your studies and future career as a licensed property and casualty agent in Texas.

Exam Eligibility Requirements

To qualify for the Texas Property & Casualty license exam, candidates must meet specific criteria established by the Texas Department of Insurance (TDI). Generally, applicants must be at least 18 years old and a legal resident of Texas, though exceptions may apply.

Completion of a TDI-approved pre-licensing education course is mandatory. These courses cover essential insurance concepts and Texas-specific regulations. Applicants must also demonstrate good moral character and not have a history of insurance-related violations.

Successfully passing a background check is a standard requirement. Detailed eligibility information and application procedures are available on the TDI website, ensuring all candidates meet the necessary qualifications before applying to take the exam.

Application Process for the License

The application for a Texas Property & Casualty license is primarily conducted online through the TDI’s licensing system. First, create an account and complete the online application form, providing accurate personal and contact information.

Applicants must submit proof of completing a TDI-approved pre-licensing education course. A non-refundable application fee is required, payable by credit card or other accepted methods; Following submission, TDI conducts a background check.

Once approved, candidates receive authorization to schedule their exam. Passing the exam is the final step; successful candidates then receive their license. Detailed instructions and application status updates are available on the TDI website throughout the process.

Core Insurance Concepts

Understanding fundamental insurance principles is crucial, encompassing risk pooling, indemnity, insurable interest, and the core differences between property and casualty coverage.

Property Insurance Fundamentals

Property insurance safeguards against financial loss due to damage or destruction of insured property, including structures, contents, and loss of use. Key concepts involve perils – causes of loss like fire, wind, and theft – and coverage types, such as named-peril versus all-risk policies.

Understanding valuation methods is essential; actual cash value (ACV) considers depreciation, while replacement cost covers the cost of new property. Deductibles represent the policyholder’s out-of-pocket expense before coverage kicks in.

Furthermore, familiarize yourself with endorsements, which modify standard policy terms, and subrogation, the insurer’s right to recover claim payments from responsible third parties. Thorough knowledge of these fundamentals is vital for the Texas P&C license exam.

Casualty Insurance Fundamentals

Casualty insurance, also known as liability insurance, protects against financial loss from legal liability arising from bodily injury or property damage to others. Core principles include negligence – failure to exercise reasonable care – and the concept of legal responsibility.

Key coverage types encompass personal and commercial liability, offering protection against lawsuits and settlements. Understanding policy limits – the maximum amount an insurer will pay – and deductibles is crucial.

Furthermore, grasp the significance of exclusions, which define situations not covered by the policy. Concepts like indemnity – restoring the insured to their pre-loss financial position – and subrogation are also vital. Mastering these fundamentals is essential for success on the Texas P&C license exam.

Key Insurance Terminology

A robust understanding of insurance terminology is paramount for passing the Texas P&C license exam. Key terms include “premium” – the payment for insurance coverage – and “deductible” – the amount the insured pays before coverage kicks in.

“Policy limits” define the maximum payout, while “exclusions” specify what isn’t covered. Grasp “indemnity,” restoring the insured to their prior financial state, and “subrogation,” the insurer’s right to recover costs.

Familiarize yourself with “hazard” (a potential cause of loss) and “risk” (the probability of loss). Knowing terms like “negligence,” “liability,” and “peril” is also crucial. Mastering this lexicon will significantly improve comprehension and exam performance.

Property Insurance in Detail

Property insurance safeguards against damage or loss to physical structures and belongings, encompassing homeowners and commercial policies, plus inland marine coverage options.

Homeowners Insurance Coverage

Homeowners insurance provides financial protection against a wide range of perils affecting a residence. Coverage typically includes dwelling protection, safeguarding the physical structure of the home itself, and personal property coverage, which protects belongings from theft or damage.

Liability coverage is crucial, offering protection if someone is injured on the property, and additional living expenses (ALE) help cover costs if the home is uninhabitable due to a covered loss. Understanding policy endorsements is vital, as they can modify coverage.

Texas homeowners policies often address specific risks like windstorm and hail, sometimes requiring separate coverage or higher deductibles. Familiarity with these nuances is essential for Texas license candidates, ensuring they can advise clients effectively on appropriate protection.

Commercial Property Insurance

Commercial property insurance safeguards businesses from financial losses due to damage or destruction of their physical assets. This encompasses buildings, equipment, inventory, and furniture. Coverage forms, like named peril and all-risk, dictate the scope of protection, with ‘all-risk’ offering broader coverage.

Business interruption insurance is a critical component, compensating for lost income and ongoing expenses during a covered loss. Understanding valuation methods – actual cash value (ACV) versus replacement cost – is essential for proper client advising.

Texas-specific considerations include coverage for windstorm and hail, particularly along the Gulf Coast. License candidates must grasp these details to accurately assess business risks and recommend suitable insurance solutions.

Inland Marine Insurance

Inland marine insurance, despite its name, covers property while it’s in transit or at a temporary location, not on the ocean. This unique coverage protects goods owned by the insured against loss or damage. Common examples include construction equipment, mobile machinery, and goods being shipped.

It’s crucial to understand the ‘floaters’ – specific inland marine policies tailored to different types of property. These can cover accounts receivable, valuable papers, and even artists’ materials.

Texas agents need to be familiar with the nuances of inland marine policies, as they often require specialized underwriting and risk assessment to ensure adequate protection for clients’ diverse property interests.

Casualty Insurance in Detail

Casualty insurance focuses on liability and loss from accidents, encompassing auto, workers’ compensation, and general liability – vital components for Texas license holders.

Auto Insurance Coverage

Understanding Texas auto insurance is crucial for licensure. Liability coverage, encompassing bodily injury and property damage, is foundational, protecting against claims from at-fault accidents. Collision coverage pays for vehicle damage regardless of fault, while comprehensive covers losses from events like theft or weather.

Uninsured/Underinsured Motorist (UM/UIM) coverage protects policyholders when involved with drivers lacking adequate insurance. Medical Payments (MedPay) and Personal Injury Protection (PIP) cover medical expenses.

Deductibles impact premiums; higher deductibles mean lower costs. Texas law requires minimum liability limits. Agents must explain these coverages clearly to clients, ensuring appropriate protection based on individual needs and financial situations. Thorough knowledge of these components is essential for passing the exam.

General Liability Insurance

General Liability (GL) insurance is vital for businesses, protecting against financial loss from bodily injury, property damage, and personal/advertising injury claims. Coverage typically includes premises liability (injuries on the business property), product liability (defects in products), and completed operations (injuries from finished work).

Policies are structured with limits per occurrence and aggregate, defining maximum payouts. Understanding exclusions – like intentional acts or pollution – is critical.

Texas agents must advise clients on appropriate GL coverage based on their business type and risk exposure. Properly explaining endorsements, which modify the standard policy, is also key. A solid grasp of GL principles is essential for the Texas P&C license exam, demonstrating competency in commercial risk management;

Workers’ Compensation Insurance

Workers’ Compensation (WC) insurance provides benefits to employees injured on the job, covering medical expenses, lost wages, and rehabilitation costs. In Texas, WC is not mandatory for all employers, creating unique considerations for agents. Understanding the opt-out provisions and alternative coverage options is crucial.

Agents must explain the benefits of WC, even for non-mandated employers, highlighting risk management and potential liability. Coverage details include indemnity benefits (wage replacement) and medical benefits.

Texas WC laws are specific, requiring agents to be knowledgeable about reporting requirements, dispute resolution processes, and employer responsibilities. Proficiency in WC is a key component of the Texas P&C license exam, demonstrating understanding of employee protection and workplace safety regulations.

Texas Specific Regulations

Texas insurance regulations, including the Insurance Code and Administrative Code, dictate licensing, claims handling, and policy provisions for agents operating within the state.

Texas Insurance Code Overview

The Texas Insurance Code is the foundational legal framework governing the insurance industry within the state. It’s a comprehensive body of statutes addressing various aspects of insurance, from licensing requirements for agents and companies to policy regulations and claims procedures. Understanding its core principles is crucial for passing the Property and Casualty license exam.

Key areas covered include the powers and duties of the Texas Department of Insurance (TDI), rules for policy forms and rates, and provisions related to unfair trade practices. The Code also outlines requirements for financial solvency of insurers, ensuring they can meet their obligations to policyholders. Familiarity with specific chapters pertaining to property, casualty, auto, and workers’ compensation insurance is essential. Agents must adhere to these regulations to maintain their licenses and operate legally in Texas.

Texas Administrative Code (TAC)

The Texas Administrative Code (TAC) provides detailed rules and regulations implementing the broader guidelines established in the Texas Insurance Code. While the Code sets the legal framework, the TAC offers specific instructions on how to comply with those laws. It’s published by state agencies, including the Texas Department of Insurance (TDI), and is vital for license candidates.

The TAC covers a wide range of topics, such as continuing education requirements for agents, filing procedures for insurance forms, and standards for claims handling. It’s frequently updated, so accessing the most current version is critical. Understanding the TAC demonstrates a practical grasp of insurance regulations beyond the basic legal statutes. Mastery of these administrative rules is heavily tested on the Property and Casualty exam, ensuring agents operate within established guidelines.

Texas Prompt Payment of Claims Law

Texas’ Prompt Payment of Claims Law is a crucial component of insurance regulation, designed to protect policyholders by establishing strict deadlines for insurance companies to process and pay valid claims. This law dictates specific timeframes for acknowledging claims, completing investigations, and issuing payments, varying based on the type of claim.

Failure to adhere to these timelines can result in penalties, including interest on the delayed payment and potentially, additional damages to the policyholder. Understanding the law’s nuances – including acceptable reasons for delays and the proper procedures for disputing a claim – is essential for agents. The Texas Department of Insurance (TDI) actively enforces this law, and exam questions frequently assess an agent’s knowledge of its provisions, ensuring fair and timely claim settlements.

Exam Preparation Strategies

Maximize your success by utilizing practice exams, effective study techniques, and a thorough understanding of the detailed exam content outline provided by TDI.

Utilizing Practice Exams

Practice exams are absolutely crucial for Texas Property & Casualty license preparation. They simulate the real exam environment, helping you build confidence and identify knowledge gaps. Numerous resources offer full-length practice tests, often including detailed answer explanations – a key component for understanding why an answer is correct or incorrect.

Focus on consistently reviewing your performance, analyzing areas where you struggle, and revisiting relevant study materials. Aim to achieve consistently high scores on practice exams before attempting the official test. Several study guides, like those by Matthew Bowling and Nathan Perez, specifically emphasize the inclusion of ample practice questions and sample exams. Don’t just take the tests; actively learn from them!

Effective Study Techniques

Successful preparation for the Texas P&C license demands strategic study habits. Break down the material into manageable sections, focusing on core insurance concepts and Texas-specific regulations. Utilize flashcards for key terminology and regularly review the Texas Insurance Code and Administrative Code.

Consider a dedicated study schedule and minimize distractions. Online courses, like those offered by Test Crushers, provide structured learning paths aligned with the 2025 TDI syllabus. Supplement these with comprehensive study guides from authors like Thomas Reed and Leland Chant. Consistent review, spaced repetition, and actively testing your knowledge are vital for retaining information and maximizing your chances of success.

Understanding Exam Content Outline

The Texas P&C license exam comprehensively assesses your knowledge of insurance principles and state regulations. Familiarize yourself with the official TDI syllabus to pinpoint key areas of focus. Expect questions covering property insurance fundamentals, casualty insurance basics, and detailed coverage specifics for homeowners, auto, and general liability policies.

A strong grasp of Texas Insurance Code and TAC provisions is crucial. Practice exams, like those found in study guides by Matthew Bowling and Nathan Perez, mirror the exam format and content. These resources offer detailed answer explanations, reinforcing your understanding. Knowing the exam’s structure and weighting allows for targeted study and improved performance.

Resources for License Candidates

Candidates can access the TDI website for publications and find approved pre-licensing education providers, alongside comprehensive study guides and practice materials for exam preparation.

TDI Website and Publications

The Texas Department of Insurance (TDI) website serves as a central hub for prospective licensees, offering a wealth of information crucial for exam preparation and understanding state-specific regulations. Candidates should thoroughly explore the TDI’s online resources, including downloadable publications, frequently asked questions, and detailed explanations of the licensing process.

Specifically, look for study materials related to the current Texas Insurance Code and Administrative Code. The TDI frequently updates its publications to reflect changes in legislation and industry best practices. Utilizing these official resources ensures you are studying the most accurate and relevant information. Furthermore, the website provides access to important forms and applications needed throughout the licensing journey, streamlining the process and minimizing potential delays. Don’t overlook the value of these freely available tools!

Approved Pre-Licensing Education Providers

Completing a course with an approved pre-licensing education provider is a vital step towards obtaining your Texas Property & Casualty license. The TDI maintains a list of providers who meet specific curriculum requirements, ensuring a standardized and comprehensive learning experience. These courses cover essential insurance concepts, Texas laws and regulations, and ethical practices.

Choosing a reputable provider can significantly enhance your exam preparation. Options range from traditional classroom settings to convenient online courses, like those offered by Test Crushers, catering to diverse learning styles. Look for providers offering updated materials aligned with the 2025 TDI syllabus and incorporating practice exams. Thorough research and comparing course features will help you select the best fit for your needs and maximize your chances of success on the licensing exam.

Study Guides and Materials

A wealth of study guides and materials are available to support your preparation for the Texas Property & Casualty license exam. Options include comprehensive study guides from authors like Matthew Bowling, Nathan Perez, and Thomas K. Reed, offering detailed explanations and practice questions. These resources often include state law supplements and full-length practice tests mirroring the exam format.

Supplementing core study guides with flashcards and focused review sessions is beneficial. Many guides, like those mentioned, emphasize detailed answer explanations, crucial for understanding concepts. Utilizing practice questions – some guides offer 600+ – builds confidence and identifies knowledge gaps. Regularly updated materials, reflecting the latest TDI syllabus, are essential for exam success, ensuring you’re prepared for the current exam content.